Here is an illustration show you guide on how to use HINO DX3 truck diagnostic software device specification function.
Related Contents:
2024.03 HINO Diagnostic Explorer DX3/DX2 Diagnostic Software Free Download
HINO Trucks EPC Electronic Parts Catalog 2018 2016 Free Download
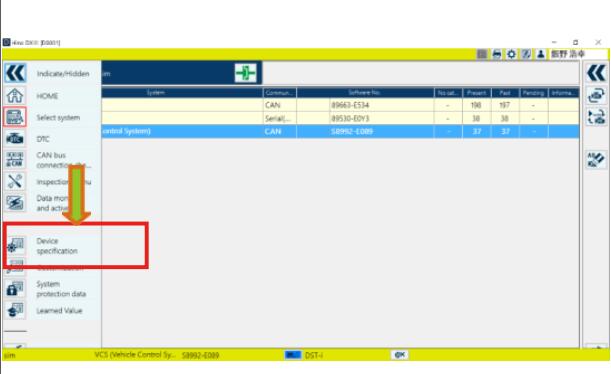
1 Select Device specification from the System selection screen.
(System selection screen)
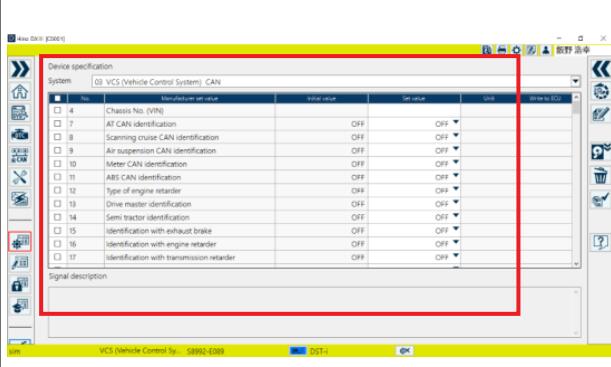
2 When you select a system, a list of the Device specification items set in the system is displayed.
(Device specification screen)
Writing the Device specification
A function to write values in the specified item boxes.
1 Select Device specification from the System selection screen.
(System selection screen)
2When you select a system, a list of the Device specification items set in the system is displayed.
(Device specification screen)
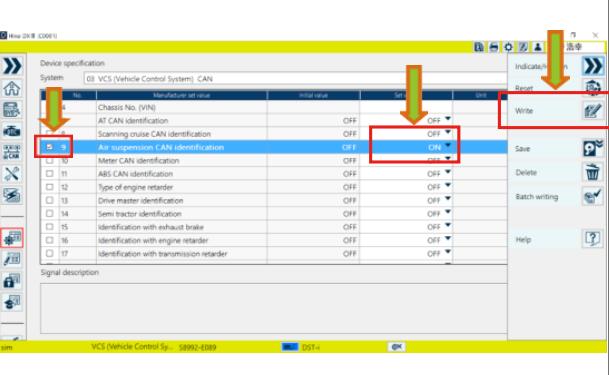
1Set a value in the setting value field of the item you would like to write; then click or press the [Write] button.
(Device specification screen)
[Reference]
• Make sure that a check mark is placed on the item you would like to write.
• You can write multiple item boxes simultaneously by checking multiple items and setting values.
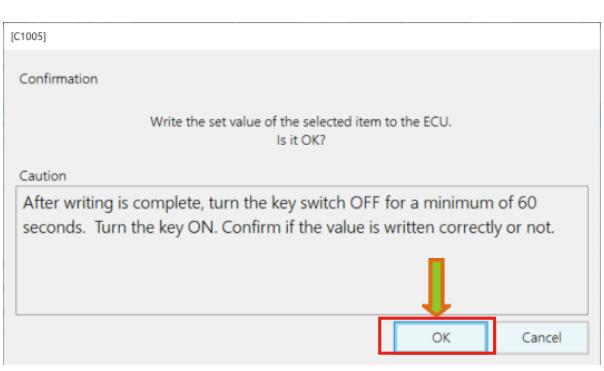
2 Check the contents and click or press the [OK] button. (Checking written values screen)
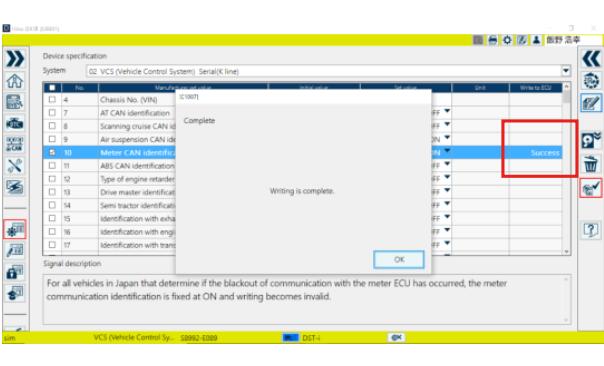
3 A message is displayed when writing to the device is complete.
(ECU writing completion screen)
[Reference]
• This message is displayed regardless of whether the writing was successful or not.
• Items that have been successfully written are displayed as Successful in the ECU writing field.
• Items for which writing has failed are displayed as Failed in the ECU writing field.
Resetting the Device specification
This function is used when you would like to return to the value when the screen was opened after writing once.
3A message is displayed when writing to the device is complete.
(ECU writing completion screen)
[Reference]
• This message is displayed regardless of whether the writing was successful or not.
• Items that have been successfully written are displayed as Successful in the ECU writing field.
• Items for which writing has failed are displayed as Failed in the ECU writing field.
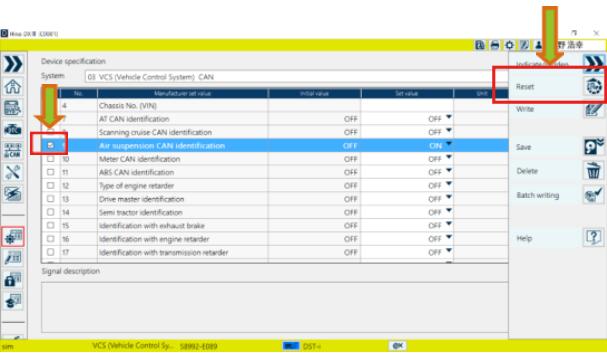
1 Place a check mark on the item you would like to reset and click or press the [Reset] button.
(Device specification screen)
[Reference]
• Reset here means to return to the value read from the ECU when the Device specification screen was opened.
• It is possible to reset multiple items by checking multiple items.
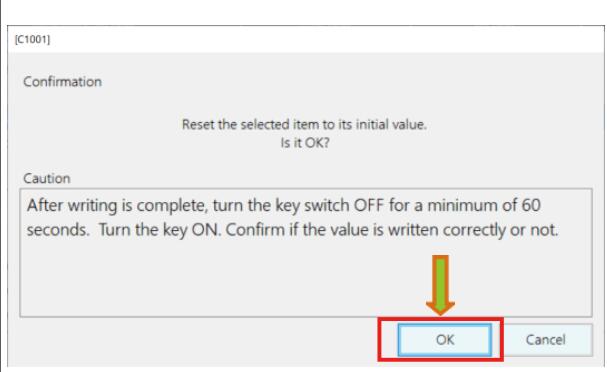
2 Check the contents and click or press the [OK] button. (Reset Confirmation screen)
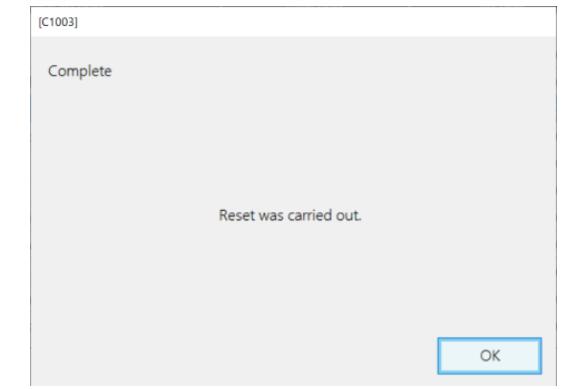
3 A message will be displayed when the reset is complete.
(Reset Completion screen)
[Reference]
• This message is displayed regardless of whether the reset was successful or not.
• Items that have been successfully reset are displayed as Successful in the ECU writing field.
• Items for which reset has failed are displayed as Failed in the ECU writing field.
More HINO DX3 User Guide,please refer to:How to Use HINO DX3