This instruction show you guide on how to use HINO DX3 data monitor function.
Related Contents:
2024.03 HINO Diagnostic Explorer DX3/DX2 Diagnostic Software Free Download
HINO Trucks EPC Electronic Parts Catalog 2018 2016 Free Download
Procedures:
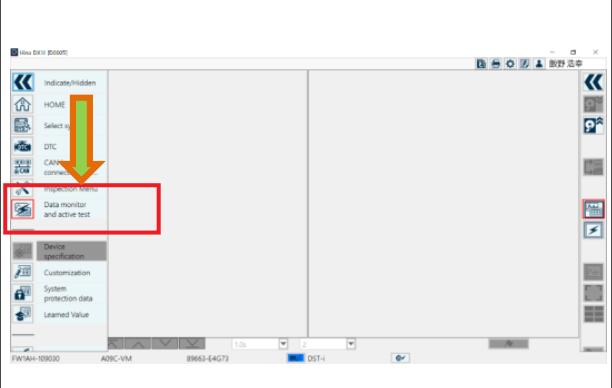
1.Select Data monitor and Active test on the System selection screen.
(System selection screen)
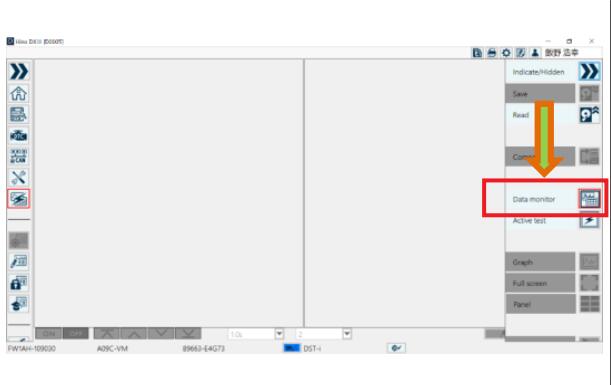
2.Click or press the [Data monitor] button.
(Data monitor/Active test screen)
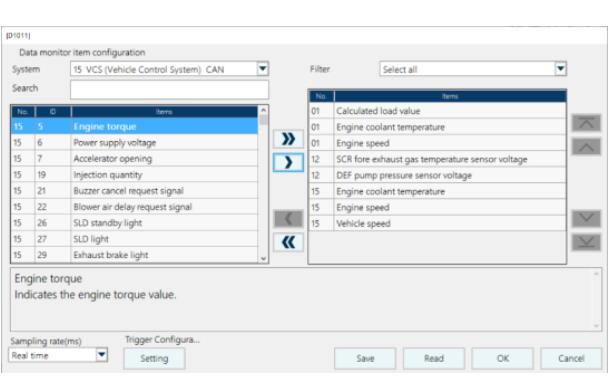
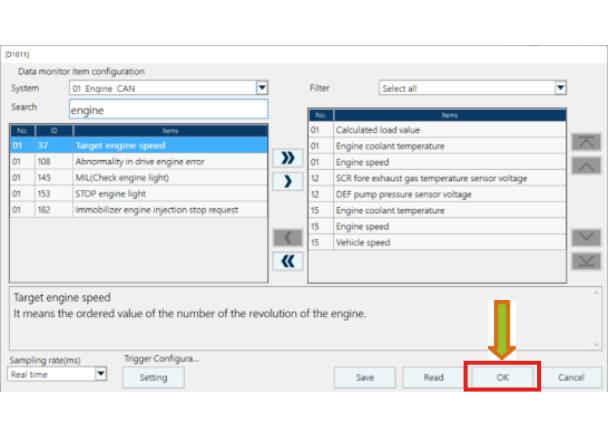
3.Select the system and select the item to be monitored from Items.
(Data monitor item setting screen)
[Reference]
* DX III can monitor items of up to three systems simultaneously.
The combinations of the systems that can be monitored at the same time are as follows:
CAN/CAN/CAN, CAN/CAN/SIL, CAN/CAN, CAN/SIL
(CAN: CAN communication, SIL: serial communication)
• Up to 400 items can be displayed per system. Up to 1200 items for 3 devices.
• To select a monitoring item, double-click the monitoring item you would like to select, or click or press the > button.
• When the >> button is clicked or pressed, all monitoring items of the selected system are selected. (Maximum number of items is 400)
• Click the < button to delete the selected monitoring item.
• Click the << button to delete all monitoring items.
• You can add and delete monitoring items by pressing the → and ←buttons on the keyboard.
• By pressing the △ and ▽ buttons, the order of the selected monitor items can be changed.
• By clicking or pressing the [Save] and [Load] buttons, you can save the created monitoring item settings and load the saved settings.
• To set the trigger, press the Trigger setting button.
• You can set the sampling rate in the sampling rate selection box.
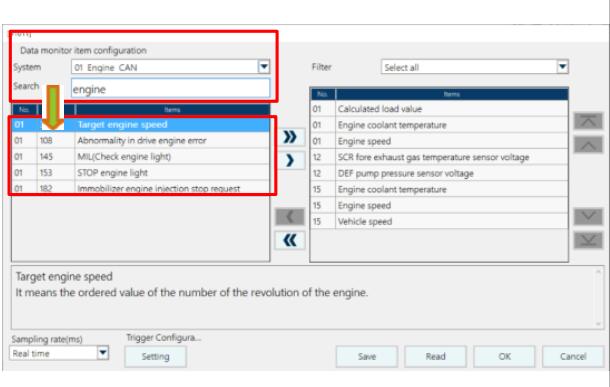
• When you enter the character you would like to search in the item search box, the items containing the character you would like to search are displayed in a list.
(Example: Enter engine in the item search box to list items that include the engine)
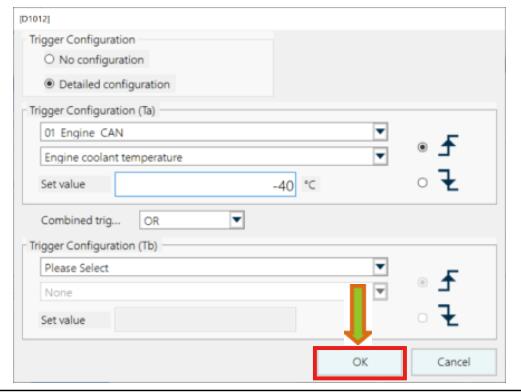
4.Set the monitoring item and set value to set the trigger; then click or press the [OK] button.
(Trigger setting screen)
[Reference]
• Select the rise/fall detection of the monitoring item.
• If you would like to set multiple triggers, select the combination setting.
5.Click or press the [OK] button to close the Data monitor item setting screen.
(Data monitor item setting screen)
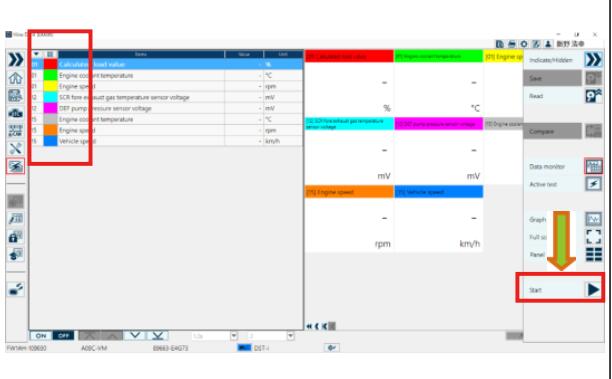
6.Click or press the [Start] button.
(Data monitor display screen)
[Reference]
By double-clicking the color-displayed part of the selected monitor item,you can set the item display color and graph scale.
7.Data monitoring starts.
(Data monitor display screen)
[Reference]
If you click or press [Timestamp] while monitoring, you can set a time stamp on the data. If you set a time stamp, you can use the time stamp jump after stopping Data Monitor or when reading the saved data.
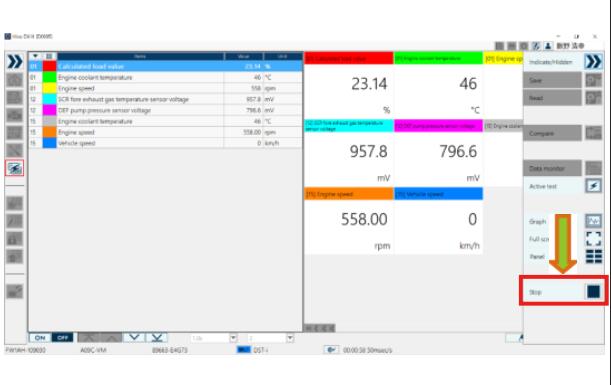
8.To exit the Data monitor, click or press the [Stop] button.
(Data monitor display screen)
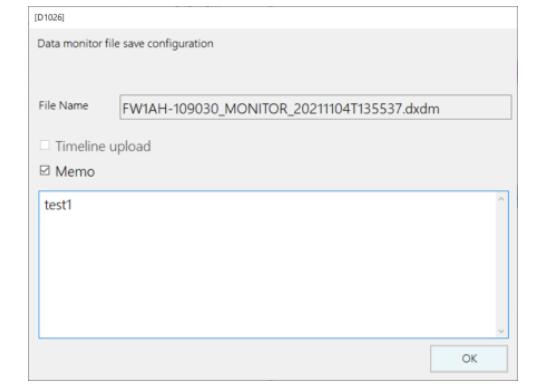
9.The Data monitor file save dialog opens; click or press the [OK] button.
(Data monitor file save setting screen)
[Reference]
• The file name will be [VIN + MONITOR + measurement start time (local time)].
The file name cannot be changed.
• If you put a check mark on the note, the written note will be saved in association with the Data monitor file.
• If you put a check mark on the timeline upload, the Data monitor file to be saved will be updated to GSPS.
You can check the uploaded file with the DX3 Timeline Search of GSPS.
More case for HINO please refer to:HINO Trouble Repair.