This instruction show you guide on how to remove and install slew system for Takeuchi TB128 mini excavator.More information about Takeuchi excavator workshop manual please refer to:Takeuchi Excavator Workshop EPC+Service Manual 2018 PDF Files
Procedures:
Slew motor
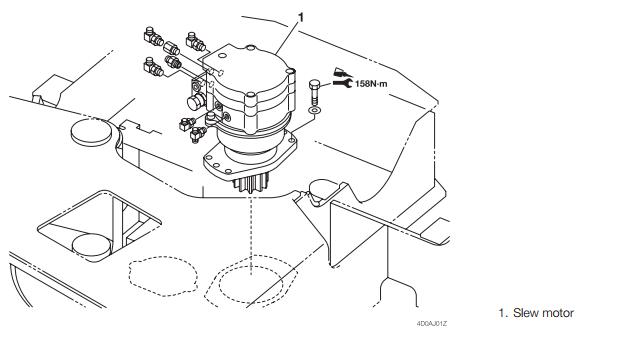
Removing the slew motor
1.Remove the attachment.
“Removing the attachments”
2.Disconnect the right link arm from the boom bracket.
“Removing the attachments”
3.Tilt up the floor frame.
4.Remove the hydraulic hoses and valves over the slew motor.
5.Disconnect the hydraulic hoses from the slew motor (1).
6.Remove the bolts fixing the slew motor.
Bolt: ThreeBond #1324
Bolt: 158 N·m
7.Suspend the slew motor (1), and then remove it.
Slew motor: 32 kg
Installing the slew motor
For installation of the slew motor, follow the same procedure as for removal in the reverse order.
Slew bearing
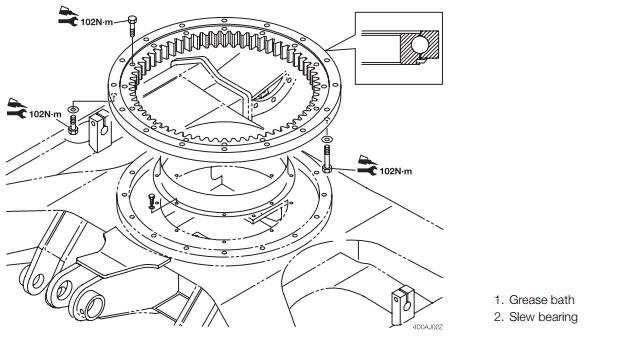
Removing the slew bearing
1.Remove the hoe attachment.
“Removing the attachments”
2.Remove the upper frame.
3.Remove the inner race fixing bolts.
Bolt: ThreeBond #1324
Bolt: 102 N·m
4.Suspend the slew bearing and remove it.
Slew bearing: 40 kg
Installing the slew bearing
For installation of the slew bearing, follow the same procedure as for removal in the reverse order.
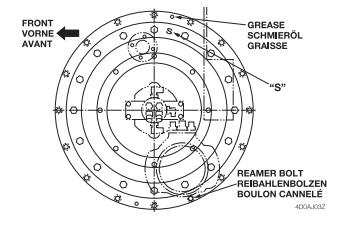
• When installing the slew bearing on the upper frame, be sure to position the reamer bolts and the grease holes as shown in the figure.
• Apply grease to the inner teeth of the slew bearing
Swivel joint
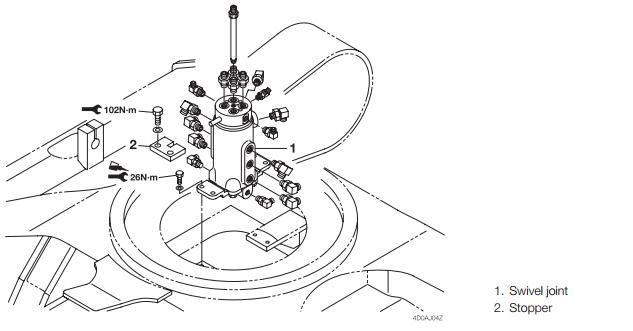
Removing the swivel joint
1.Remove the upper frame.
“Removing the upper frame”
2.Disconnect the hydraulic hoses (1) from the hub side of the swivel joint.
3.Remove the swivel joint fixing bolts.
Bolt: ThreeBond #1324
Bolt: 26 N·m
4.Suspend the swivel joint (3) and remove it.
Installing the swivel joint
For installation of the swivel joint, follow the same procedure as for removal in the reverse order.
• When installing the swivel joint, tighten it temporarily with the fixing bolts, and then center the swivel joint by using a dial gauge.
• Adjust the centering so that the deviation from the center is within 0.25 mm.