This instruction show you guide on how to remove and install rear oil seal for Komatsu hydraulic excavator PC130-8.For more Komatsu case,please refer to:Komatsu trouble repair.
All workshop manuals and parts you can get it here:
Komatsu CSS Full Set 2018 2014 Parts Viwer Free Download
Remove and Install Front Oil Seal for Komatsu PC130-8 Excavator
Procedures:
Removal:
Disconnect the negative (–) terminal of the battery beforehand.
Remove the work equipment pump assembly,referring to “Removal and Installation of Work Equipment Pump Assembly.”
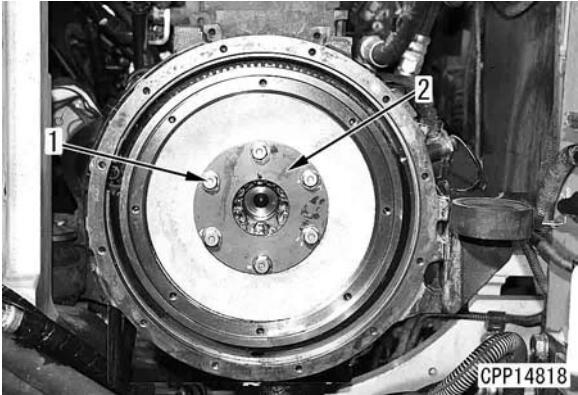
Removal of the flywheel
Remove coupling mounting bolt (1) and remove coupling (2).
Temporarily lift flywheel (3).
Remove 7 flywheel mounting bolts (4) except one.
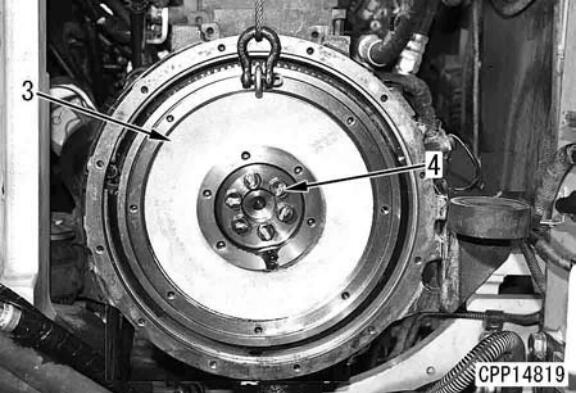
Loosen flywheel mounting bolt (4).
Leave 3 threads or 4 engaged to prevent the flywheel from suddenly shooting out in the following procedure.
Pull out the flywheel by prying with a bar,etc.
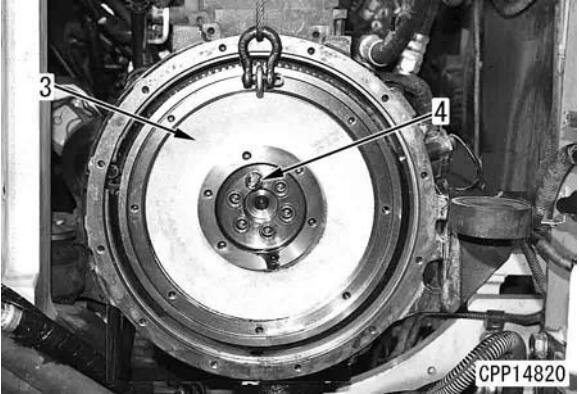
Checking that flywheel (3) is manually removable, remove the flywheel mounting bolt (4).
Lift flywheel (3) and remove it.
Flywheel: 25 kg
Removal of the rear oil seal
Screw the tip of tool A2 into the metal ring of seal (5) and pull it out with the impact of a slide hammer [1].
For the ease of pulling out the seal,slightly hammer it in to unfasten it from the housing before pulling it out.
Do not use a drill as chips may enter the engine.
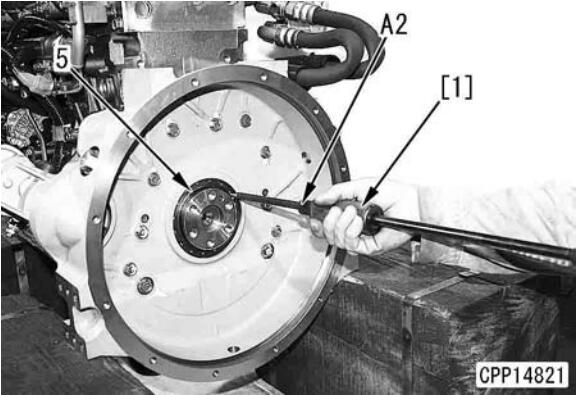
(Photo shows work on a single unit of engine, but the procedures are the same.)
Installation
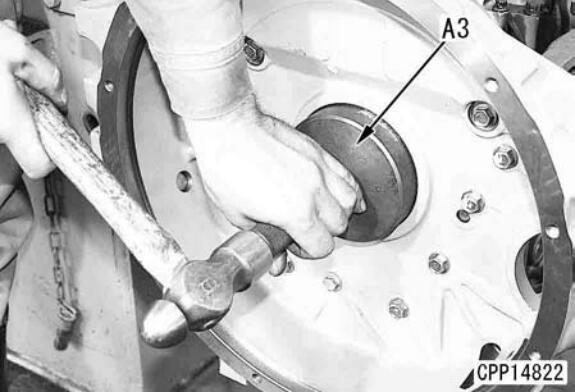
Rear oil seal mounting procedure
Use tool A3 (outside diameter of 120 mm) to install rear oil seal to flywheel housing.
Fill about 3 cc of grease to between the rear oil seal lips.
Front oil seal: grease (G2 – LI)
For the following installation work, carry out the installation in the reverse order of removal.
3 Coupling mounting bolt:
98 – 122.6 Nm (10 – 12.5 Kgm)
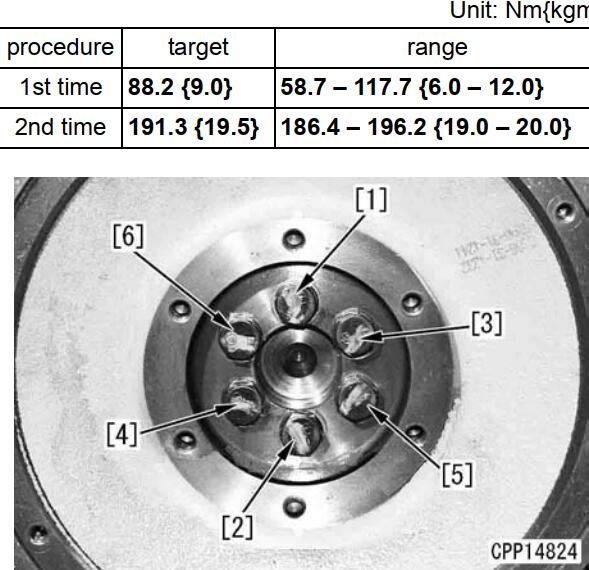
Tighten the flywheel mounting bolts according to the following procedure:
Apply engine oil EO#30 to the bolt threads.
Mounting bolt threads:
Engine oil (EO30)
Tighten the bolts in the order of 1 to 6 as shown in the diagram (CPP14824).
Tighten the bolts each in two actions by applying torque as specified in the order of item 2) above.
3 Mounting bolt:
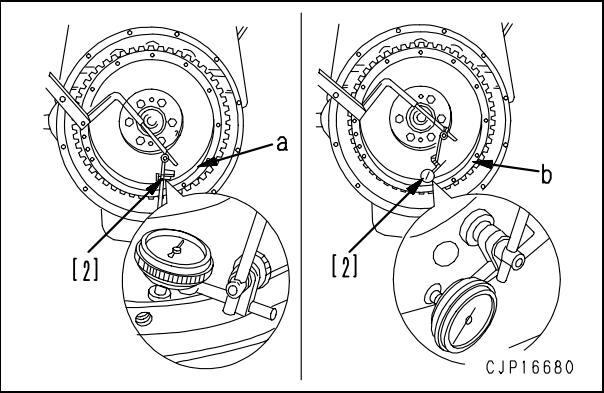
Measuring radial runout of flywheel
Install dial gauge [2] to the flywheel housing.
Set the probe of the dial gauge at right angles to the spigot joint (a) or the outer periphery of the flywheel.
Rotate the crank shaft one full turn and measure the difference of the maximum values of runout of the needle.
Check that the position of needle remains in its original position after the flywheel is rotated one full turn.
Radial runout: Max. 0.15 mm
Measuring face runout of flywheel
As with the measurement of radial runout,set the probe of the dial gauge at right angles to end face (b) close to the outer periphery of the flywheel.
For measurement, move the crank shaft forward or backward to prevent error caused by an end play.
Rotate the crank shaft one full turn and measure the difference of the maximum values of runout of the needle.
Face runout: Max. 0.25 mm