This instruction show step by step guide on how to remove and install swivel joint for Kubota U48-4 and U55-4 excavator.
Related Contents:
Takeuchi Excavator Workshop EPC+Service Manual 2018 PDF Files
2022 Kubota Takeuchi Diagmaster v22.08.01 v4.1.2 Software Free Download
Kubota EPC Spare Parts Catalogue 2021.06 Download
CAUTION
• When removing a hydraulic device after operating the mini-excavator, lower the bucket and blade to the ground and turn off the engine.
• Each of the devices and the hydraulic oil are hot and under high pressure immediately after operating the mini-excavator. If the hydraulic oil reached a high operating temperature, it may cause a burn.
• Oil gushing out under pressure has enough force to pierce your skin and may cause you injury. Always allow the temperature to drop and relieve any remaining pressure prior to working to remove any hydraulic equipment.
Stabilizing the Mini-excavator
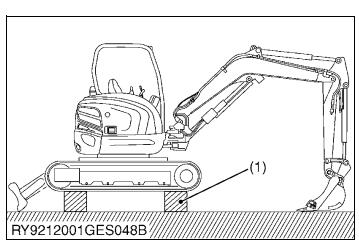
1.Position the mini-excavator on hard, level ground, operating the equipment and blade to lift the body.
DANGER
• Put blocks under the crawler to prevent the mini-excavator from lowering.
(1) Block
Attaching the vacuum pump
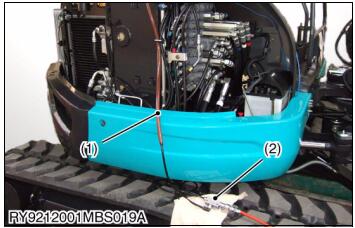
1.Attach the breather hose (1) of the hydraulic tank to the vacuum pump (2), and apply vacuum pressure to the hydraulic tank.
(1) Breather hose (2) Pneumatic vacuum pump
Removing the swivel motor
1.Remove the swivel motor. (Refer to the chapter “Swivel Motor Installation & Removal”.)
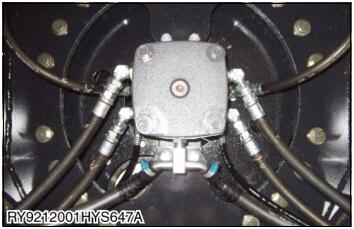
Removing the hydraulic hoses
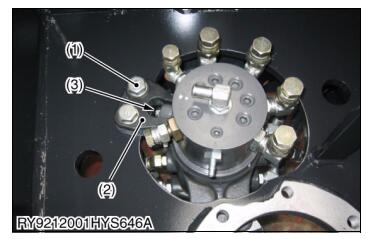
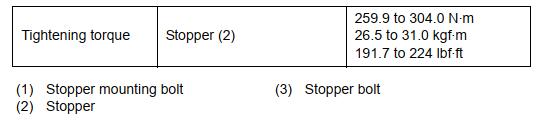
1.Remove all the hydraulic hoses on the swivel joint side (inside the travel frame) and plug or cap the adapters and hoses to prevent foreign matter from getting into them. Remove the
stopper mounting bolt (1) and the stopper (2).
IMPORTANT
• Apply a threadlock (Loctite #271).
Removing the hydraulic hoses
1.Remove the bottom cover of the track frame.
2.Remove all the hydraulic hoses on the body side (inside the track frame). Plug or cap the adapters and hoses to prevent foreign matter from getting into them.
Positioning a Hydraulic Jack
1.To prevent the swivel joint from coming down, support the bottom of the body with a hydraulic jack.
Removing the swivel joint
1.Remove the four swivel joint mounting bolts (1).
IMPORTANT
• Apply a threadlock (Loctite #271).
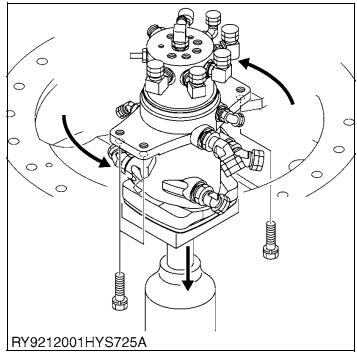

2.Rotate the swivel joint, remove it from the track frame and slowly lower it.
Swivel joint weight : About 28 kg (62 lbs) (U48-4, U55-4)
(1) Bolt (M14x45)
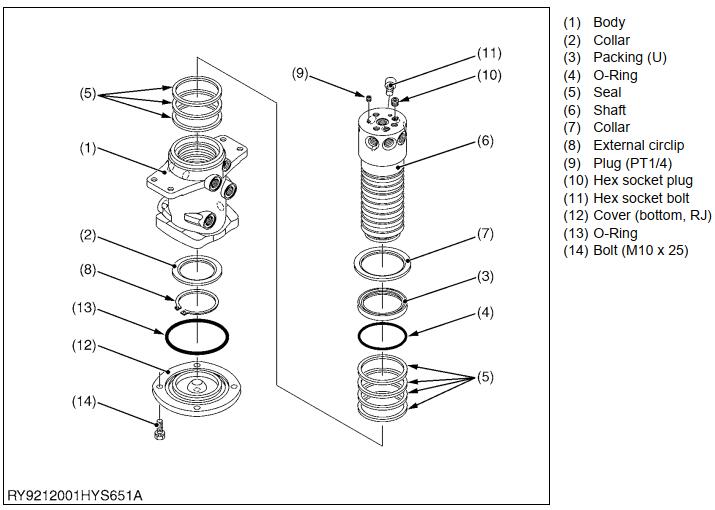
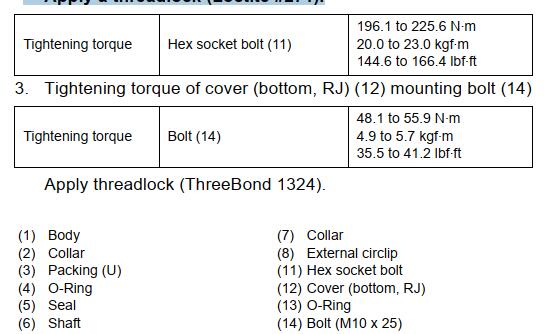
Swivel joint exploded view
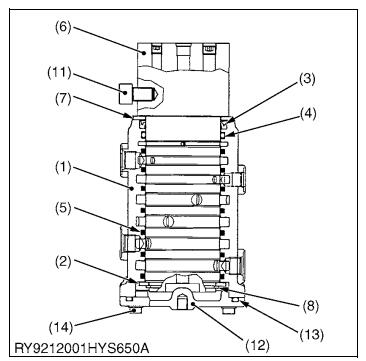
Swivel joint assembly diagram
1.Packing (U) (3) fitting orientation
Apply grease to the inner and outer surfaces of the packing (U),and install with the seal lip on the outer side.
2.Tightening torque of screw base (11)
IMPORTANT
• Apply a threadlock (Loctite #271).
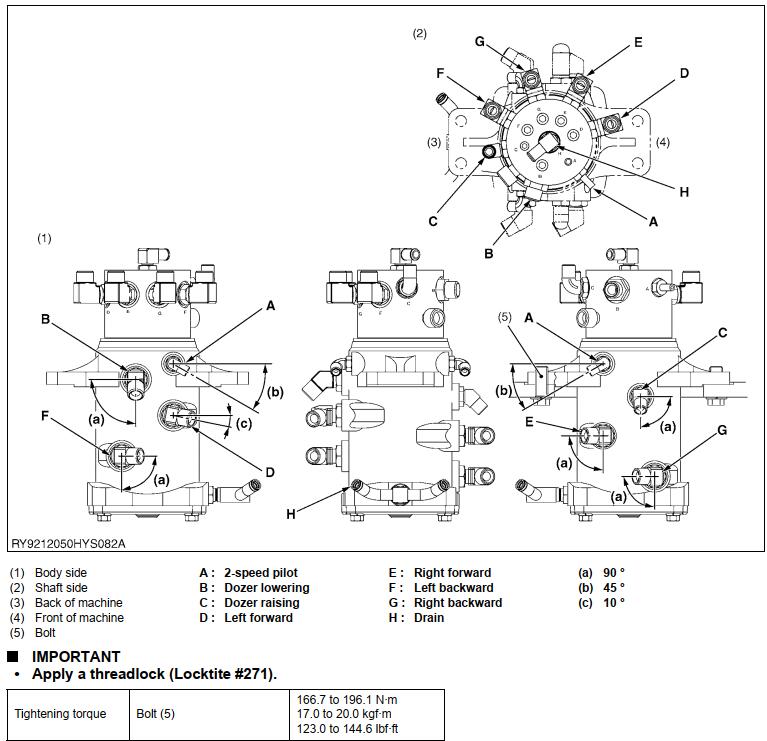
Swivel Joint Adapter Angles
More repair case for Kubota,please refer to:Kubota Trouble Repair