Here is a illustration show you guide on how to set up the wireless CA3 W-CA3 radio for old CAT ET3 adapter.
Related Contents:
Caterpillar ET 2024A 2023C 2019C 2018A Electronic Technician Software Free Download
CAT Adapter 3 ET4 478-0235 High Quality Diagnostic Adapter
Caterpillar SIS 2021 2019 2018 Full EPC+Service Manual Free Download
Caterpillar Factory 18 Digits Password Service
Procedures:
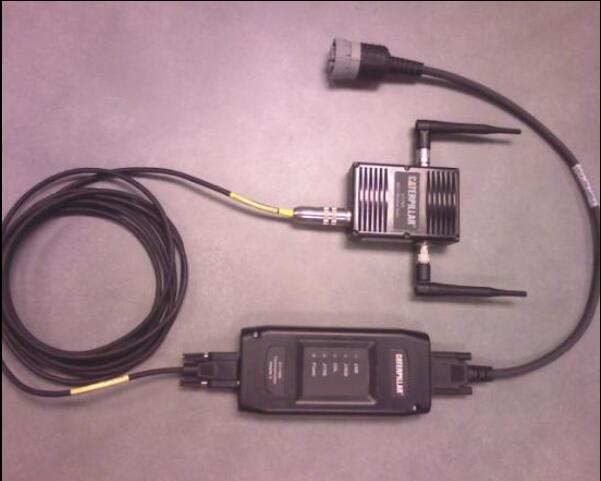
317-7493 – Cat Wireless Communication Adapter 3 Radio
The following equipment is included in this group:
Cat Communications Adapter 3
Cat 802.11 Wireless Radio
Wireless Radio CA3 Cable
Wireless Communication Adapter 3 CD-ROM
Wireless Communication Adapter 3 User’s Manua
NOTE: For specific part number information, contact the Parts Department of your local dealership.
Instructions
To connect the Wireless CA3 Radio to the Comm Adapter 3, perform the following steps:
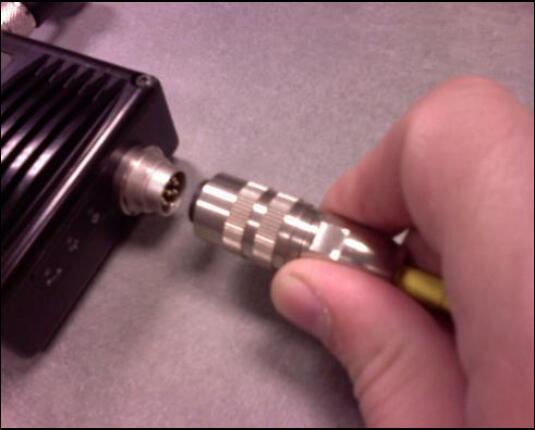
Step 1 Align and attach the round end of the Wireless CA3 Radio cable to the cable connection on the Wireless CA3 radio.
Step 2 Connect the other end of the cable to the cable connection on the Comm Adapter 3.
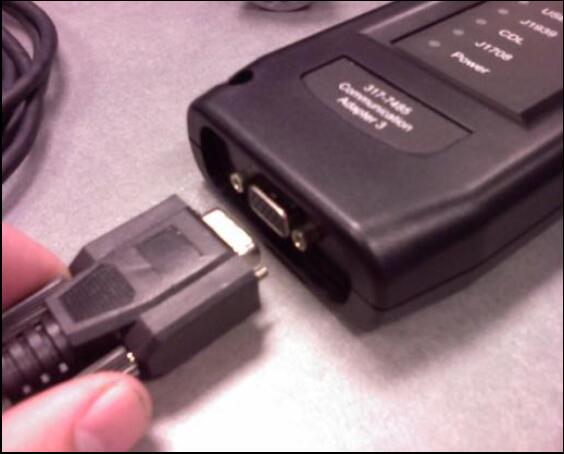
To connect the Communication Adapter 3 to the data link, perform the following steps:
Step 1 After connecting the Communication Adapter 3 to the Wireless CA3
Radio, connect one end of the data link cable to the data link connection on the Communication Adapter 3.
Step 2 Connect the other end of the data link cable to the service connector on the product.
If the data link is powered (machine power is on), the Power light on the Communication Adapter will glow and the diagnostic test will begin.
The lights on the front of the Communication Adapter 3 will sequentially glow from the top (“Data Link” end) to the bottom (“Computer” end) of the device. The service tool is now ready to be started.
If the data link is powered (machine power is on), the Power light on the Communication Adapter will glow and the diagnostic test will begin.
The lights on the front of the Communication Adapter 3 will sequentially
glow from the top (“Data Link” end) to the bottom (“Computer” end) of the device. The service tool is now ready to be started.