Thera are two method for Benz Xentry diagnostic software configuration with SDconnect.We have shared the first on SDconnect configuration with Xentry by cable operation,here show another method configure by wireless operation.
Preparations:
2024.03 Benz Xentry.OpenShell.XDOS Diagnostic Software Free Download
How to Install Benz Xentry 2024.03 Diagnostic Software
Note:Please note that comprehensive IT knowledge is absolutely required for this configuration!
If necessary, contact your local IT administrator. (Administrator rights are always required for any changes to the network settings.)
Procedures:
Configuring the wireless operation via access point (workshop infrastructure)
Start the SDconnect Administration Toolkit via Windows Start > All Programs > Mercedes-Benz >
SDconnect Administration.
On the left side you will see a list of connected SDconnect devices, if applicable. The currently
connected SDconnect should be displayed with its number, the “Cable” status and “Accessible”. Double -click to select this SDconnect from the list.
Details of the SDconnect are displayed on the right side (see following figure):
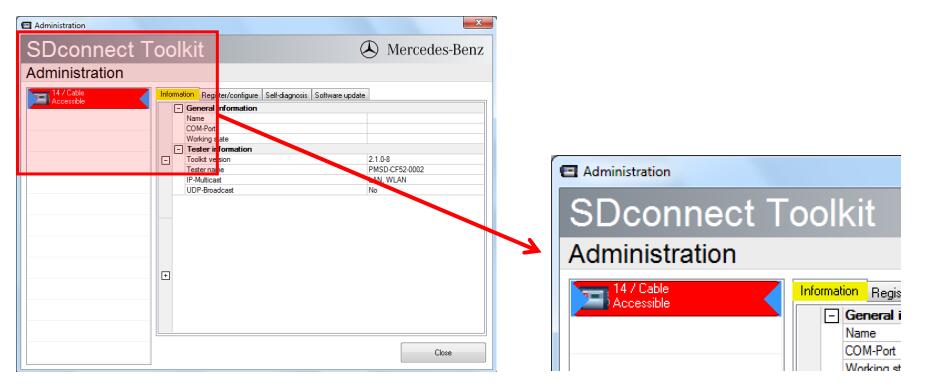
Select the “Register/configure” tab.
Then select your country under “General information” under WLAN regional setting in the drop-down menu. Check the “WLAN parameters, workshop” box:
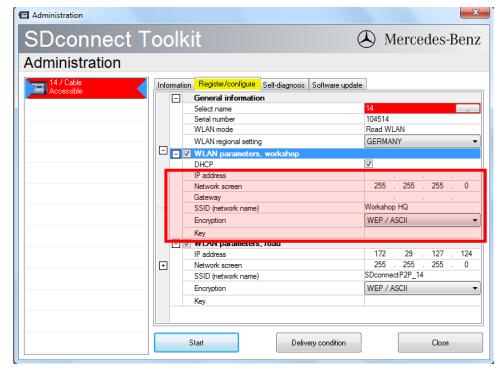
In this section, enter the corresponding data on your respective WLAN access point.
Since your wireless devices are normally configured via DHCP, select “DHCP”.
Enter the SSID of the WLAN access point (e.g. workshop).
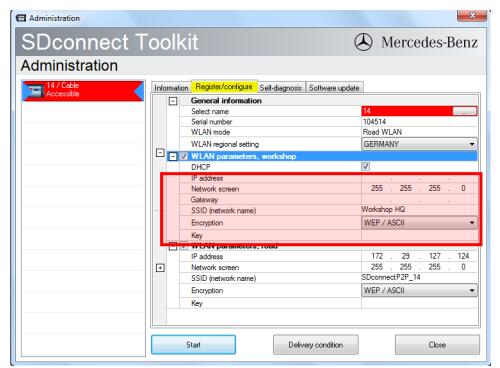
Please note:
The SDconnect currently only supports the WEP 128-bit encryption. Therefore, you must configure your access point accordingly if you are currently using a different encryption type.
Enter the WEP key (exactly 13 characters) in the SDconnect Administration Toolkit.
The key is shown during entry but will not be readable as plain text later.
Once you have entered all settings, click “Start” in order to save them in SDconnect.
Configuring the wireless operation for an ad-hoc connection (“wireless network,road”)
This connection between the system and SDconnect is the recommended wireless operation type.
First, connect the SDconnect to the system via cable (i.e. Ethernet cable, USB2LAN cable or USB2LAN adapter plus Ethernet cable). Configure the SDconnect for cable operation if this has not already been done.
The configuration consists of two main steps:
– Configuration of the SDconnect for an ad-hoc connection
– Configuration of the computers for the connection
Configuration of SDconnect
Call up the SDconnect Administration Toolkit. Select Windows Start > All Programs > Mercedes-Benz > SDconnect Administration.
You should see the SDconnect currently connected by cable with its number and the “Cable” and “Accessible” status displayed on the left side. Select this SDconnect from the list. The data shown on the right is updated. Select the “Register/configure” tab.

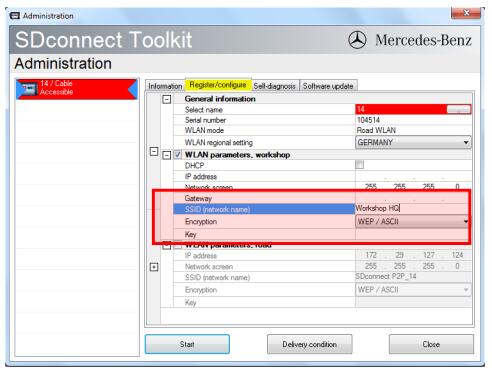
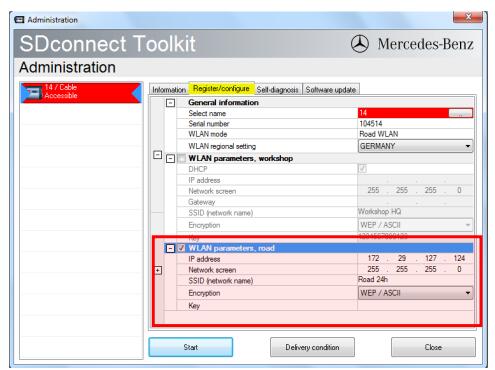
On this tab, first click the “WLAN parameters, road” option under “General information”.
Select your country from the drop-down list on the right for the WLAN regional settings.
Make sure that the “WLAN parameters, workshop” box is not checked.
Instead, check the “WLAN parameters, road” box.
Enter a static IP address for the SDconnect that is not yet used in your workshop. In our example we use the address 172.29.127.124. Do not change the network mask.
Change the SSID entry from the “Road24h” default value to a different value.
The value for the SSID must be unique for this combination of SDconnect and system.
In this example we set the SSID value to “SDconnect P2P_14”, which is unique for the system and SDconnect combination.
To date, SDconnect only supports WEP encoding. Therefore, you must configure your
Access Point correspondingly if you are currently using a different encryption type.
Enter the WEP key (exactly 13 characters). The key is shown during entry but will no longer be readable later.
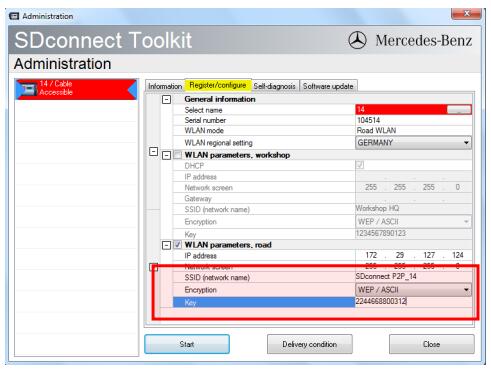
Once you have entered all settings click “Start” to confirm. The tool then shows a summary of all settings for the SDconnect including the WLAN settings.
Now the computer must be configured for the Peer2Peer connection (administrator rights required).
Open the dialog for the Windows WLAN network adapter. Open the Windows Control Panel and the “Network and Sharing Center”. Select “Change adapter settings” on the left.
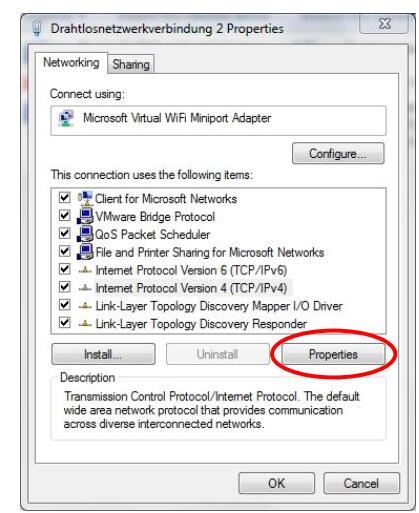
Double-click to open the currently active WLAN connection and go to “Properties”, or right-click
the adapter icon and select “Properties”.
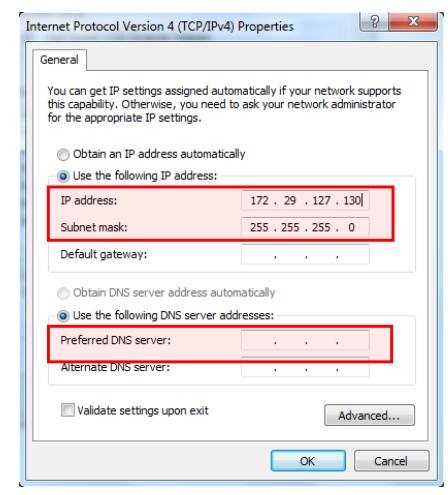
In the list of connection items, select the entry “TCP/IP Version 4” and click “Properties” below “:
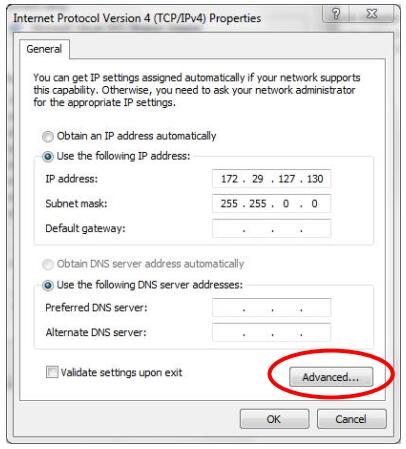
Select the option “Use the following IP address” and enter a static IP address from the same range (172.29.127.X, where X stands for a number between 0 and 254, however not the corresponding number of the SDconnect address) like for the address entered for the SDconnect before.
For example, select the address: 172.29.127.130.
Keep the value of the network mask and leave the “Default gateway” field empty.
Also, select the “Use the following DNS server addresses” option.
However, leave the address field empty.
Click “OK”. Close the other open dialog window.
Configuration of the computer
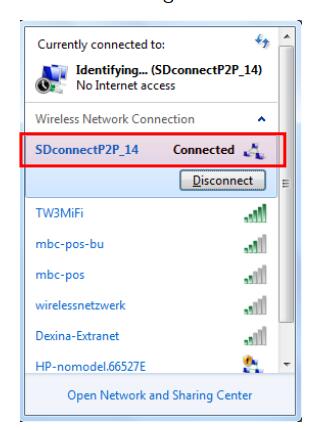
Click the icon for wireless networks in the Windows tray. The SSID that you entered during configuration of the SDconnect should now be displayed. If not, click “Update”.
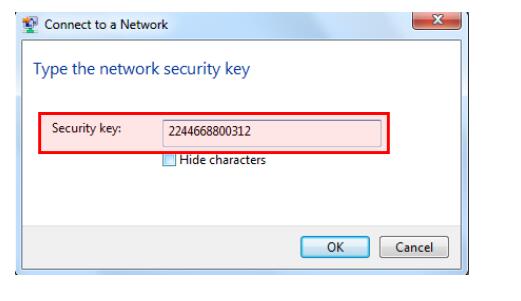
Select this SSID and click “Connect”. Then you will be requested to enter the security key.
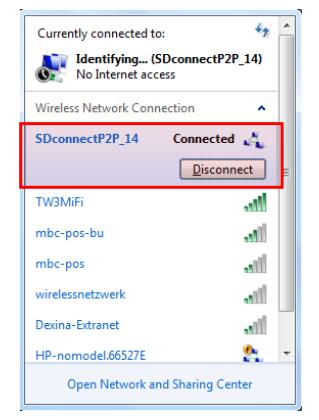
Enter the WEP key that you previously entered in the SDconnect Administration Toolkit. Click “OK”.
The SDconnect Peer2Peer network should then be displayed as “Connected” in the dialog.
Close the dialog.
Configuring a DoIP connection
Configuring the network adapter for DoIP
As specified before, the system environment is configured for DoIP subsequently, based on a previously configured connection with the SDconnect. Here, it is possible to configure DoIP both for a connection via cable (directly or by USB2LAN adapter) and a wireless connection, while the connection has been set up using a static IP address on the Open Shell system.
Setting up the DoIP connection is carried out using a second static IP address for the network adapter which has already been installed for SD communication. Therefore, according to the specific configuration, this adapter will either be the LAN connection via the Ethernet card, integrated in the system, the USB2LAN-Adapter’s LAN connection or even a wireless connection.
In order to configure DoIP, please open the respective network adapter’s settings: please open the Windows Control Panel and then the “Network and Sharing Center”. Please select the entry “Change adapter settings” on the top left. Please double click the tile for the respective network adapter.
In the window, please click on “Settings” and then select the entry “Internet protocol Version 4 (TCP/IPv4)” from the list of connection elements. Then select the “settings” again below:
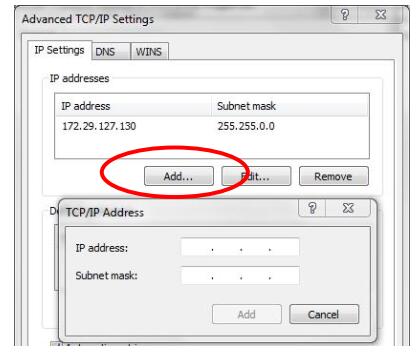
Here you may have already indicated a static IP address during the SDconnect configuration. However,please click on „Advanced” below right.
Please select “Add…” in section “IP addresses” and insert the following information regarding the
configuration via DoIP connection:
IP address: 169.254.0.42
Subnet mask: 255.255.0.0
The previously inserted IP address for the SDconnect (172.29.xxx.xxx or 172.27.xxx.xxx) will persist!
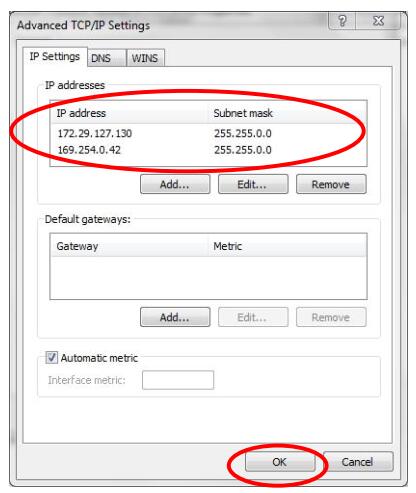
Please close every window by clicking “OK”.
Subsequently, please modify your Firewall configuration