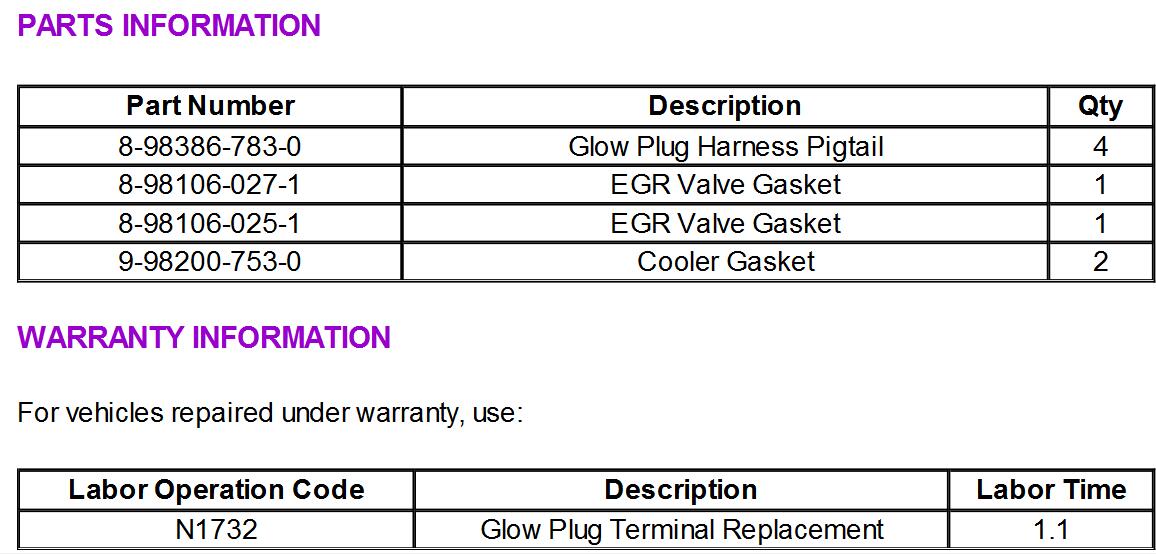
Some customers may complain of an illuminated Check Engine Malfunction Indicator Light (MIL) associated with Diagnostic Trouble Code (DTC) U0106, Lost Communication with Glow Plug Control Module (GPCM). This condition may be the result of water intrusion into the GPCM connector. Water from rain and other outside sources can pool in the glow plug recessed area on the outside of the cylinder head. If enough water accumulates, it can seep into the glow plug harness through the terminal ends and enter the GPCM connector, causing this DTC to set.
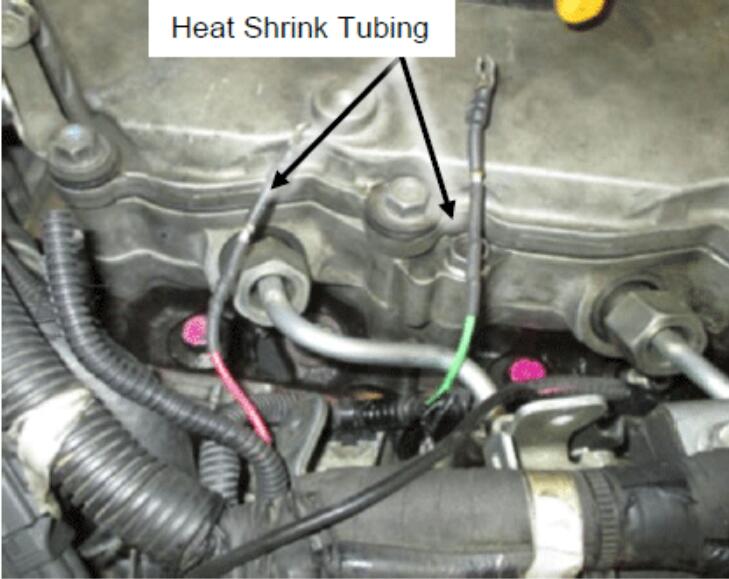
If this DTC is found and evidence of water is present in the GPCM connector, replace the glow plug harness terminals as outlined in the service procedure in this bulletin. The replacement terminal ends are sealed so that water cannot get into and through the wire.
Related Contents:
ISUZU E-IDSS 2024 2019 Engine Diagnostic Service System Free Download
SERVICE PROCEDURE
1.Disconnect the negative battery terminal.
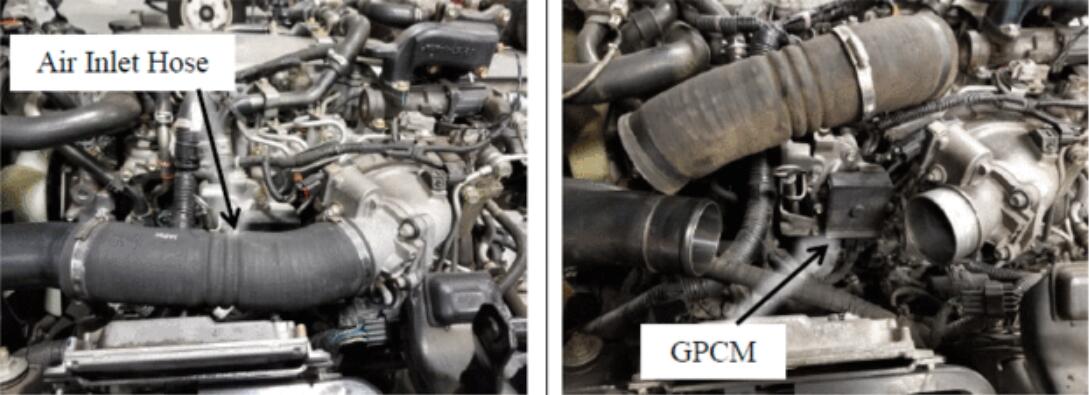
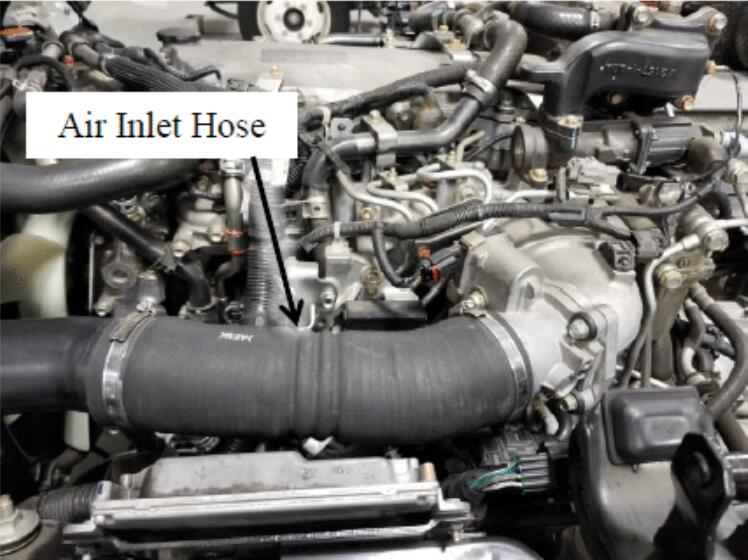
2.Remove the Air Inlet Hose from the Intercooler to the Throttle Body,for access to the Glow Plug Control Module.
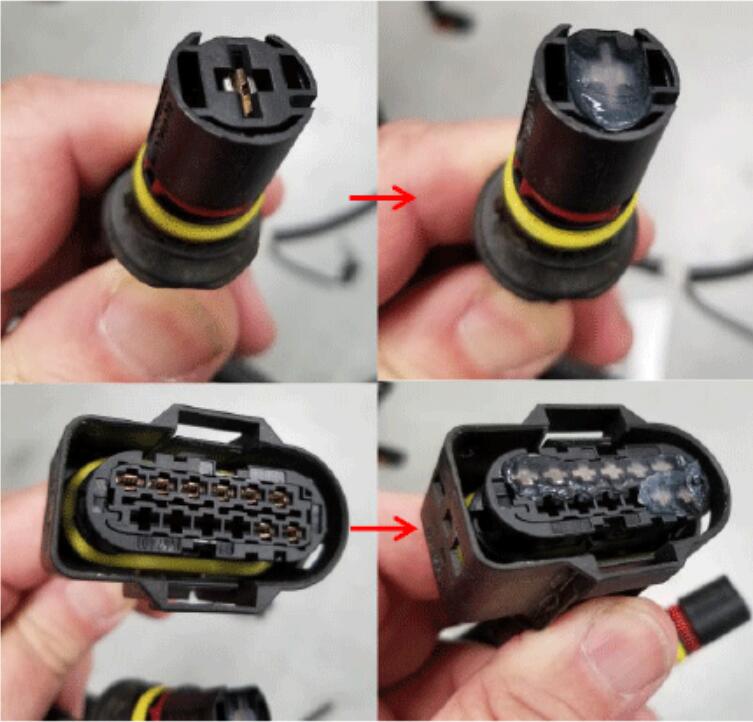
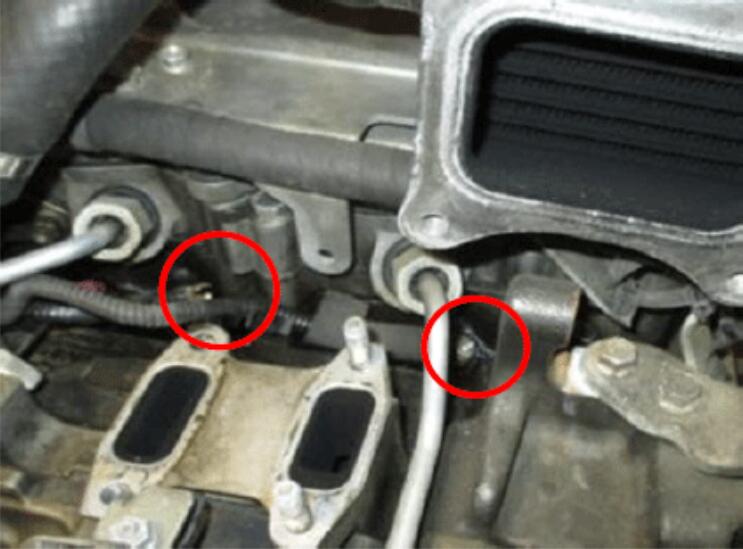
3.Inspect the GPCM harness connectors at the module (E-64 and E-65) for moisture intrusion and damage to the connector or terminals
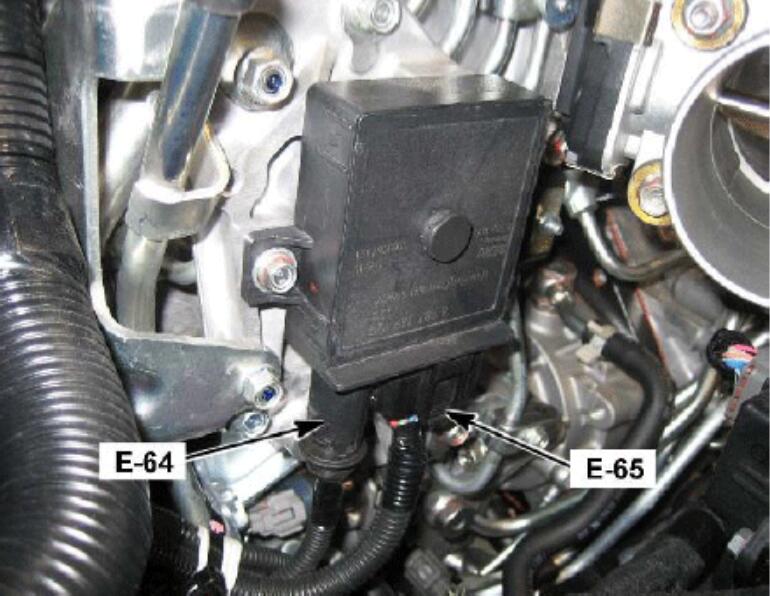
NOTE:Use shop air supply to blow away any moisture and debris found in the connectors before proceeding.
4.Clean the connections with electrical contact cleaner.
5.Put dielectric grease in the GPCM connectors (Figure 4) and reconnect them to GPCM
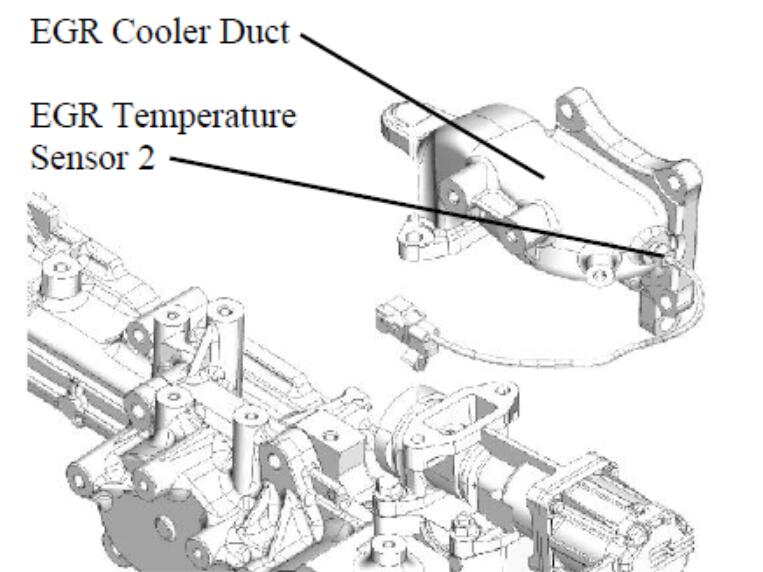
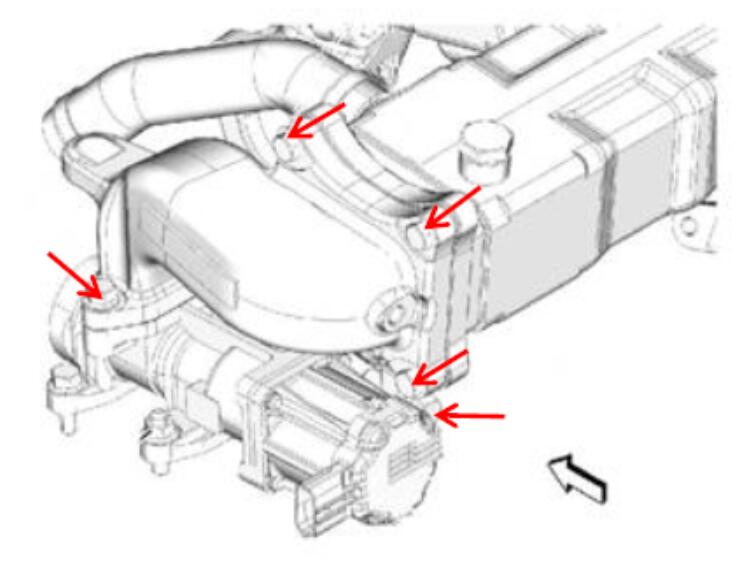
6.Disconnect EGR Gas Temperature Sensor 2 connector and remove the EGR Cooler Duct with EGR Temperature Sensor 2
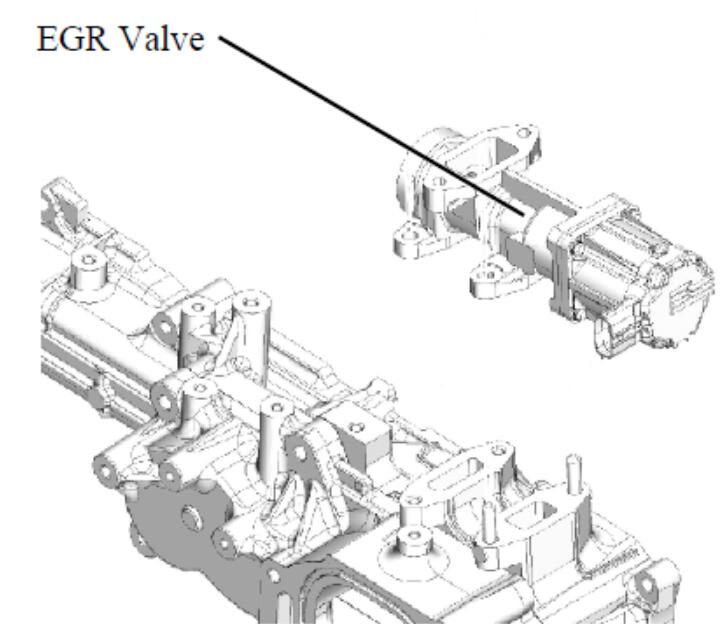
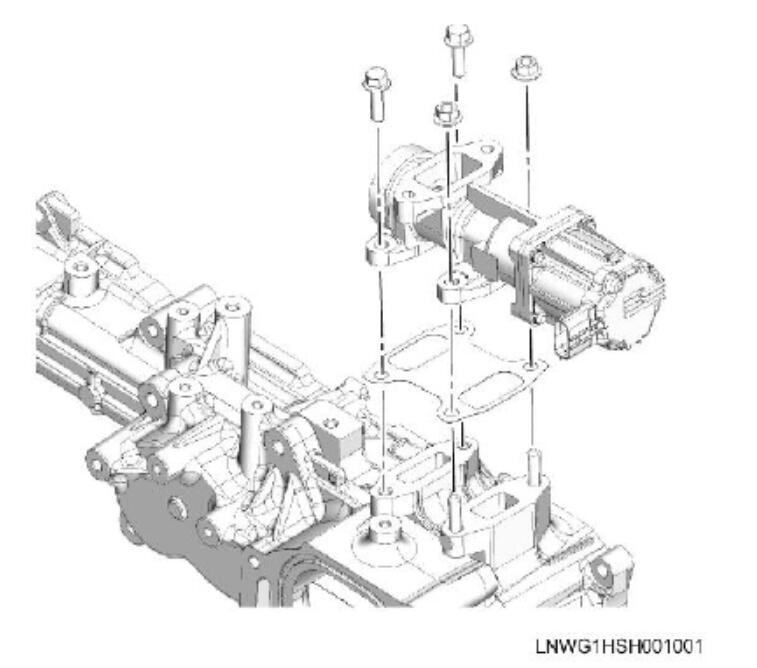
7.Disconnect the EGR valve connector and remove the EGR valve (Figure 6).
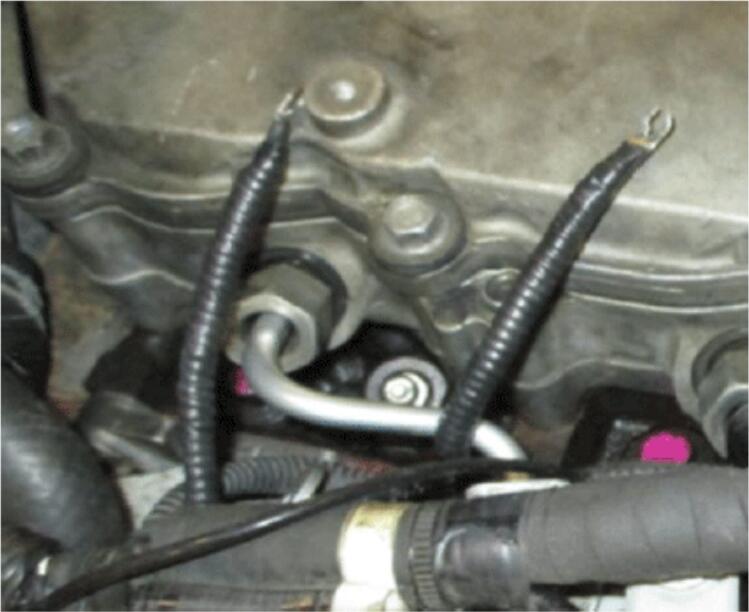
8.At each individual glow plug wire, remove the nut that holds the terminal onto the glow plug. Gently pull the wire with terminal end upwards.
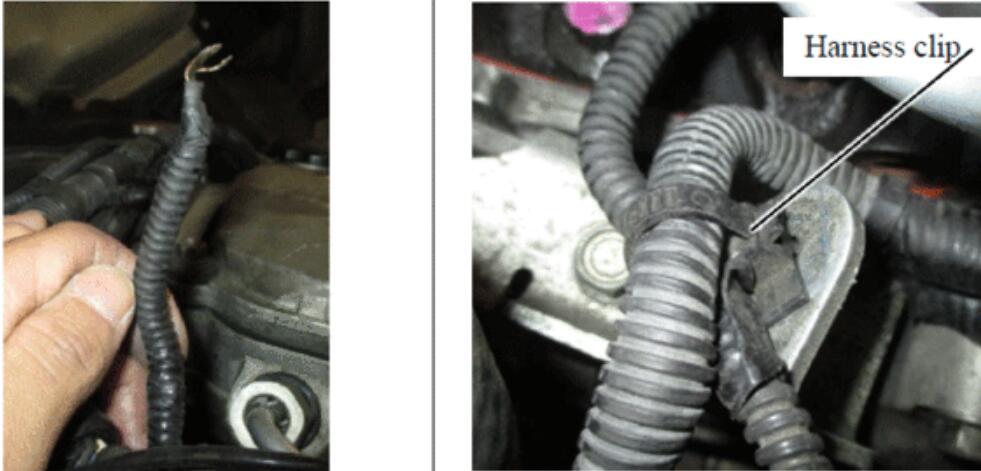
Remove the original harness clips as necessary to gain greater access
9.Remove the original glow plug wire from the corrugated tubing.
Note:The corrugated tubing will be reused.
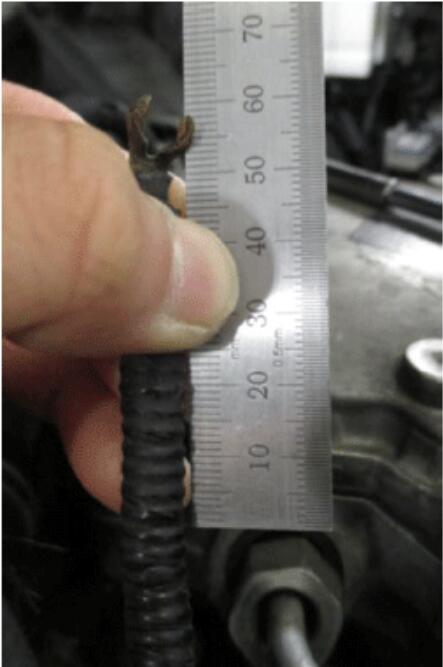
10.Cut off the original glow plug wire at approximately 60mm up from the glow plug connection eyelet (See Figure 9). Discard the removed wire with eyelet.
11.Cut one of the new pigtail harness wires to the same length as the original wire that was removed in Step 10 (approximately 60mm).
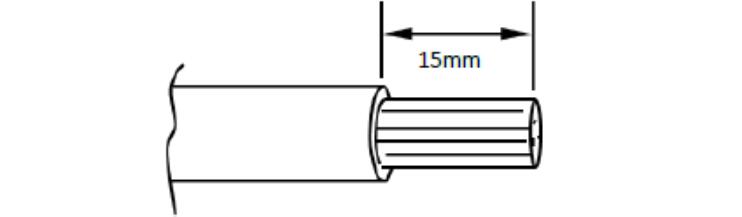
12.Strip 15mm of insulation off of the glow plug wire that remained on the engine harness and 15mm of insulation off of the new pigtail wire that was cut in Step 11 (See Figure 10). Slip a piece of shrink wrap at least 40mm long onto the pigtail wire.
SPLICING WIRE
There are two types of splices that can be used, a solder or crimp type splice. Perform only one type of splice per vehicle. The procedure for a Solder splice starts at Step 13 and for a Crimp splice starts at Step 17.
SOLDER TYPE SPLICE
13.Divide each of the stripped wire portions in two, join and then twist them together

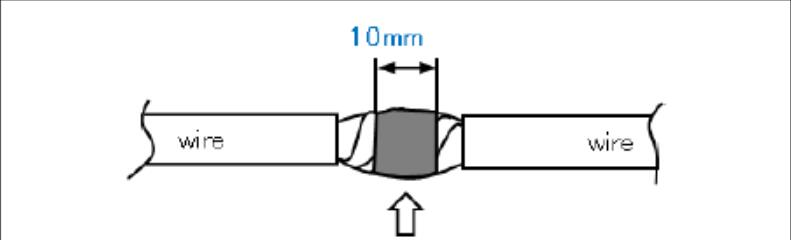
14.Solder the twisted wire joint together. Make sure that the soldered joint goes completely around the wires and is at least 10mm in length
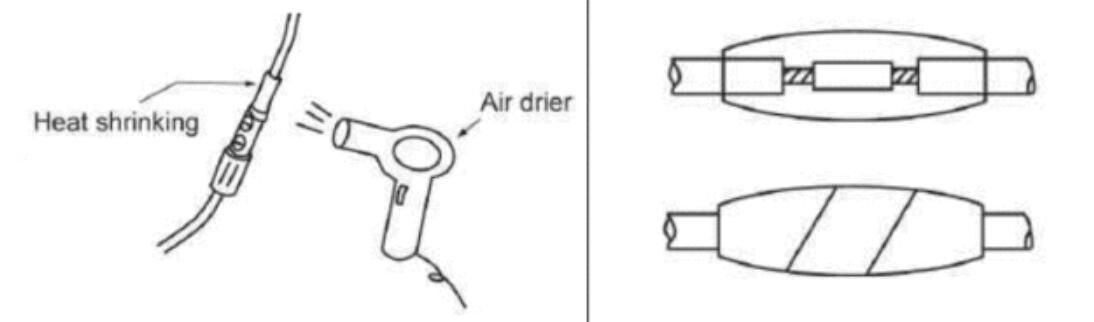
15.Slide the heat shrink tubing that was put on in Step 12 down over the soldered joint and center it. Use a heat gun to heat and shrink the heat shrink tubing in place
16.Repeat Steps 13 through 15 for each of the remaining three (3) glow plug terminals. Once all terminals have been replaced, proceed to Step 21.
CRIMP TYPE SPLICE
NOTE:Use weatherproof type butt connectors that have adhesive on the inside of the shrink tubing. Recommended connector size is 16-14 gauge, which is normally blue in color.
17.Insert stripped wire from the new glow plug pig tail into solderless connector until it reaches the center stop. Crimp the connector onto pig tail harness.
18.Insert the pig tail with solderless connector onto the stripped wire from the glow plug harness until it reaches the center stop. Crimp the connector onto the glow plug harness

19.Apply heat to the connector to shrink the adhesive-lined shrink tubing. Wrap connection with electrical tape
20.Repeat Steps 17 through 19 for each of the remaining three (3) glow plug terminals. Once all terminals have been replaced, proceed to Step 21.
21.Insert the glow plug wire back into the corrugated tubing removed in Step 9. Tape the tubing in place using vinyl electrical tape
22.Install the new glow plug terminal onto the glow plug and torque the nut to 1.2 Nm (10.5 lb-in). Replace any harness clips that were removed to gain access.
23.Install the EGR valve and plug in the EGR valve connector. Torque bolts and nuts to 23.5 Nm (17.3 lb-ft)
24.Install the EGR Cooler Duct with EGR Temperature Sensor.
Plug in the EGR Gas Temperature Sensor 2 connector to the harness.
Torque the bolts holding EGR Cooler Duct to EGR Valve to 23.5 Nm (17.3 lb-ft).
Torque the bolts holding EGR Cooler Duct to EGR Cooler to 28.4 Nm (21 lb-ft).
Torque the bolt holding EGR Cooler Duct to Cylinder Head to 48 Nm (35 lb-ft)
25.Install the Air Inlet Hose from the Intercooler to the Throttle Body. Tighten the Air Inlet Hose clamps to 5 Nm (44 lb-in)
26.Connect the negative battery terminal.
27.Start vehicle and verify repair.
28.Clear DTC’s.
29.Cycle switch to “Key On” and check for proper glow plug operation.
30.Confirm no DTC’s are stored.