This illustration show you guide on how to remove and install H.P. line for MTU 12-16V4000 engine.
Related Contents:
2022 MTU DiaSys 2.74 2.72 Engine Diagnostic Software Free Download
MTU Diagnostic Tool USB-to-CAN with MTU Diasys 2.73
Removing H.P. lines between H.P. pump and H.P. accumulator
Note: Before removing H.P. lines, it is advisable to photograph the mounted lines or attach metal tags to the lines so that they can be reinstalled in their original positions.
Notice: Fuels and fuel mists are flammable and poisonous. Risk of fire, explosions and poisoning! When using fuel: – do not use naked flame, – no electric sparks, – do not smoke, – do not spill fuel. Do not inhale. Always wear protective gloves and protective goggles/safety mask. Ventilate working area well.
Release H.P. line threaded connections and catch fuel emerging in a suitable container.
Remove H.P. fuel lines between H.P. pump and H.P. accumulator.
After removing H.P. lines, seal all open connections by installing suitable plugs.
Removing H.P. lines
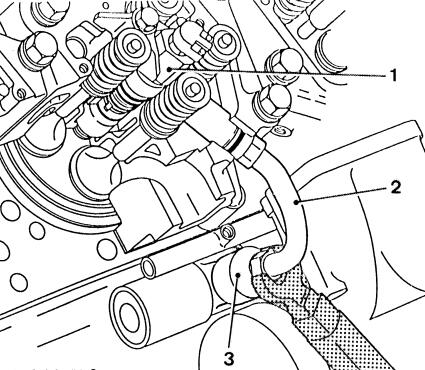
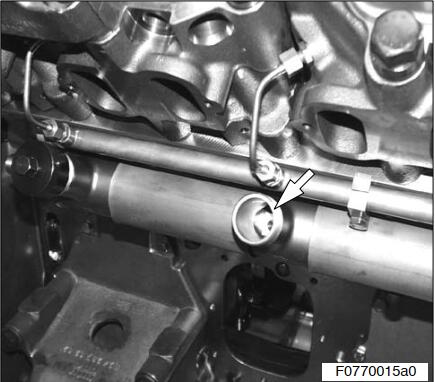
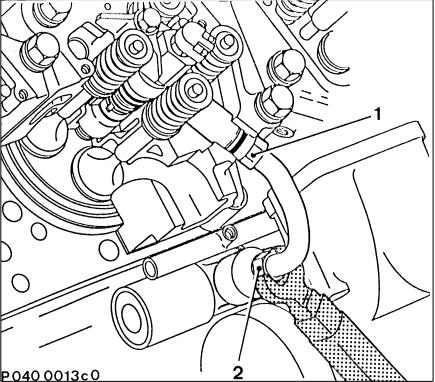
Unscrew and remove H.P. line (2) from injector (1) and limiting valve (3).
Removing H.P. accumulator
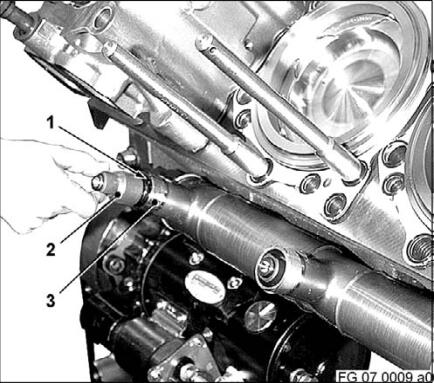
Remove limiting valve (2) from connector (3).
Remove fuel return lines and plug-in pipe end pieces
(1) or pressure relief valve as per overview drawing from H.P. accumulator.
Carefully remove H.P. accumulator from connectors and plug-in pipes.
Release connector (2), hex screws (4) and remove with plug-in pipe (1) from crankcase.
ÉÉ Remove O-ring (3) from connections.
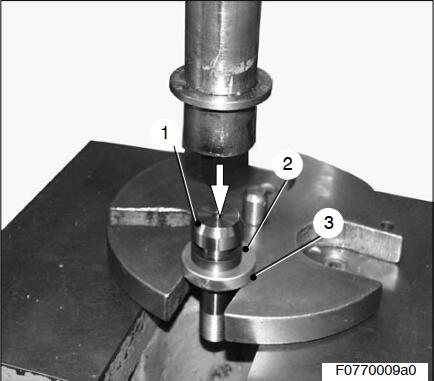
Disassembling H.P. accumulator
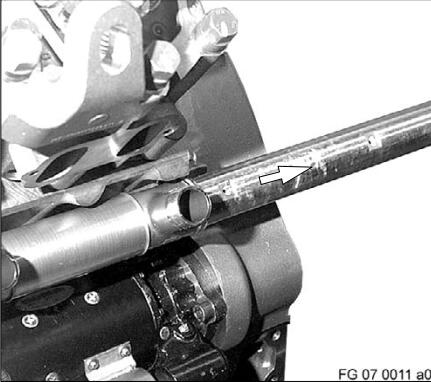
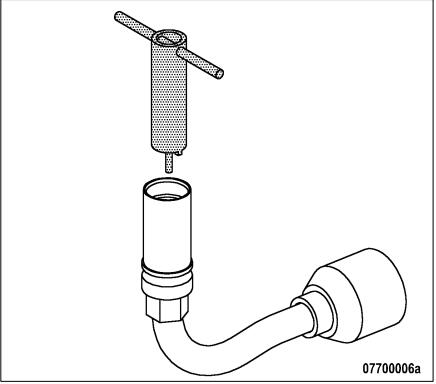
Use retaining device (arrow) to clamp H.P. accumulator in vice.
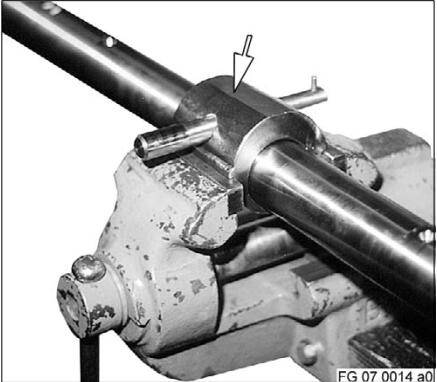
Remove thrust screws.
Remove thrust pad and pressure relief valve.
C077.05.07 Inspection and repair
Clean all components.
Check thread of hex screws for damage; replace screws if necessary.
Check condition of threads of H.P. lines and connectors for ease of movement; replace components as necessary.
Check sealing cones of thrust pads and pressure relief valve for damage and wear, and replace as necessary.
Check sealing taper of H.P. accumulator for damage and wear; replace component if necessary.
Using the magnetic crack-testing method with fluorescent magnetic powder, check H.P. accumulator for cracks;
replace component if necessary.
Check H.P. lines, plug-in pipes and fuel return line for damage and wear; replace components as necessary.
After damage to the ceramic bearing of the high-pressure pump, flush the H.P. lines and check that they are particularly clean; see also Section C 083.05.07 Fuel filter.
For checking limiting valves and pressure relief valves, see Manufacturer’s Documentation.
Consult MTU service for further information.
Check that H.P. lines and H.P. accumulator are perfectly clean.
Note: Do not bend the H.P. line!
Replace O-rings and sealing rings at every assembly.
Assembly
Assembling H.P. accumulator
Note: Make sure parts are perfectly clean.
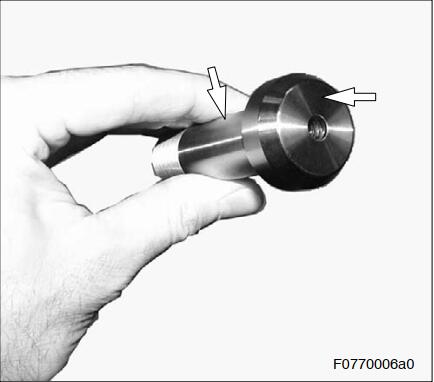
Clean and degrease surfaces (arrows) of thrust pad.
Coat surface (arrow) with oil.
Press-fit washer (2) on thrust pad (1), ensuring there is no gap.
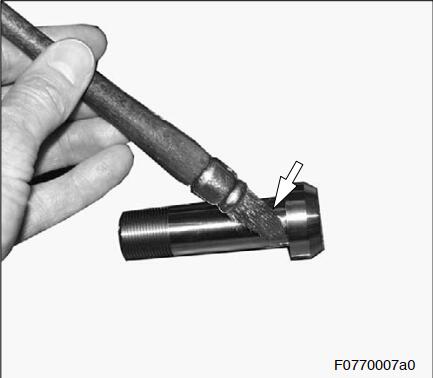
Note: Protect washer with disc (3) against damage.
Coat thread and pressure surface (arrows) of thrust screws with engine oil.
Join thrust screw to preassembled thrust pad.

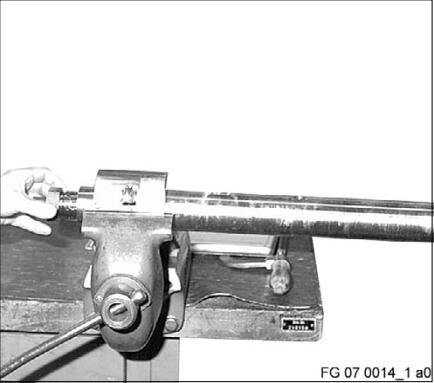
Use retaining device to clamp H.P. accumulator in vice.
Insert prepared thrust pad with thrust screw in support bore and tighten to specified tightening torque.
Insert pressure relief valve in opposite support bore of H.P. accumulator.
Insert thrust screw and tighten to specified torque.

Installation
Note: Make sure fuel-carrying components are perfectly clean.
Prior to installation, remove all blanking plug and/or covers.
Installing H.P. accumulator
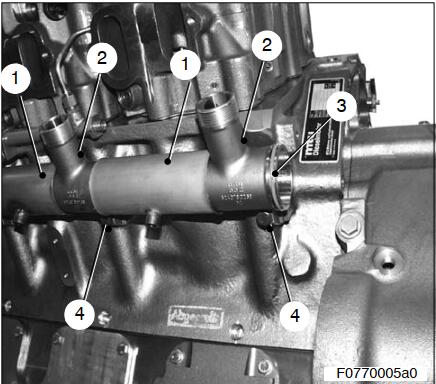
Insert O-rings in grooves (arrow) on connector and coat with petroleum jelly.
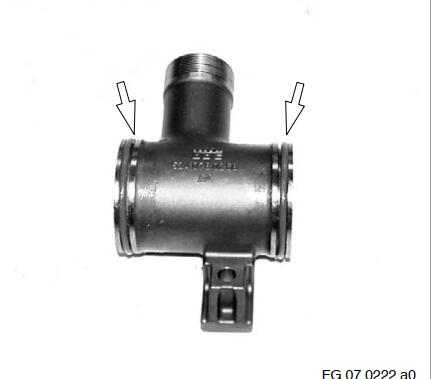
Fit connectors and plug-in pipes together in alternating sequence.
Fit plug-in pipes over O-rings of connectors.
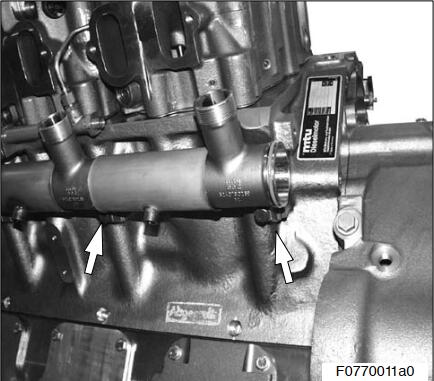
Note: Make sure mating face of connector is correctly positioned with regard to crankcase,corresponding to left or right engine side.
Fit hex screws (arrow) to secure connectors on
crankcase and tighten to 5 Nm to 10 Nm.
Carefully insert H.P. accumulator in preassembled connector and plug-in pipe assembly.
Note: Ensure that H.P. accumulator is correctly positioned.

Insert alignment tools in tightened connectors (first and last connector of respective engine side).
Align H.P. accumulator until alignment tool taper is centred in bore of H.P. accumulator.
Tighten alignment tools to 20 Nm + 2 Nm.
Insert limiting valves into free outlets (arrow) of connectors.
Note: Remove alignment tools only after injection lines have been installed.
Installing H.P. lines
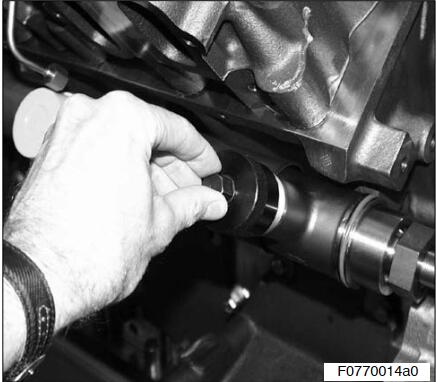
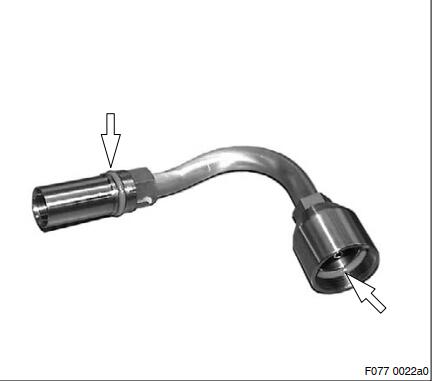
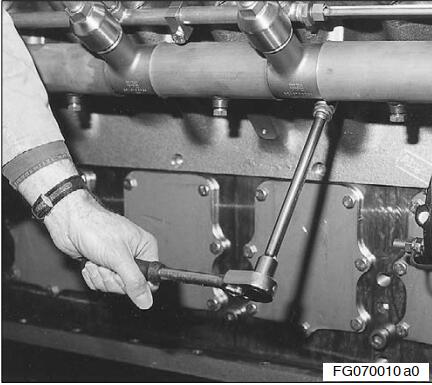
Check thrust rings at both ends of line for security with face spanner (10 Nm).
Measure distance (A) from end of line to thrust ring.
A = 11.7 mm.
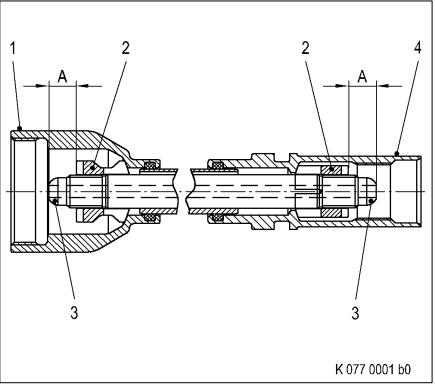
Insert O-rings (arrows) in grooves
Note: If injectors are removed, procedure as in
Install H.P. line on injector and on limiting valve.
Pretighten union nuts (1) and (2) to 5 Nm to 10 Nm.
Note: If necessary, for further tension-free assembly, release hex screws for connectors.
Tighten union nuts to specified tightening torque.
Remove alignment tools for H.P. accumulator and other H.P. lines as described.
Tighten hex screws for connectors to crankcase to specified tightening torque.
Tightening sequence: From centre outwards.
Complete H.P. accumulator and connect to return lines
More repair case for MTU engine,please refer to:MTU Engine Trouble Repair