This instruction show you guide on how to remove and install diesel engine for Combine AVERO 240.More information about CLAAS,please refer to:CLAAS Trouble Repair
Related Contents:
Claas WebTIC Offline Repair & Service 2021 2015 Free Download
Class Parts Doc EPC Agricultural 2021 2011 Free Download
Procedures:
Let the diesel engine cool down.
Disconnect the battery isolating switch.
Disconnect the battery.
Drain the coolant.
Drain the engine oil.
Remove / disassemble the engine output.
Remove the fan blades
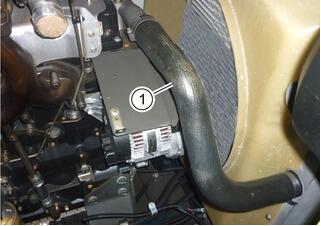
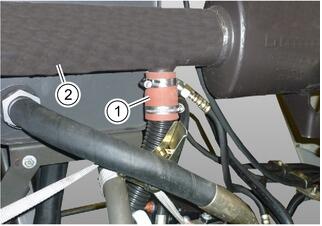
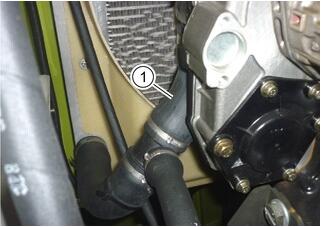
Remove hose (1).
Collect any escaping coolant and dispose of it properly.
Seal the openings tightly.

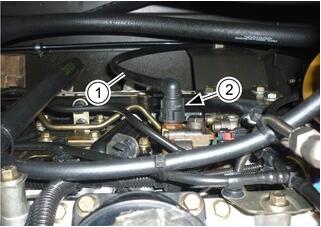
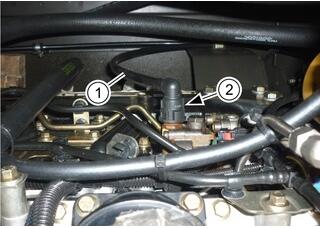
Unlock plug (1) and disconnect it from module (A015).
Unscrew cable (2) from the engine.
Unscrew housing (3).

Unlock plug (1) and disconnect it from module (A015).
Unscrew cable (2) from the engine.
Unscrew housing (3).
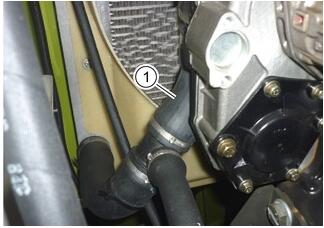
Remove hose (1).
Collect any escaping coolant and dispose of it properly.
Seal the openings tightly.
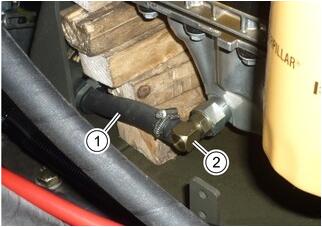
Slacken off and pull off hose line (1) from elbow union (2).
Collect and properly dispose of any escaping engine oil.
Seal the openings tightly.
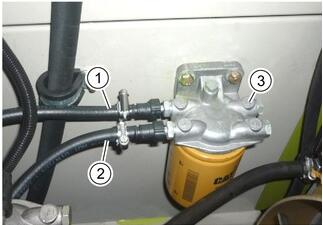
Mark hose lines (1) and (2) and unscrew them from filter housing (3).
Collect any escaping fuel and dispose of it properly.
Seal the openings tightly.
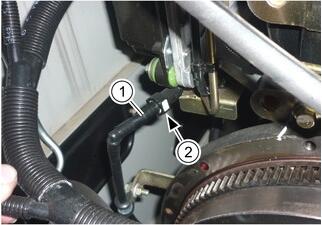
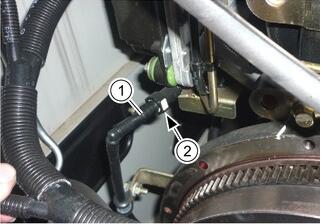
Mark hose line (1) and unscrew at (2).
Collect any escaping fuel and dispose of it properly.
Seal the openings tightly.
Remove hose with hose union (1) from silencer (2).
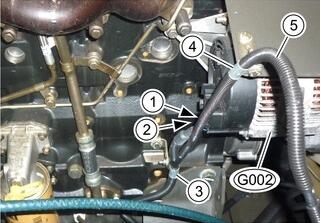
Mark and unscrew cable connections (1) and (2) from alternator (G002).
Unscrew clamps (3) and (4).
Put cable (5) aside.
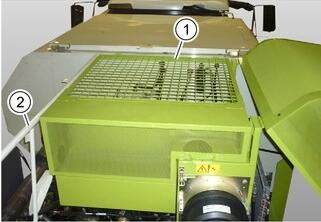
Remove sheet metal cover (1) and railing (2).
Observe the specifications in the overview!
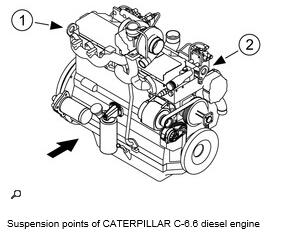
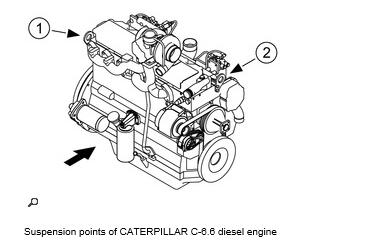
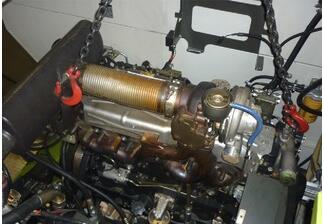
Suspend the diesel engine in a suitable lifting device at the suspension points (1) and (2) provided for that purpose.
Slightly lift the diesel engine
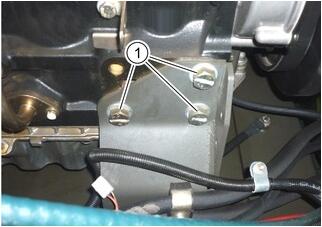
Left and right side:
Unscrew plugs (1).
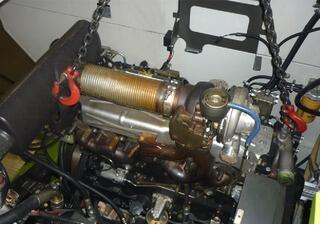
Lift the diesel engine out of the machine.
Caution! When lifting the diesel engine, avoid damaging any hoses and cables.
Collect any escaping coolant and dispose of it properly.
Installation
Preparing a parts change and release information when installing a new diesel engine:
Take down the engine number of the new diesel engine.
Open CLAAS Extra.Net / Service Online.
Write the parts change and release information for the machine.
Before installing the diesel engine, check all hoses and cables as well as all cable connectors for damage and replace them if necessary.
Seal all openings of the engine closely to avoid the ingress of dirt.
When making electric connections, observe the information provided in the Technical Systems documentation (Main power supply of electric starting motor / diesel engine)!
Observe the specifications in the overview!
Suspend the diesel engine in a suitable lifting device at the suspension points (1) and (2) provided for that purpose.
Lift the diesel engine to the installation position into the machine.
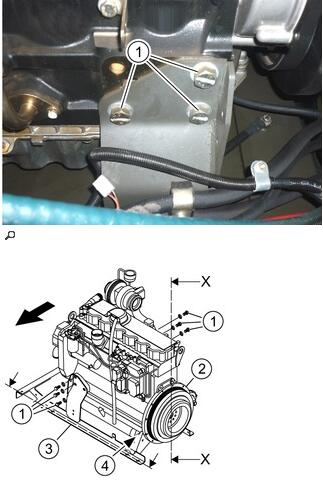
Left and right side:
Screw in bolts (1) hand-tight.
Align the engine housing (2) vertically with console (3).
Support the engine with timber blocks at (4).
Tighten bolts (1).
Caution! Bolts (1) may have to be slackened off once again when installing the engine output later.
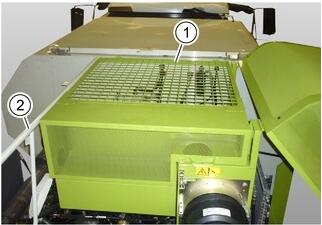
Install sheet metal cover (1) and railing (2).
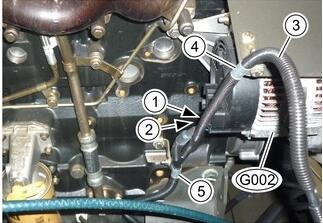
Screw cable connections (1) and (2) on the alternator (G002) according to the marks.
Screw on cable (3) with clamps (4) and (5).
Install hose union (1) on silencer (2).
Observe the specified tightening torque of clamps!
Bolt down hose (1) at (2).
Screw on hose lines (1) and (2) on the filter housing (3) according to the marks.
Join hose line (1) at (2).

Fit hose line (1) on elbow union (2).
Observe the specified tightening torque of clamp!
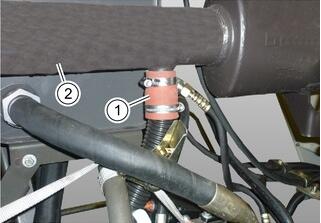
Install hose (1).
Observe the specified tightening torque of clamps!
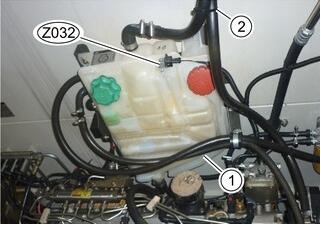
Install the compensating reservoir (2).
Plug connector on switch (Z032) and lock it.
Fit all hose lines according to the marks on the compensating reservoir (1).
Observe the specified tightening torque of clamps!
Fasten hose lines with cable band (2).
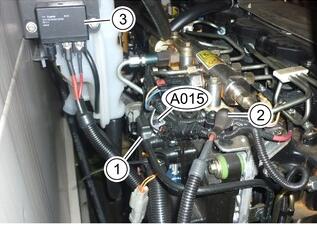
Connect plug (1) with module (A015) and lock it.
Screw cable (2) down on the engine.
Bolt down housing (3).
Install hose (1).
Observe the specified tightening torque of clamps!
Assemble / install the engine output.
Install the fan blades.
Top up engine oil.
Top up coolant.
Connect the battery.
Switch on the battery isolating switch.
Bleed fuel system.
Perform a function check.
Check the engine oil level and the coolant level.
Check all hose lines for leaks.