Here is an instruction show you guide on how to remove pistons and conrods for MTU 12-16 v4000 engine.
Related Contents:
2022 MTU DiaSys 2.74 2.72 Engine Diagnostic Software Free Download
MTU Diagnostic Tool USB-to-CAN with MTU Diasys 2.73
Procedures:
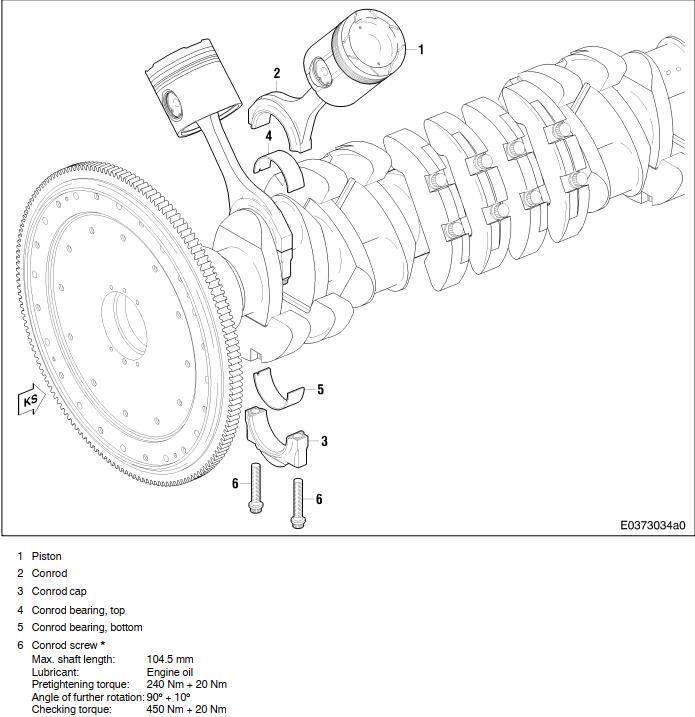
Overview drawing

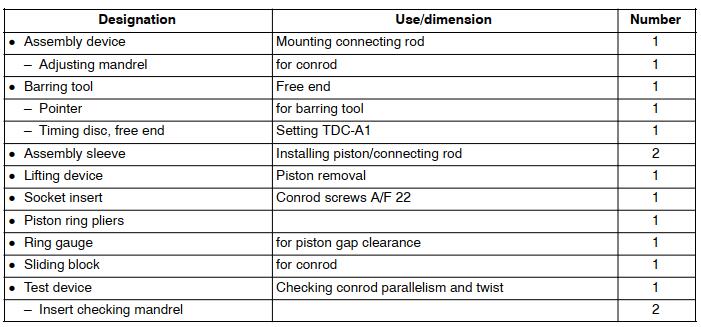
Special tools
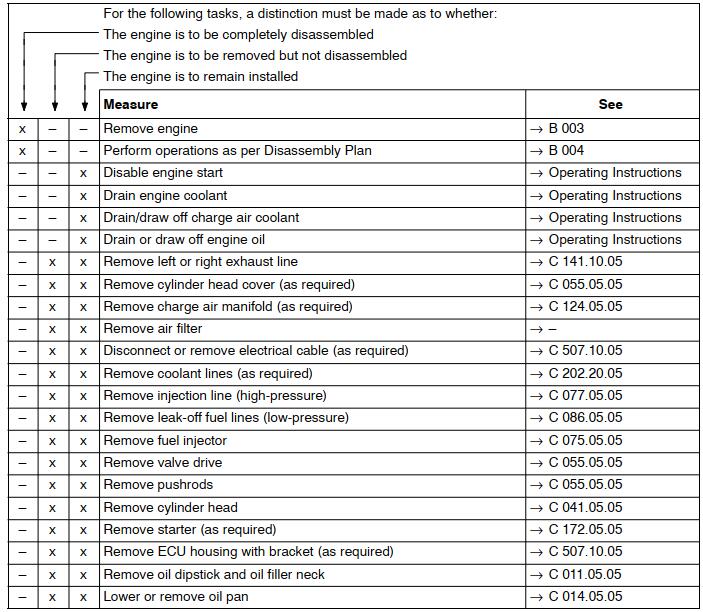
Before-removal operations
Removal:
Removing piston with connecting rod with oil pan installed (via access port)
Remove carbon scraper ring.
Install barring tool.
Remove inspection port covers, left and right sides, from respective cylinders.
Note: Crankshaft must be turned only with flywheel
installed or when axially located.
Turn crankpin of respective cylinder on right side 40 before TDC and left side 40 after TDC.MTU Engine USB to CAN diagnostic adapter
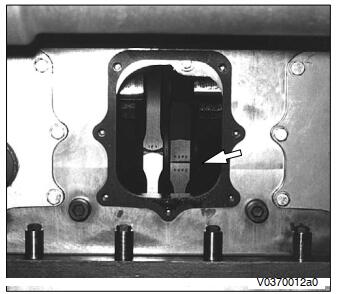
Release conrod screws with socket and large ratchet through inspection port (arrow).
With the exception of the unchanged position of the crankcase (engine in normal position), rest of removal procedure is the same as for Removing piston with conrod in assembly dolly.
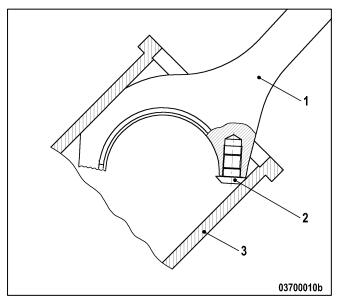
Before removal, mount the sliding block on the conrod to be removed – see next illustration.
1 Connecting rod
2 Sliding block
3 Cylinder liner
Removing piston with conrod in assembly dolly
Turn crankcase in assembly dolly so that conrod bearing cap (1) of piston to be removed is horizontal.
Note: Crankshaft must be turned only with flywheel installed or when axially located.
Turn crankpin of respective cylinder on right side 40 before TDC and left side 40 after TDC.
Remove combustion residues in cylinder liner.
Note: This is not required for cylinder liners with carbon scraper ring.
Remove carbon scraper ring.
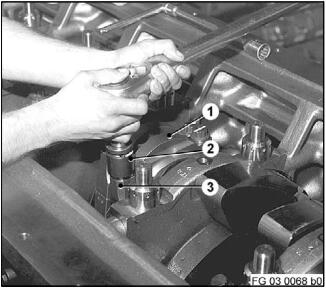
Release conrod screw (3) with socket (2), extension and ratchet.
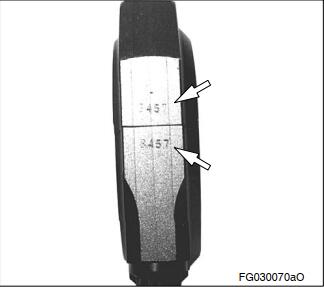
Check marking (arrows) of conrod cap to conrod.
Mark parts as necessary.
Note: Bearing cap and conrod are a single unit and must not be interchanged.
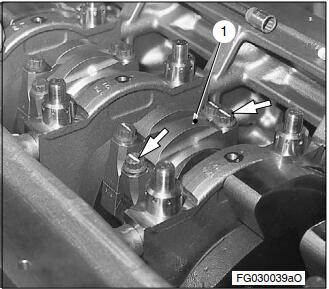
Remove conrod screws (arrows) with socket and ratchet and remove conrod cap (1).
Remove bearing shell from conrod cap and protect from damage.
Note: The toothing on the conrod and conrod cap mating faces must not be damaged. If necessary, replace conrod.
Check markings from bearing shell to conrod; reapply markings if necessary.
Turn crankcase in assembly dolly so that piston to be removed with conrod is vertical.
Note: When removing piston do not damage or warp oil spray nozzle.
Remove bearing shell from conrod and protect from damage.
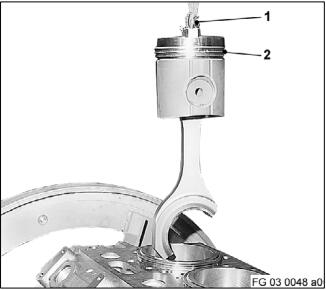
Secure lifting device (1) on piston crown (2).
Withdraw piston and connecting rod with rope and crane from cylinder liner fit.
Remove lifting device from piston crown.
More repair case for MTU engine,please refer to:MTU Engine Trouble Repair