This instruction show you guide on how to remove aerial angle controller for Hitachi ZX890-7 excavator.
Related Contents:
Hitachi MPDr v2.56 v2.25 Diagnostic Software Free Download
Hitachi Excavator ZX-7 Service Repair Workshop Manual 2021
Hitachi Dr.ZX Excavator Diagnostic Tool Cable
Procedures:
1.Set the machine position for inspection and maintenance.
2.IMPORTANT
Set the key switch to the OFF position. Wait 5 minute or longer, and then set battery disconnect switch to the OFF position.
Set the battery disconnect switch to the OFF position.
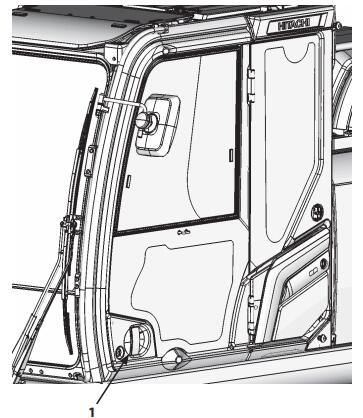
3.Open door (1).
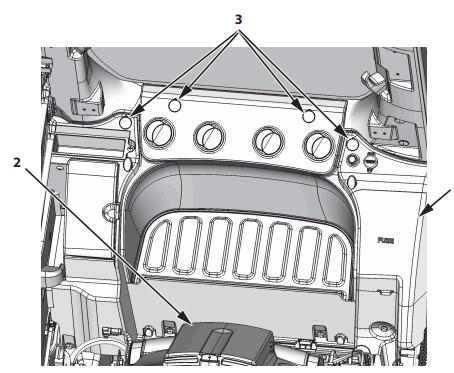
4.Fold seat (2). Slide seat (2) to the front end.
5.Remove caps (3) (4 used).
6.Remove cover (4).
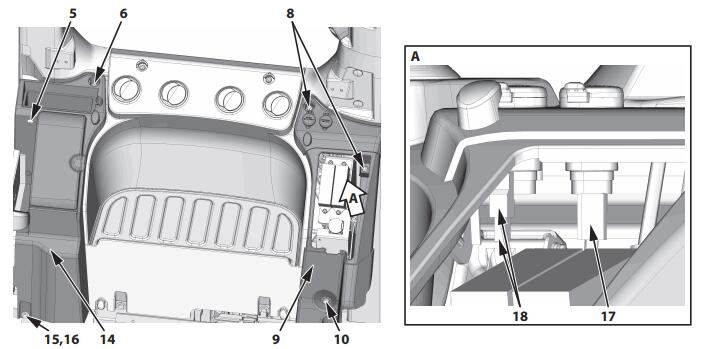
7.Remove screw (5), screws, washer (6), bolts (15), and washers (16). Remove the cover (14) assembly.
: 13 mm
8.Remove screws, washers (8) (2 used) and bolts, washer (10).
:13 mm
9.Disconnect connector (17) and connectors (18) (2 used). Remove cover (9)
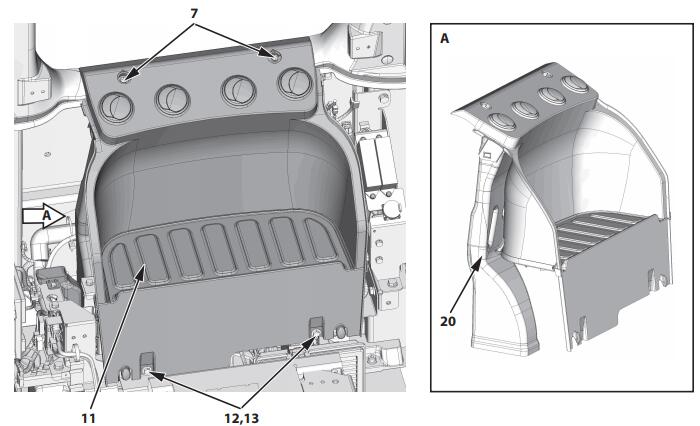
10.Remove screws, washers (7) (2 used), bolts (12) (2 used), and washers (13) (2 used). Remove the cover (11) assembly. At this time, duct (20) is also removed at the same time.
: 13 mm
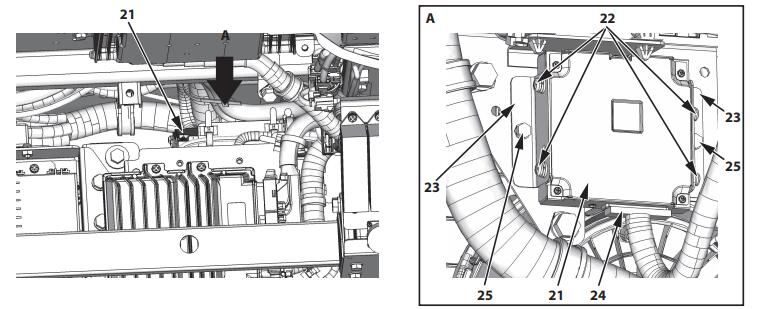
11.Disconnect connector (24). (Refer to “Instructions for Disconnecting Connectors”T5-1-7)
12.Remove bolts, washers (25) (2 used). Remove the aerial angle controller (21) assembly.
: 10 mm
13.Remove screws, washers (22) (4 used). Remove aerial angle controller (21) from brackets (23) (2 used).