A pressure switch will be located on both the low pressure side and high pressure side of the air conditioner system. These switches act as a safety device which prevent the compressor clutch from turning if the refrigerant pressure is to low on the low pressure side, or it’s to high on the high pressure side. If the pressure is too low, the compressor can be damaged due to low oil. If the pressure is too high, the compressor can be damaged due to overheating.
This instruction will show you guide on how to locate and preform testing on the air conditioner pressure switch on Toyota.
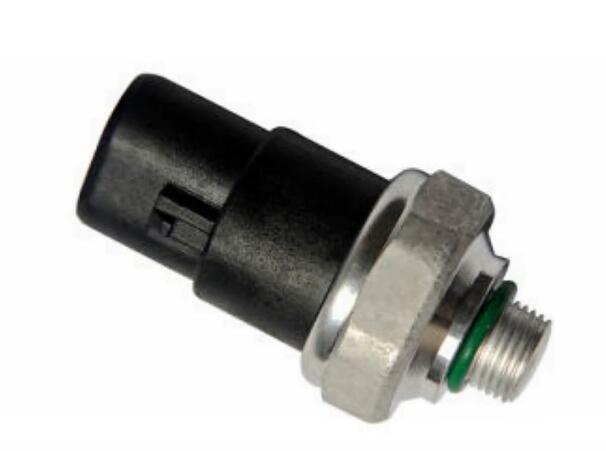
This is what a typical air conditioner pressure switch looks like on a vehicle as shown in this picture.
Symptom of a bad pressure switch on either the low pressure side or the high pressure side is the compressor clutch will turn on and off rapidly when the air conditioner is on and the vehicle is idling making it unable to properly cool the vehicle.
The easiest way to locate the pressure switch is to follow the AC lines coming out of the compressor, the lager line will be your low side pressure switch and the smaller line will be your high side pressure switch.
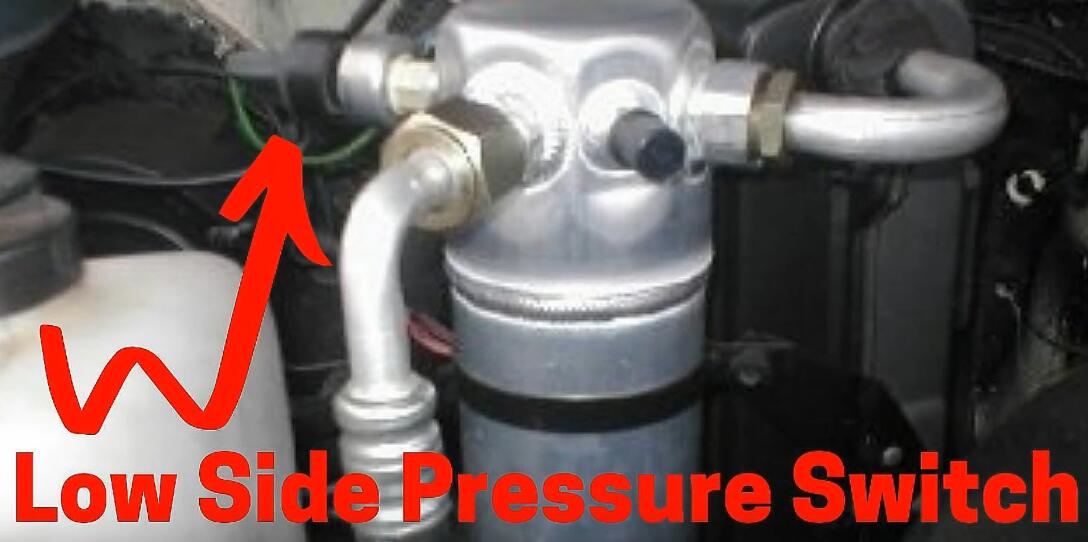
The low side pressure switch will be located on the larger line between the compressor and the evaporator and is almost always on or near the accumulator which looks like a metal can as shown in this picture.
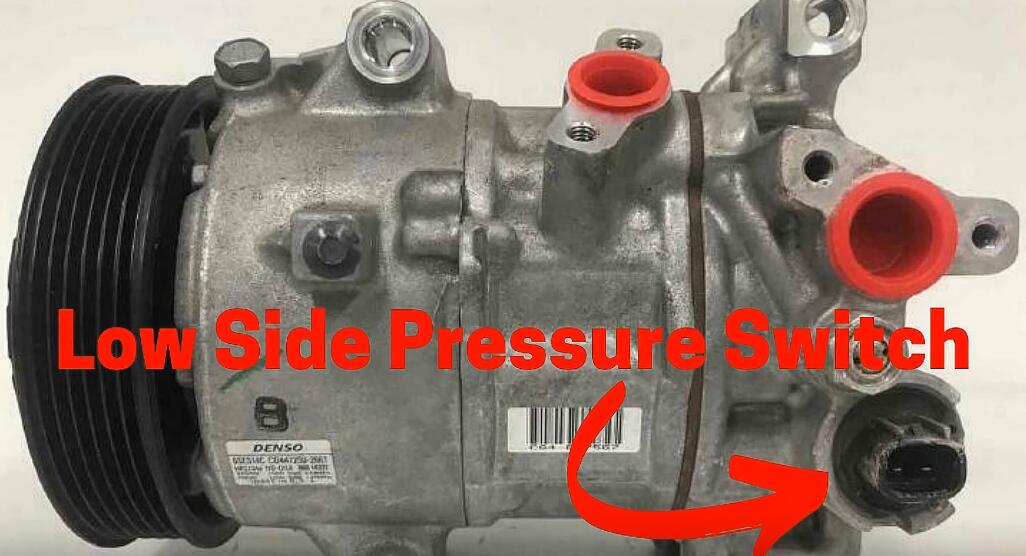
The low side pressure switch can also be located directly on the compressor as shown in this picture.
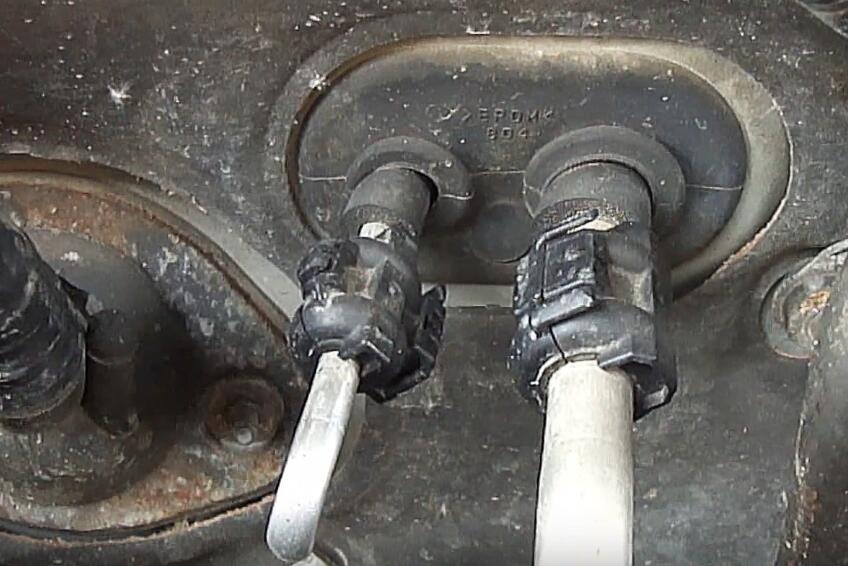
The low side pressure on our Toyota is located past the firewall here by the AC lines inside the dashboard.
Removing the dashboard can require hours of labor. So before removing the dashboard, it would be wise to first have a repair shop, check the low pressure switch with an advanced diagnostic scanner to confirm that the switch is bad.
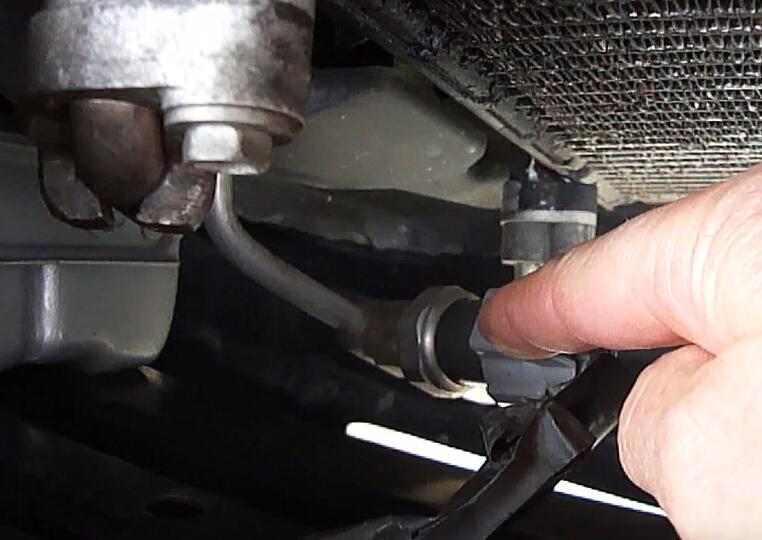
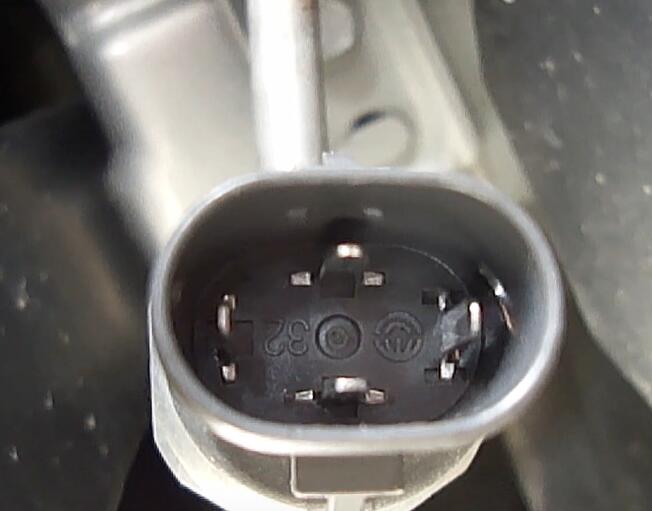
The high side pressure switch will be located on the smaller line and will usually be located at the front of the vehicle by the condenser. The high side pressure switch on this vehicle is located right here.
In order for the air conditioner to work both the low pressure switch and high pressure switch must be in the closed position. When the switch closes it causes a complete electrical circuit which then allows the compressor clutch to turn. If the pressure is too low on the low pressure side then the low pressure side switch will not close. If the pressure is too high on the high pressure side then the high pressure side switch will not close.
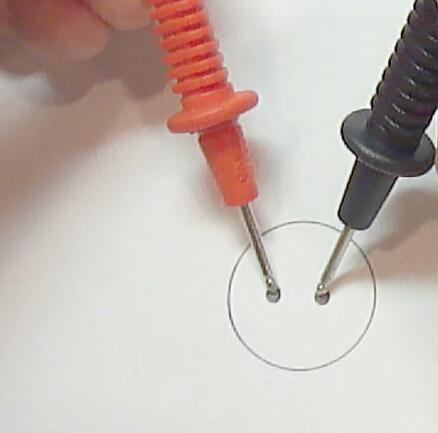
The pressure switch rating will vary for each specific year make and model vehicle. One way to determine if the pressure switch is in the closed position is by performing a continuity test with a digital multimeter. A low pressure switch or a high pressure switch will have two, three or four electrical contacts. For demonstration purposes, we’ll fist show how to perform a continuity test on the drawing with the test probes.
If you have two electrical contacts then place the two test probes on the two electrical contacts.If the pressure switch is closed, this will cause continuity
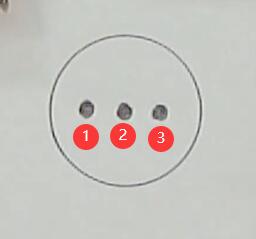
If you have three electrical contacts then place the two test probes like that:“1-2”,”2-3” and “1-3”. If the pressure switch is closed then one of these combinations will cause continuity.
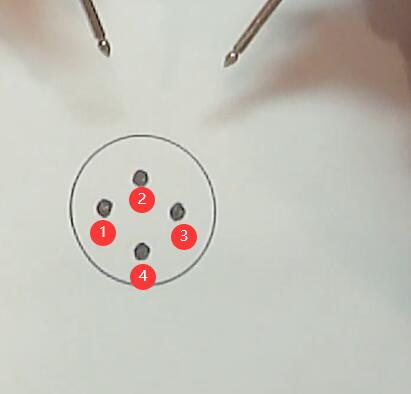
If you have four electrical contacts then place the two test probes like that: “2-3”,”4-3”,”1-4”,”1-2”, “1-3” and “2-3”. If the pressure switch is closed then one of these combinations will cause continuity.
Here we’ll do an actual continuity test on this high pressure switch which has four electrical contacts, this means it’ll have six possible test combinations like we showed in the demonstration.We’ll perform this test with the vehicle turned off.
Place the digital multimeter on the continuity setting which will have an arrow and a plus sign and a volume symbol
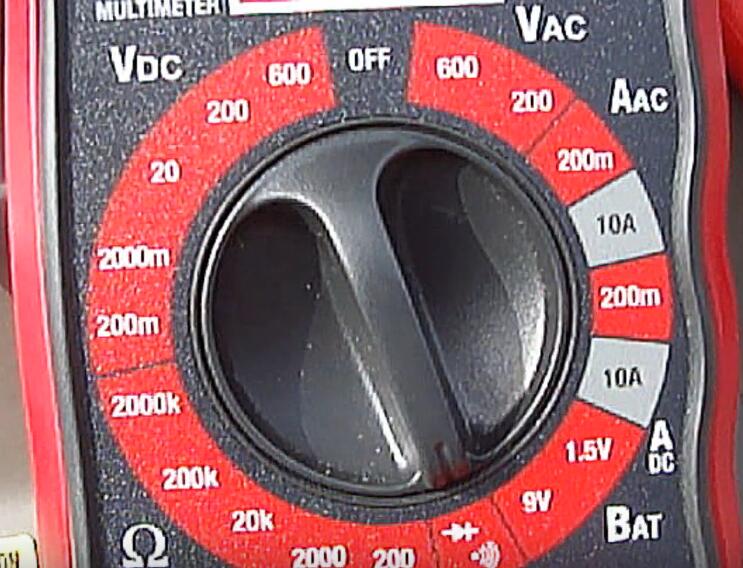
Touch the two probes together to make sure that the digital multimeter continuity setting is working which will make a beep sound.
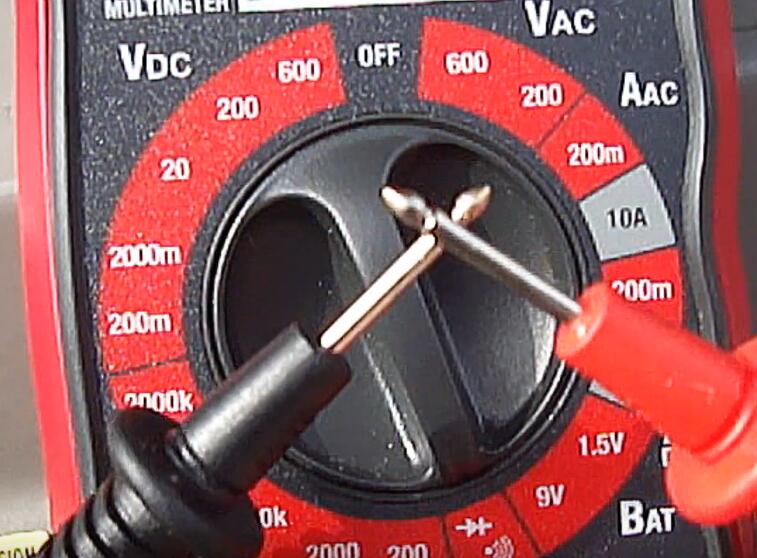
With the electrical connection disconnected, test the different electrical contact combinations after trying all the possible combinations on this particular high pressure switch.
After tested, the 12 o’clock and the six o’clock position had continuity. Now we know that this high pressure side switch is in the closed position which will allow the compressor clutch to engage as needed.
If you do have to replace a pressure switch, make sure your system has a built-in check valve which will prevent refrigerant from escaping once the switch is removed. Otherwise the refrigerant will have to be removed prior to removing the pressure switch.