This instruction show you guide on how to remove and install Hydraulic Coupler Kit for Bobcat E85 excavator.
This kit requires the excavator includes the Hydraulic Pin Grabber Ready option installed as a factory option.
NOTE:The procedure is shown on an excavator that is equipped with a standard arm. The procedure is the same for all excavators except where noted. Some photos may vary slightly from the actual machine.
Remove the attachments or bucket from the existing coupler.
Lower the boom / coupler and blade to the ground.
With the engine off, turn the key to the ON position and move both hydraulic control levers (and clamp switch if equipped) to relieve hydraulic pressure.
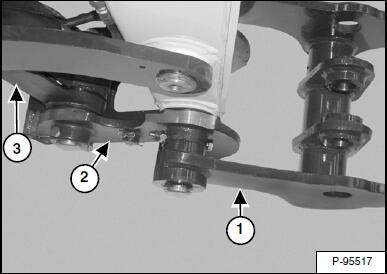
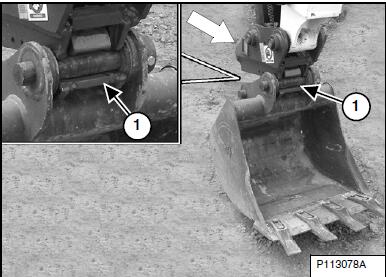
Remove the clamp (Item 1) (if equipped) and the bucket coupler (Item 2). Remove the bucket link (Item3). (See the Service Manual for correct procedures.)
Save the bucket cylinder and arm pins along with the hardware for reuse.
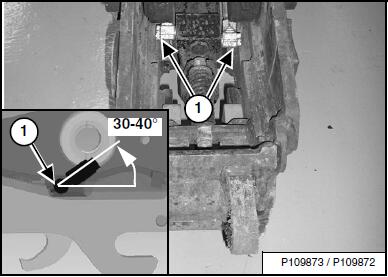
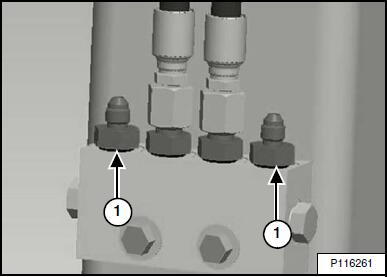
Install the coupler banjo fittings (Item 1) before installing the coupler to the arm. Orient the fittings upward and toward the rear at 30 – 40°. Tighten to 45 – 49 N•m (33 – 36 ft-lb) torque.
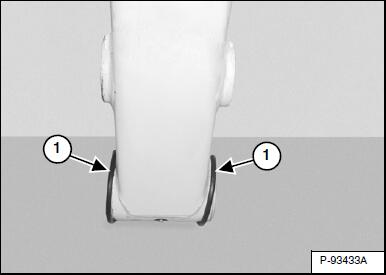
Install new O-rings (Item 1) on the arm.
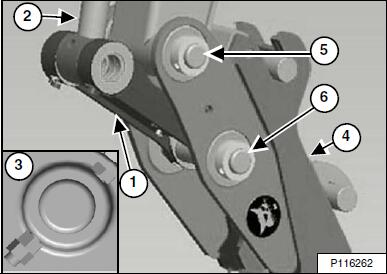
Assemble the bucket link (Item 1) to the cylinder rod end (Item 2) reusing the original pin and hardware (Item 3).
Install the new bucket coupler (Item 4) (and hydraulic clamp, if equipped) reusing the arm pin (Item 5) and the bucket link pin from the kit (Item 6). Install the bolts with two nuts (Item 3).Do not tighten the bolt to the pin boss.
NOTE: After the nuts are tightened together, the bolt should be free to turn (Item 3).
Lube all grease fittings on the coupler.
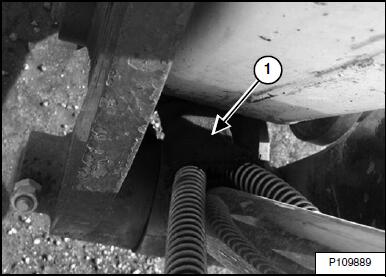
Remove the plugs and install the fittings (Item 1)
Install the coupler hoses (Item 1) on the manifold.
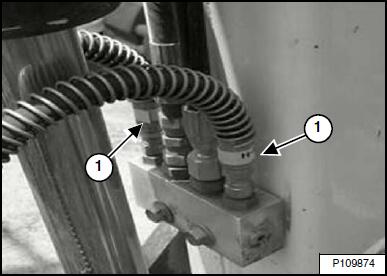
Route the coupler hoses through the hose guard sleeve from the kit (Item 1) and install them on the coupler banjo fittings.
NOTE: Do not cross the hoses, the left hose goes to left banjo fitting and the right hose goes to the right fitting.
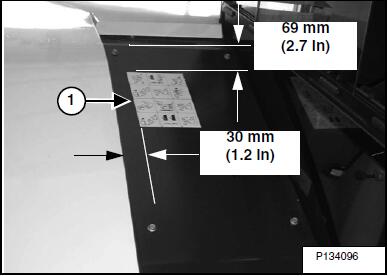
Wash and dry the center cover. Using the dimensions shown in, install the decal (Item 1) so it is visible when seated in the operator’s seat.
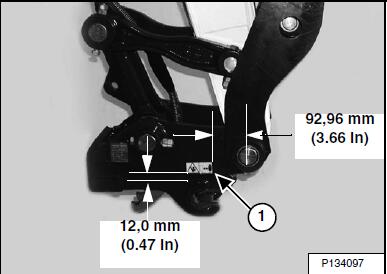
Wash and dry the sides of the coupler. Using the dimensions in, install the warning decal (Item1).
Start the engine and check for leaks.
WARNING
Hydraulic fluid under pressure can penetrate skin and eyes, causing serious injury or death. Fluid leaks under pressure may not be visible. Use a piece of cardboard or wood to find leaks. Do not use your bare hand. Wear safety goggles. If fluid enters skin or eyes, get immediate medical attention from a physician familiar with this injury.
Stop the engine.
Add hydraulic fluid as necessary.
Remove air from the hydraulic system. (See the Service
Manual for the correct procedure.)
NOTE:Verify the coupler is functioning properly before installing an attachment.
If the coupler is not functioning properly, verify the hose routing is correct.
More repair topic for Bobcat,please refer to:Bobcat Excavator Repair
CUSTOMER PACKING LIST
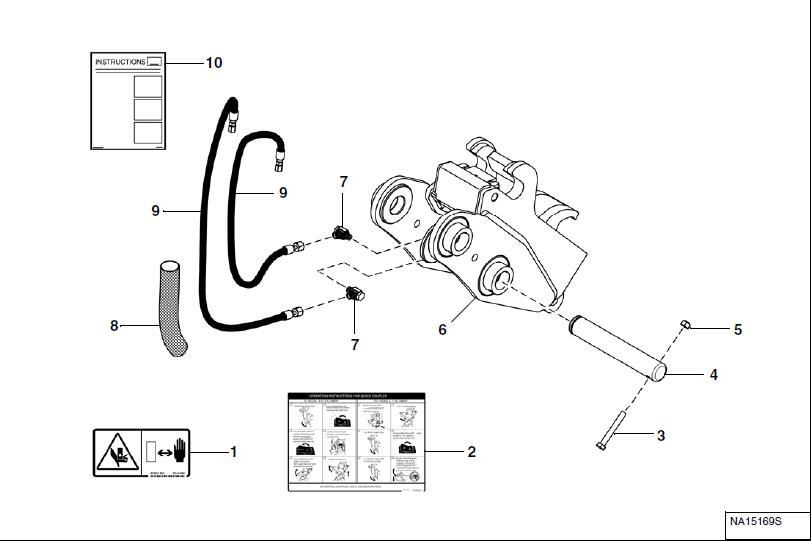
(Kit #7350524) Hydraulic Coupler Kit
NOTE TO INSTALLER: You MUST remove the following Pin Grabber Operation Instructions from this Installation Instruction and add it to the excavator Operation & Maintenance Manual for future Pin Grabber operation reference.
Installation
NOTE: Installation and removal of the bucket is shown. The procedure is the same for other attachments. Disconnect any hydraulic lines that are operated by hydraulic power before removing any attachments (breaker, auger,etc.).
Start the engine.
Position the arm and coupler to the attachment
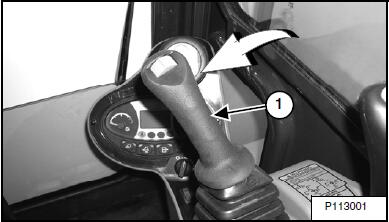
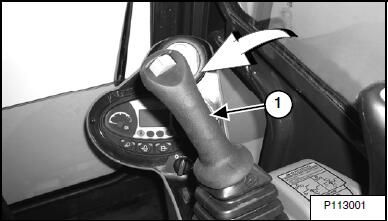
Move the right joystick (Item 1) [Figure 11] to the left (IN) and curl the coupler (Item 1) toward the cab fully.
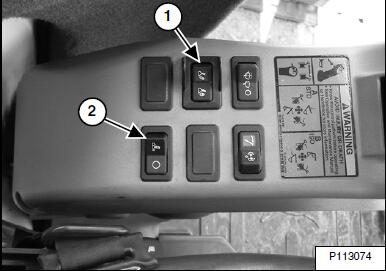
Press the coupler ON / OFF switch (Item 1) to the left (ON) position to enable the pin grabber quick coupler feature. The switch will illuminate when in the ON position and a buzzer will sound.
Press and release the INTENT switch (Item 2) within five seconds. (The buzzer will continue to sound and the light (Item 1) will stay ON.)
NOTE: If the pin grabber quick coupler, the switch and / or the buzzer do not operate correctly, see the troubleshooting chart.
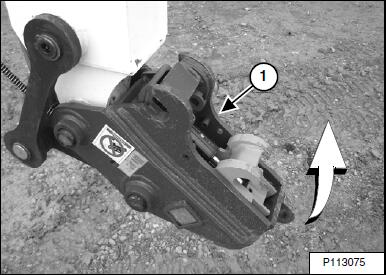
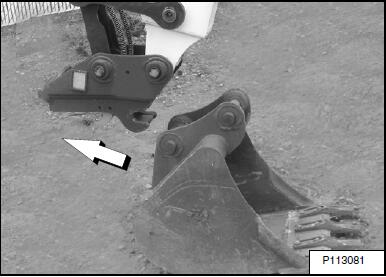
Continue to curl the quick coupler until the locking clasp (Item 1) moves in fully.
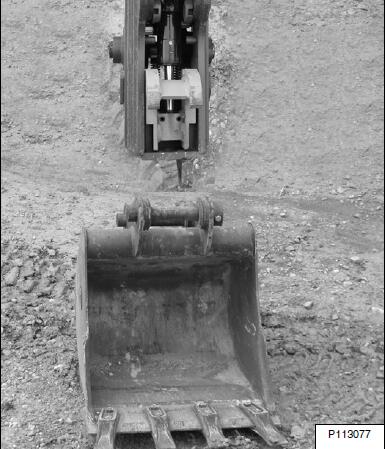
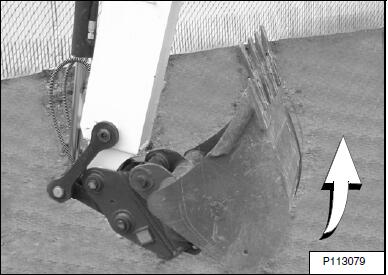
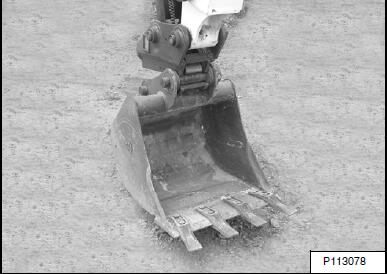
Roll the coupler out. Move the arm toward the attachment. Reposition the boom, arm and coupler until the coupler (Item 1) [Figure 15] is position over the attachment pin. Raise the attachment up slightly.

Curl the quick coupler in fully.
Press the coupler ON / OFF switch (Item 1) to the right, (OFF) position. The switch light and buzzer will turn OFF.
Continue to curl the attachment in for an additional ten seconds to allow the locking clasp to move and lock to the attachment pins.
With the attachment as low to the ground as possible,curl the attachment out and in several times to ensure the attachment is secured to the coupler.
Lower the attachment flat to the ground.
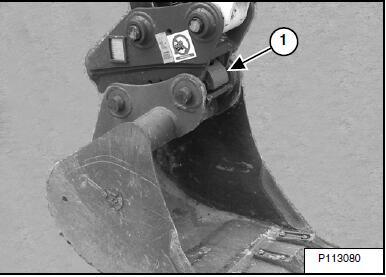
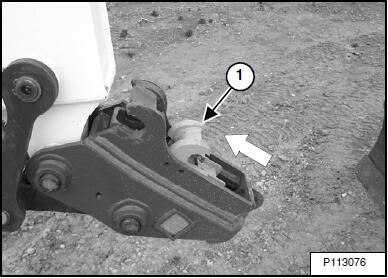
Visually check that the green locking clasp (Item 1) is FULLY ENGAGED AND LOCKED.
WARNING
Keep all bystanders 6 m (20 ft) away from equipment when operating. Contact with moving parts, a trench cave-in or flying objects can cause injury or death.
AVOID INJURY OR DEATH
The quick coupler locking clasps must be fully engaged and locked to the attachment pins. Failure to fully engage the locking clasps can allow attachment to come off.
Removal
NOTE: Removal and installation of the bucket is shown. The procedure is the same for other attachments. Disconnect any hydraulic lines that are operated by hydraulic power before removing any attachments (breaker, auger,etc.).
Move the right joystick (Item 1) [Figure 18] to the left (IN) and curl the quick coupler (Item 1) fully.
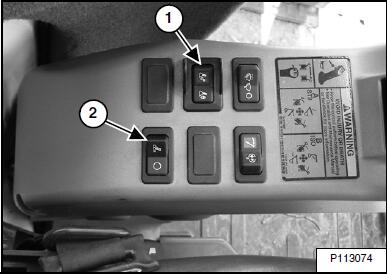
Press the coupler ON / OFF switch (Item 1)to the left (ON) position to enable the pin grabber quick coupler feature. The switch will illuminate when in the ON position and a buzzer will sound.
Press and release the INTENT switch (Item 2) within five seconds. (The buzzer will continue to sound and the light (Item 1) will stay ON.)
Move the right joystick (Item 1) [Figure 18] to the left (IN) and continue to curl the quick coupler. The coupler locking clasps will lift fully to unlock the attachment from the quick coupler.
With the attachment slightly off of the ground, roll the quick coupler back until the coupler starts to disengage from the attachment.
Roll the quick coupler back fully.
Lower the boom and arm until the attachment is on the ground and the quick coupler is disengaged from the attachment pins.
Move the arm away from the excavator until the quick coupler is clear of the attachment
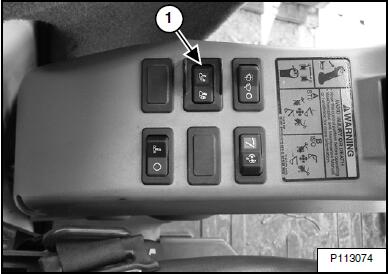
Press the coupler ON / OFF switch (Item 1) to the right, (OFF) position. The switch light and buzzer will turn OFF.