This instruction show you guide on how to remove and install centrifugal filter element for Perkins 1600 series engine.
This engine news article applies to the 1606D engine only.
The 1606D engine has a centrifugal oil filter installed. The filter element of the centrifugal oil filter must be changed at the same time as the oil filter element. Both filter elements on the 1606D engine must be replaced at 400 hours.
Related Contents:
Perkins EST 2024A & 2023A & 2019A Software Free Download
Perkins SPI2 2018A EPC+Service Manual Free Download
Remove Centrifugal Filter Element
1 Ensure that the outer casing for the centrifugal filter assembly is clean and free from dirt.
2 Loosen handle of band clamp (A2) and remove band clamp (A3) and cover (A1) from filter body (A4).
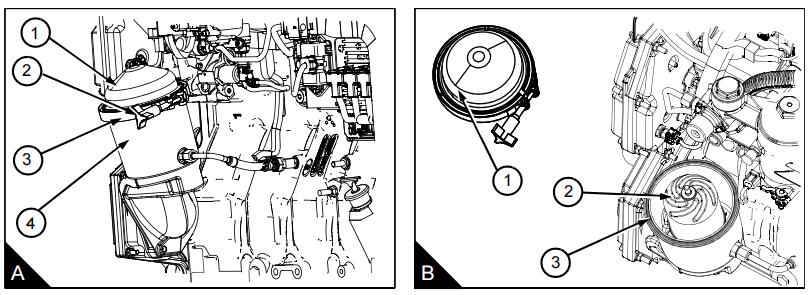
3 Remove O ring seal (B3) and remove element (B2).
Install Centrifugal Filter Element
1 Install a new filter element (B2) and install a new O ring seal (B3) into filter body (A4).
2 Install cover assembly (B1) onto filter body (A4).
3 Ensure the band clamp (A3) is located correctly and tighten handle (A2) for band clamp securely.
4 Check engine oil level before starting the engine. Operate engine and check for leaks.
More Perkins case,please refer to:Perkins Engine Trouble Repair