This instruction show you guide on how to use eTechnician truck diagnostic software to read and clear fault codes.
Related Contents:
2023 Nexiq eTechnician 2.8 2.1 1.1 Diagnostic Software Free Download
Procedures:
The Faults screen provides a comprehensive list of faults (both Active and Inactive. From this screen you can do the following:
• View the list of active and inactive faults
• View the Description screen for a particular fault
• View the Freeze Frame screen for a particular fault
• View Repair-Connect information for a particular fault
• Clear All Faults
• Print the list
To view the Faults screen:
1 Click on the Faults tab on the left side of the display
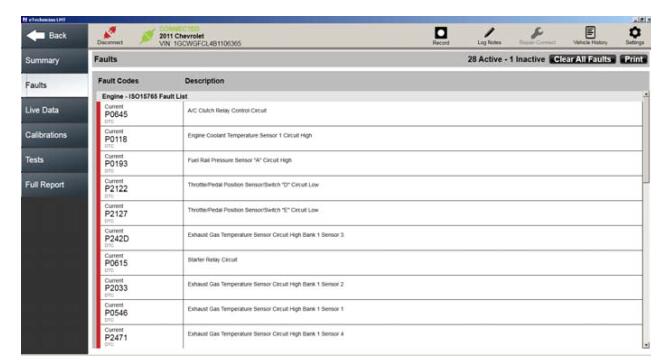
Active and Pending faults are presented first in the list with a red bar along the right side of the list. Inactive faults do not have the red bar.
You can use the scroll bar on the right side of the screen to scroll up and down the display and review the information.
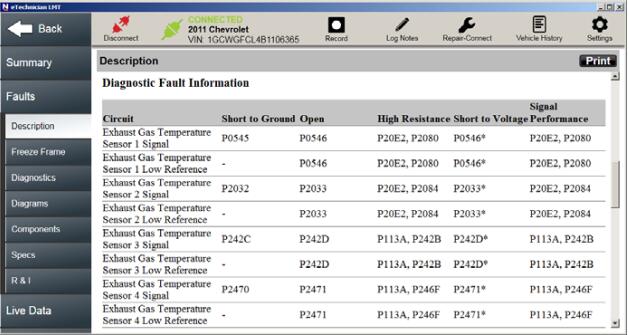
2 Click on a fault to view an extended fault description

3 Scroll down the screen to view additional information.
4 (optional) You can use the Print button at the top of the display to send the information to a printer. If you are not connected to a printer, you can save the information to a file in the location of your choice.
If you are connected to Repair-Connect, additional tabs are displayed on the left side of the screen.
The additional tabs enable you to view detailed service and repair information available only with your subscription to Repair-Connect. For example:
• Diagnostics
• Diagrams
• Components
• Specs
• R & I (Remove & Install instructions)
NOTE:
i To view Repair-Connect service and repair information, you must first log in using your Repair-Connect credentials. See Logging in to Repair-Connect, in Chapter 4 of this guide.
5 Click on the Freeze Frame tab on the left side of the screen to view freeze frame information (if available).
6 Click on the Description tab to go back to the previous screen.
Clearing Faults
You use the Clear All Faults button at the top of the Faults screen to clear Inactive faults. Faults may not be cleared individually.
NOTE:
When you “clear all faults,” both Active and Inactive faults are cleared.
Then eTechnician™ LMT re-scans the vehicle and re-lists the Active faults found during the re-scan.
To clear faults:
1 Click the Clear All Faults button at the top of the screen.
2 All faults are cleared, the vehicle is re-scanned, and any faults that are still active are re-displayed.