This post show you guide on how to install evaporator for CLAAS Lexion 480 combine.
Related Contents:
CLAAS CDS 7.5 Diagnostic Software 2021 2020 Free Download
CLAAS USB Interface Diagnostic Adapter Package
Claas WebTIC Offline Repair & Service 2024 2015 Free Download
Procedures:
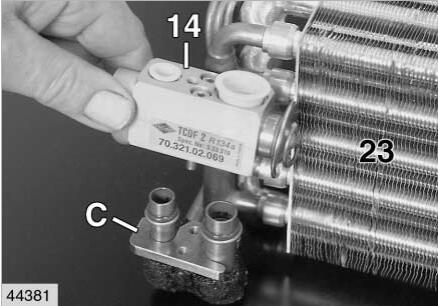
1 Insert evaporator (23) into the cab roof.
2 Push expansion valve (14) with new O-rings on the connections of evaporator (23) and bolt down
support plate (C).
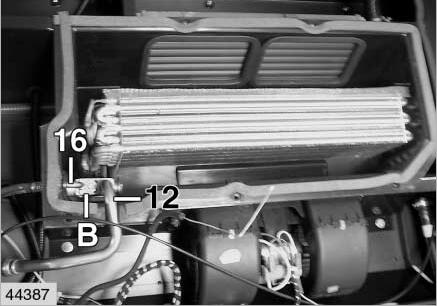
3 Push suction line (12) and discharge line (16) with new O-rings into the expansion valve (14) and bolt down support plate (B).
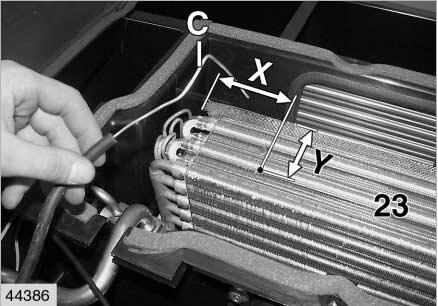
4 Guide capillary tube (C) of the temperature switch (9) through the cab covering, bend a 90°
angle approx. 80 mm from the end and carefully push it into the evaporator (23) at (X and Y).
(X) = 60 mm
(Y) = 30 mm
5 Glue on sealing plate (5).
6 Seal pipe leadthrough with sealing compound (B).

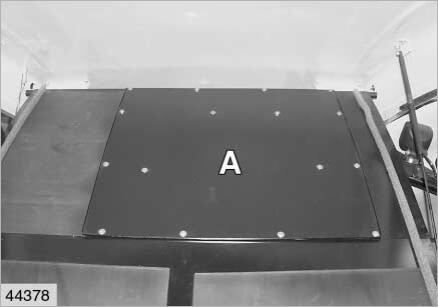
7 Screw down the cover (A) to the cab top.
8 Air conditioning system – Topping up refrigerant,
More repair case for CLAAS,please refer to CLAAS Trouble Repair