Here is the instruction show you guide on how to remove and install thermostat for CLAAS Lexion 480 machine.
Related Contents:
CLAAS CDS 7.5 Diagnostic Software 2021 2020 Free Download
CLAAS USB Interface Diagnostic Adapter Package
STEPS:
Removing the thermostat
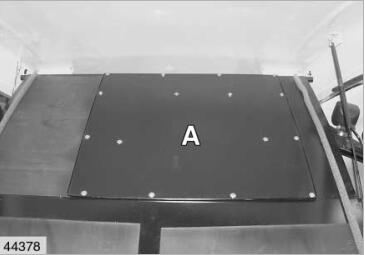
Fold up the cab roof.
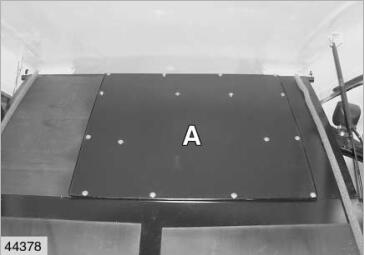
Unscrew the cover (A) from the cab top.
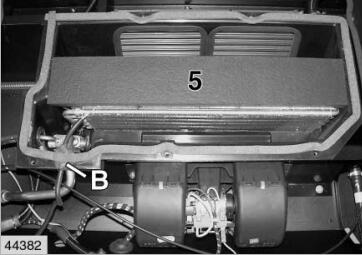
Carefully pull off the sealing plate (5).
Remove sealing compound (B).
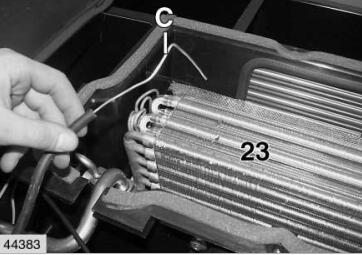
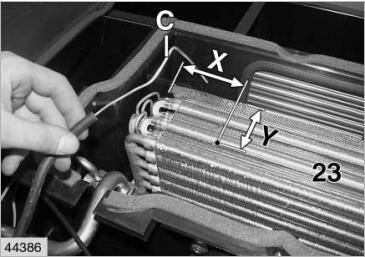
Carefully pull capillary tube (C) out of the evaporator (23).
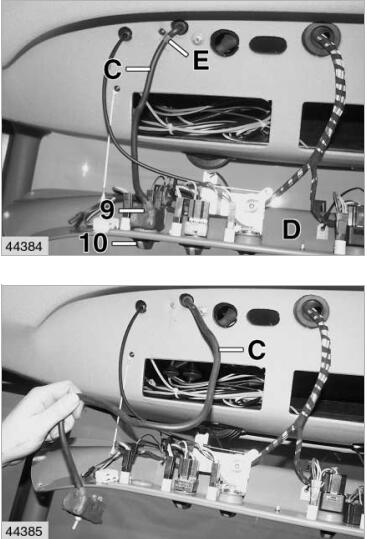
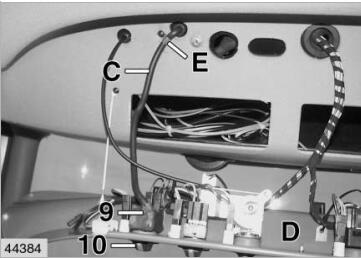
Remove the cover (D).
Disconnect cable plug from the temperature switch (9).
Loosen clamp (E).
Pull off rotary control (10), unscrew temperature switch (9) from cover (D) and carefully pull out capillary tube (C).
Installing the thermostat
1 Guide capillary tube (C) of the temperature switch (9) through the cab covering, bend a 90° angle approx. 80 mm from the end and carefully push it into the evaporator (23) at (X and Y).
(X) = 60 mm
(Y) = 30 mm
2 Fasten capillary tube (C) using clamp (E).
3 Screw down temperature switch (9) to cover (D) and fit rotary control (10).
4 Connect cable plug to temperature switch (9).
5 Isolate temperature switch (9) using sealing compound.
6 Install cover (D).
7 Seal pipe leadthrough with sealing compound (B).
8 Glue on sealing plate (5).

9 Screw down the cover (A) to the cab top.
More repair case for CLAAS,please refer to CLAAS Trouble Repair