This article show a guide on how to perform BMW Multi-Function steering wheel/Cruise control retrofit.The installation time is approx. 1 hour, but this may vary depending on the condition of the car and the equipment in it.
Note:Try it at your own risk,it need your are skillful.And for more BMM retrofit,check the collection here:BMW Retrofit Cases
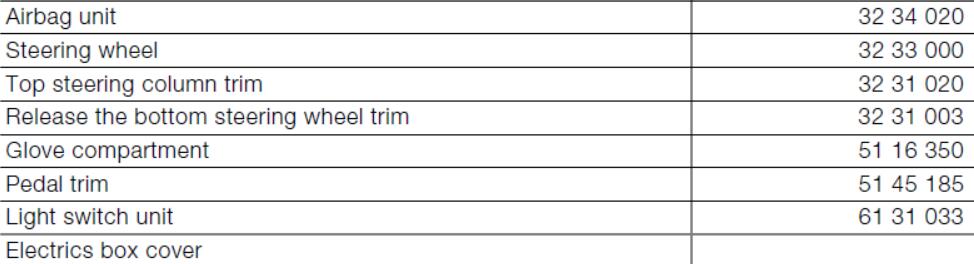
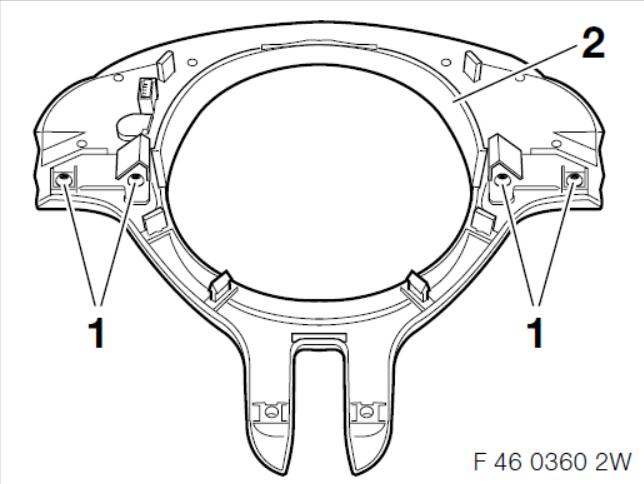
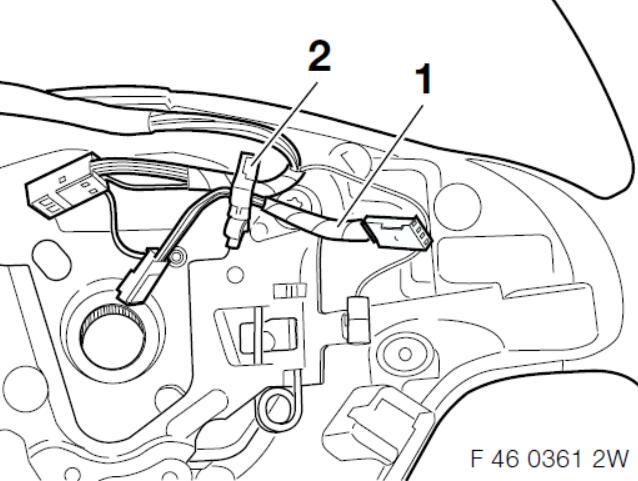
Before Starting You Need to Remove Below Units:
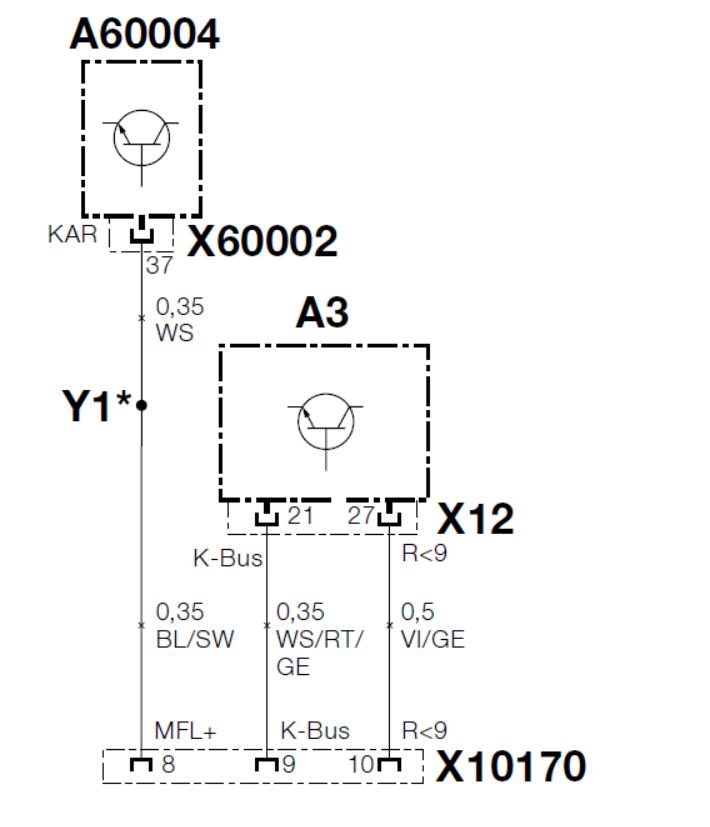
MFL/GRA wiring harness connection diagram
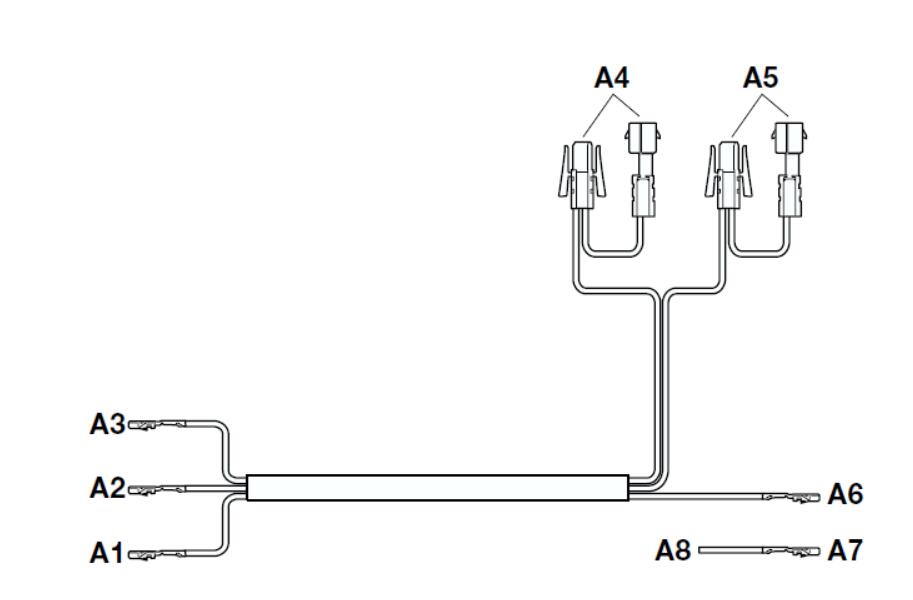
Installation and cabling diagram

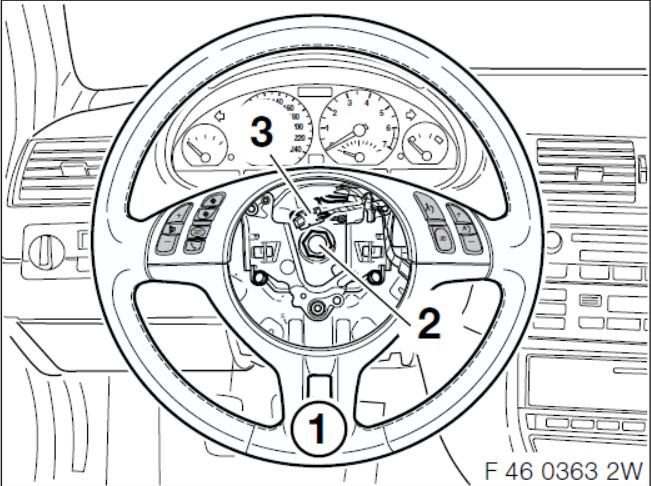
1. Steering column switch mounting
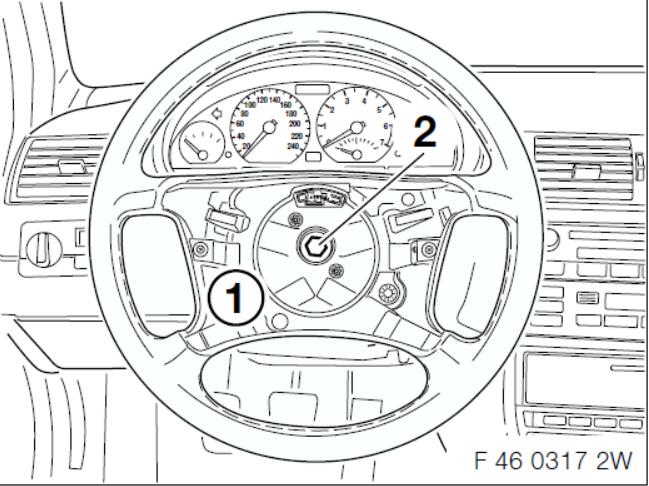
2. Multi-functional steering wheel
3. Light switch unit
4. Electrics box
To install and connect the MFL/GRA retrofit wiring harness
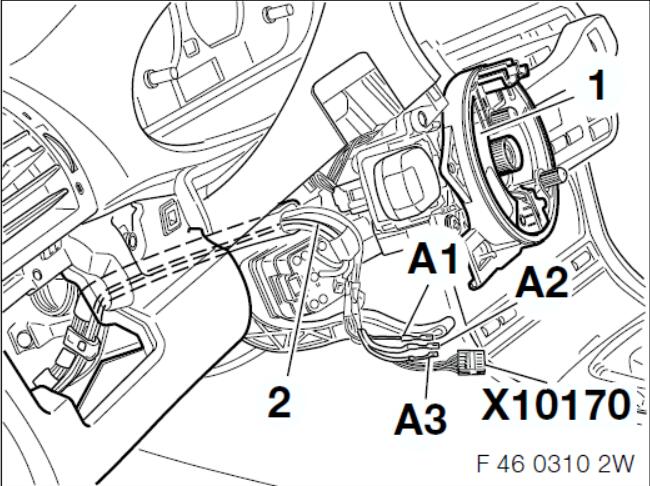
Disconnect and release the green, 10-pin plug X10170 from the switch mounting (1).
Lay the retrofit wiring harness (2) along the cable guide on the steering column to plug X10170.
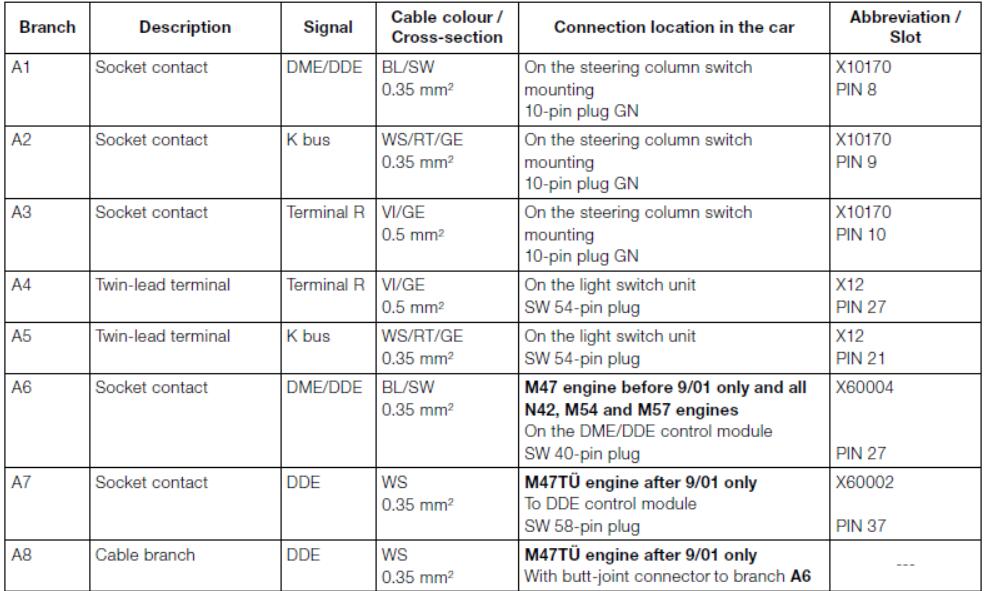
Connect branchesA1-A3 as follows to plug X10170:
Branch A1, BL/SW cable, in PIN 8
BranchA2, WS/RT/GE cable, in PIN 9
BranchA3, VI/GE cable, in PIN 10
Assemble plug X10170 again and reconnect it to the switch mounting (1).
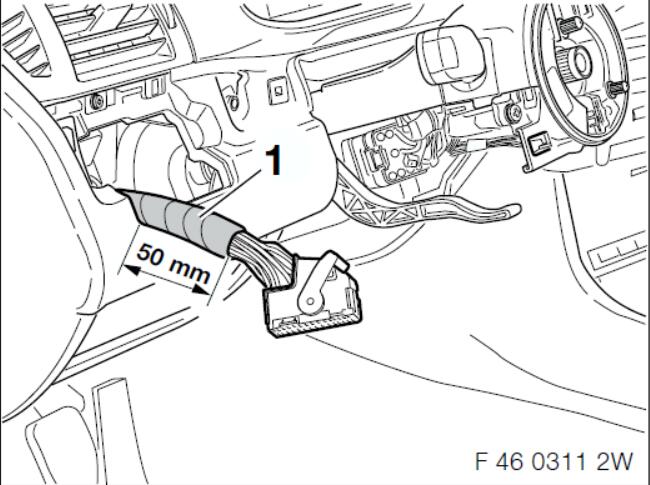
Remove the cable insulation (1) over a length of approx. 50 mm.
Cut the VI/GE (PIN 27) and WS/RT/GE (PIN 21) cables from plug X12 approx. 40 mm behind the Plug X12.
Fit the ends of the cables with a socket/pin contact and insulation casing (1).
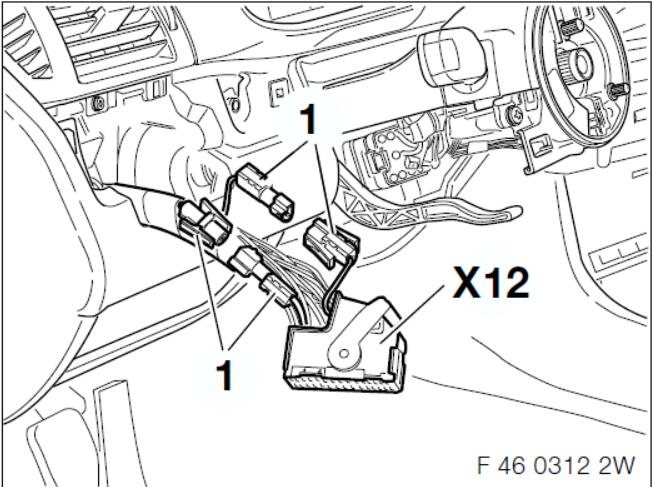
Lay branches A4-A5 to plug X12 and connect to the same colours on the new connections.
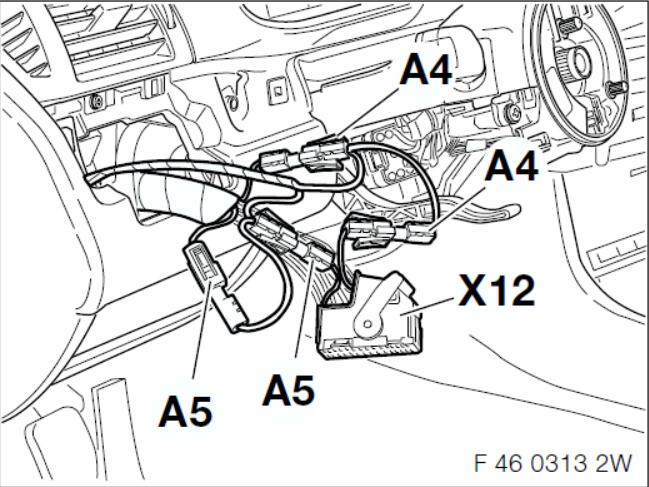
To install and connect the MFL/GRA retrofit wiring harness Secure the plug connectors to the wiring harness using cable ties (1).

On RHD cars the tied back cable on branch A6 must be released.
Branch A6 must be laid through the corrugated tube behind the heating/air conditioning unit to the left-hand side of the car and from there into then electrics box.
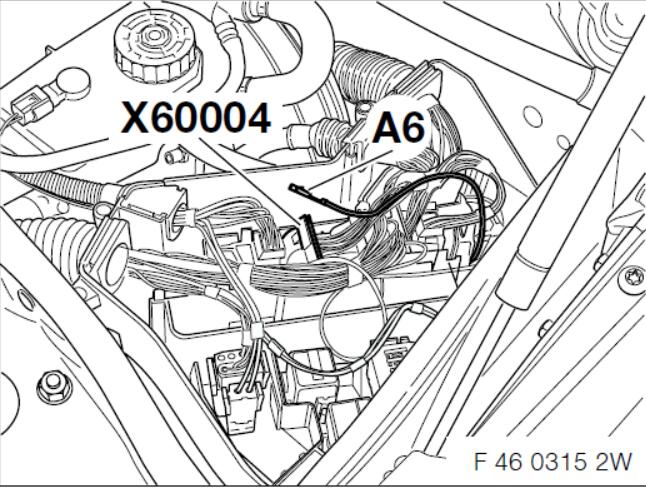
Lay branch A6 through the cable passage into the electrics box.
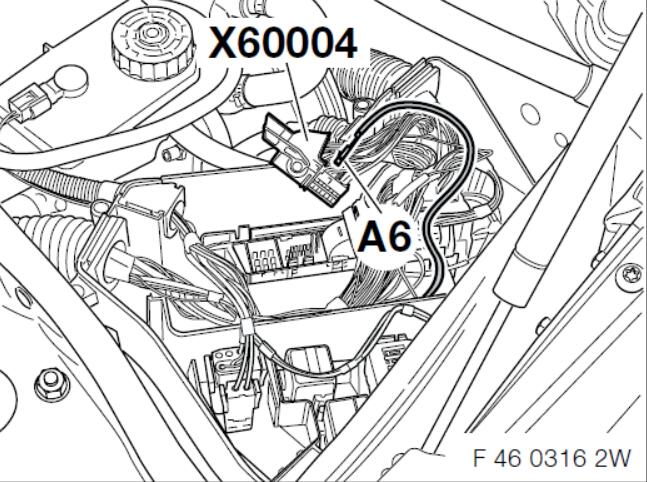
Cars with M47 engines before 9/01 only and all N42, M54 and M57 engines
Disconnect the black 40-pin plug X60004 from the DME/DDE control module and release them.
Connect branch A6 BL/SW cable, to PIN 27 in plug X60004.
Reconnect plug X60004 to the DME/DDE control module.
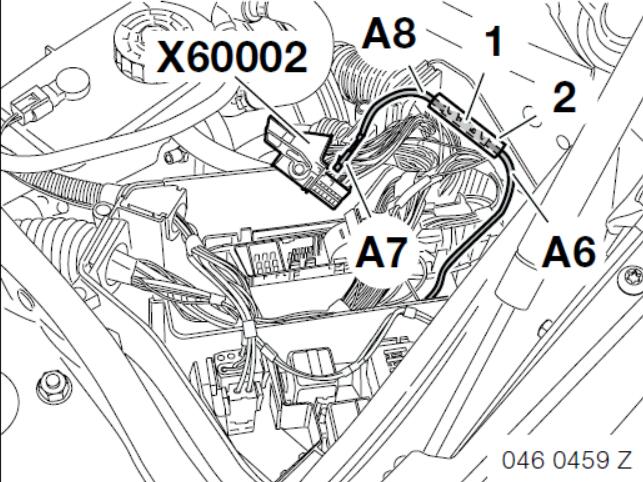
Cars with M47TÜ engine after 9/01 only Cut the socket contact off branch A6.
Connect branch A8 to the open cable end on branch A6 using a butt-joint connector (1) and shrink hose (2).Disconnect the black 58-pin plug X60002 from the DDE control module and release it.
Connect branch A7 to PIN 37 in plug X60002.
Reconnect plug X60002 to the DDE control module.
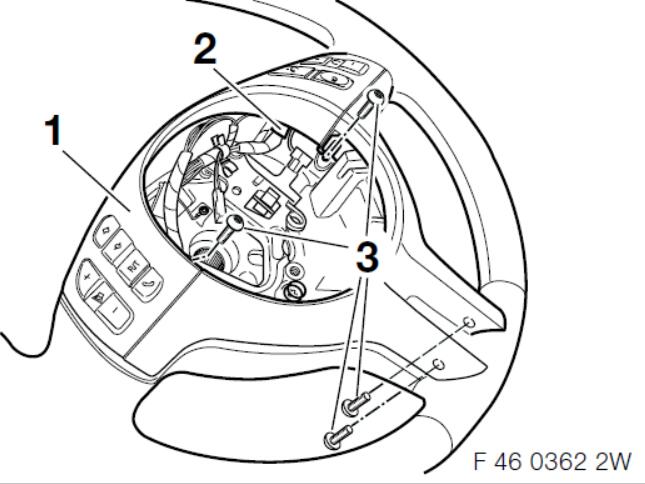
To modify a 3-spoke sport steering wheel
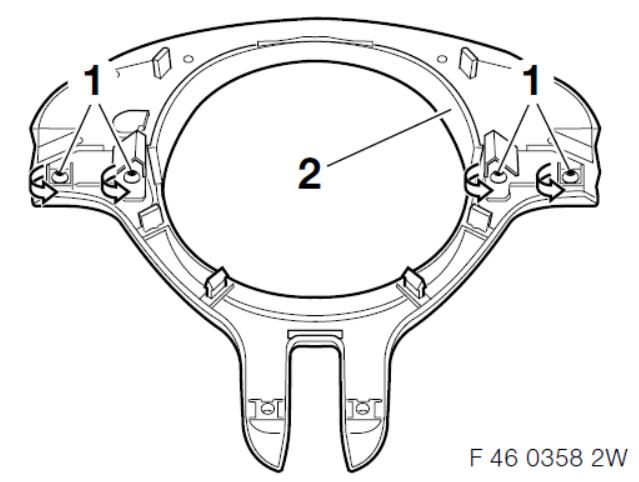
Unscrew the Torx bolts (1) and remove the cover cap (2)
Unscrew the Torx bolts (1) and remove the top section (2).
Insert the switch unit (1) and secure it with Torx bolts (2).
Place the connection cable (1) from the installation kit into the cable tie (2).
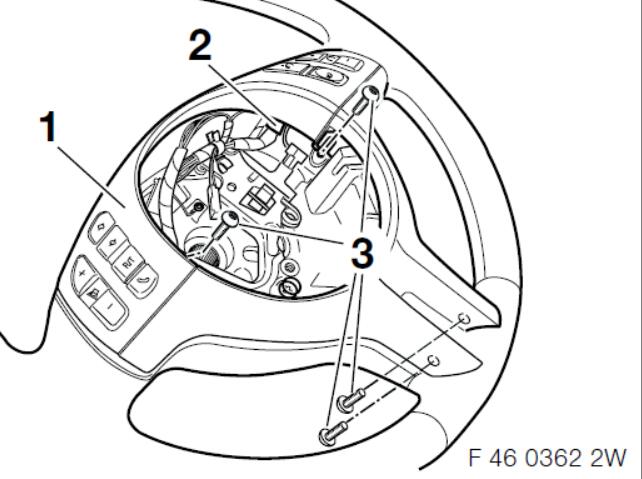
To modify a 3-spoke sport steering wheel
Place the cover cap (1) and switch unit on to the steering wheel.
Connect the connection cable (2) to the switch unit.
Secure the cover cap (1) to the steering wheel using Torx bolts (3).
To install a 3-spoke sport steering wheel
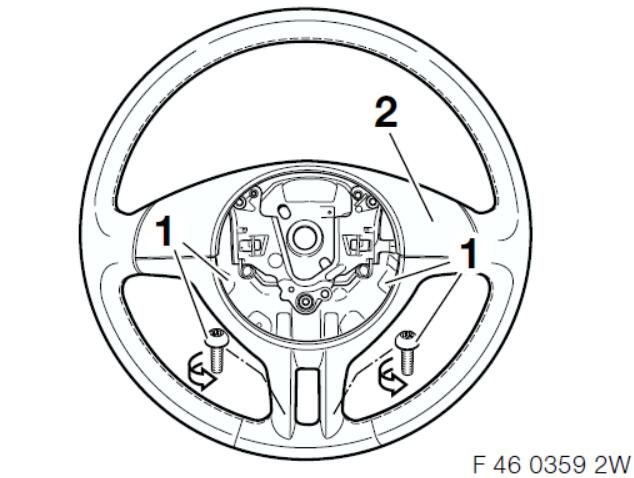
Fit the sports steering wheel (1) and tighten the screws (2) with a torque of 63 Nm.
Connect the plug (3) to the switch mounting.
Install the existing airbag unit (1).
To install a 4-spoke steering wheel
Fit the existing 4-spoke steering wheel (1) and tighten the screws (2) with a torque of 63 Nm.
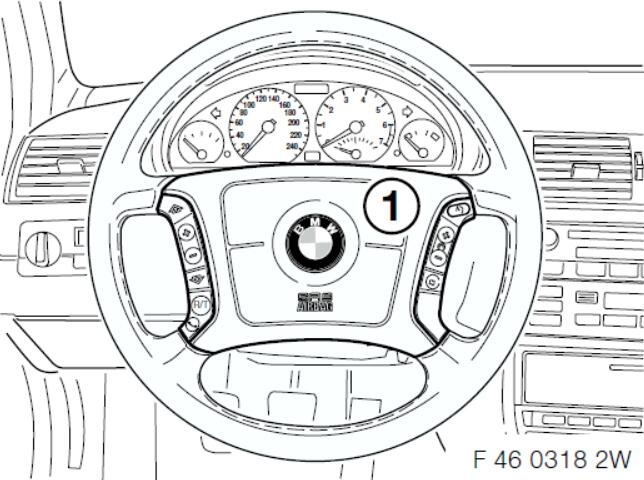
Install the airbag unit with the multi-functional steering wheel buttons (1).
Tighten the securing screws for the airbag unit with a torque of 8 Nm.
Concluding work
– This MFL/GRA retrofit kit does not require coding.
– Assemble the car following the instructions to dismantle it in reverse order.
– Conduct a brief test.
– Conduct a function test (the operating instructions for the MFL/GRA retrofit kit are set out in the car or radio owner’s manual).
Circuit diagram
Cars with M47 engines before 9/01 only and all N42, M54 and M57 engines

Legend
Cable colours
A3 Light switch centre control module
A60004 DME/DDE control module
X12 SW 54-pin plug on the light switch centre
X10170 10-pin plug GN on the steering column switch
X60004 SW 40-pin plug on the DME/DDE control module
Cable colours
RT red
SW black
BL blue
GE yellow
VI violet
WS white
Circuit diagram
Cars with M47TÜ engine after 9/01 only
Legend
A3 Light switch centre control module
A60004 DME/DDE control module
X12 SW 54-pin plug on the light switch centre
X10170 10-pin plug GN on the steering column switch
X60002 SW 58-pin plug on the DDE control module
Y1 Butt joint connector
Cable colours
RT red
SW black
BL blue
GE yellow
VI violet
WS white