Scania 4 series do not have a coordinator and uses VCI 1 to connect to the vehicle to run SD2/SP2. To read engine data in real time with for example Scanina XCOM you have to connect to CAN with VCI 2. To do that you need a “homemade” VCI-cable, see below, and a software-fix to connect to the engine control unit (ECU).
Related Contents:
2024.07 Scania SDP3 V2.61.2 V2.40 Diagnostic Software Free Download
2023 2018 Scania Multi EPC Parts Catalogue Free Download
It also works with DMecNet, CDev, Gadget and other SCOMM based programs.
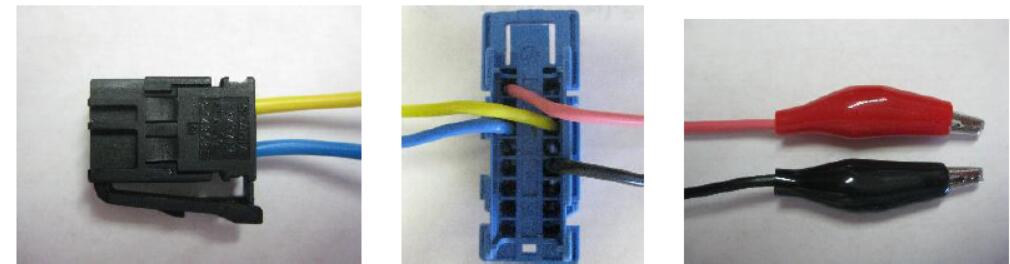
1.You need:
Standard CAN connector (Scania P/N 1349719)
4 cables (approx. 40cm)
2 alligator clip
Standard VCI connector

2.Connect the wires according to pictures
Pin 16 to red alligator clip
Pin 4 to black alligator clip
Pin 6 and 14 to CAN connector
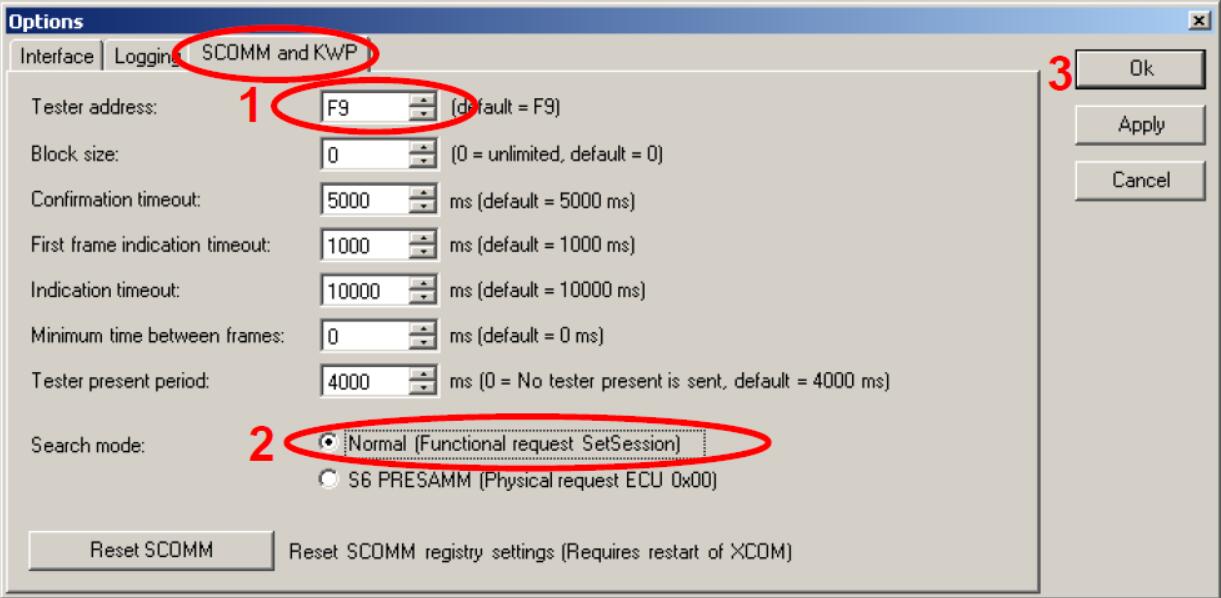
3.Set the tester address and search mode in XCOM These changes will make XCOM, SDP3, Gadget, CDev and DMecNet to only scan for EMS on the CAN bus. No other ECUs will be found!
Open Options in XCOM (Options menu -> Options)
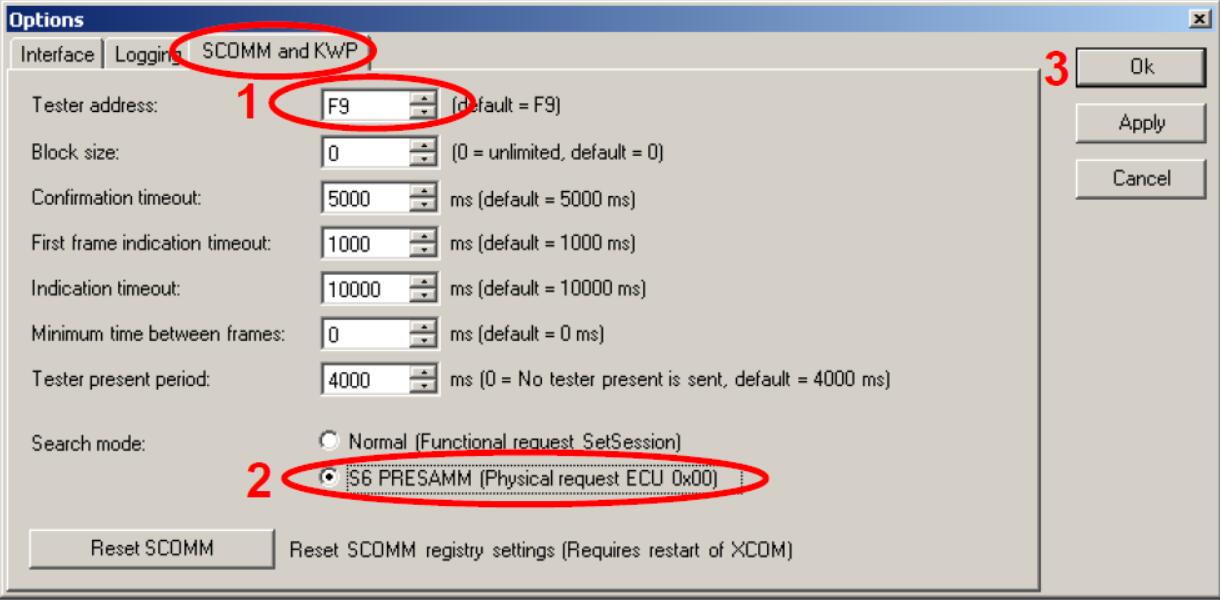
Set Tester address to “F9”
Change search mode to “S6 PRESAMM (Physical request ECU 0x00)”. Select OK on the warning.
Press OK to accept changes.
Restart XCOM
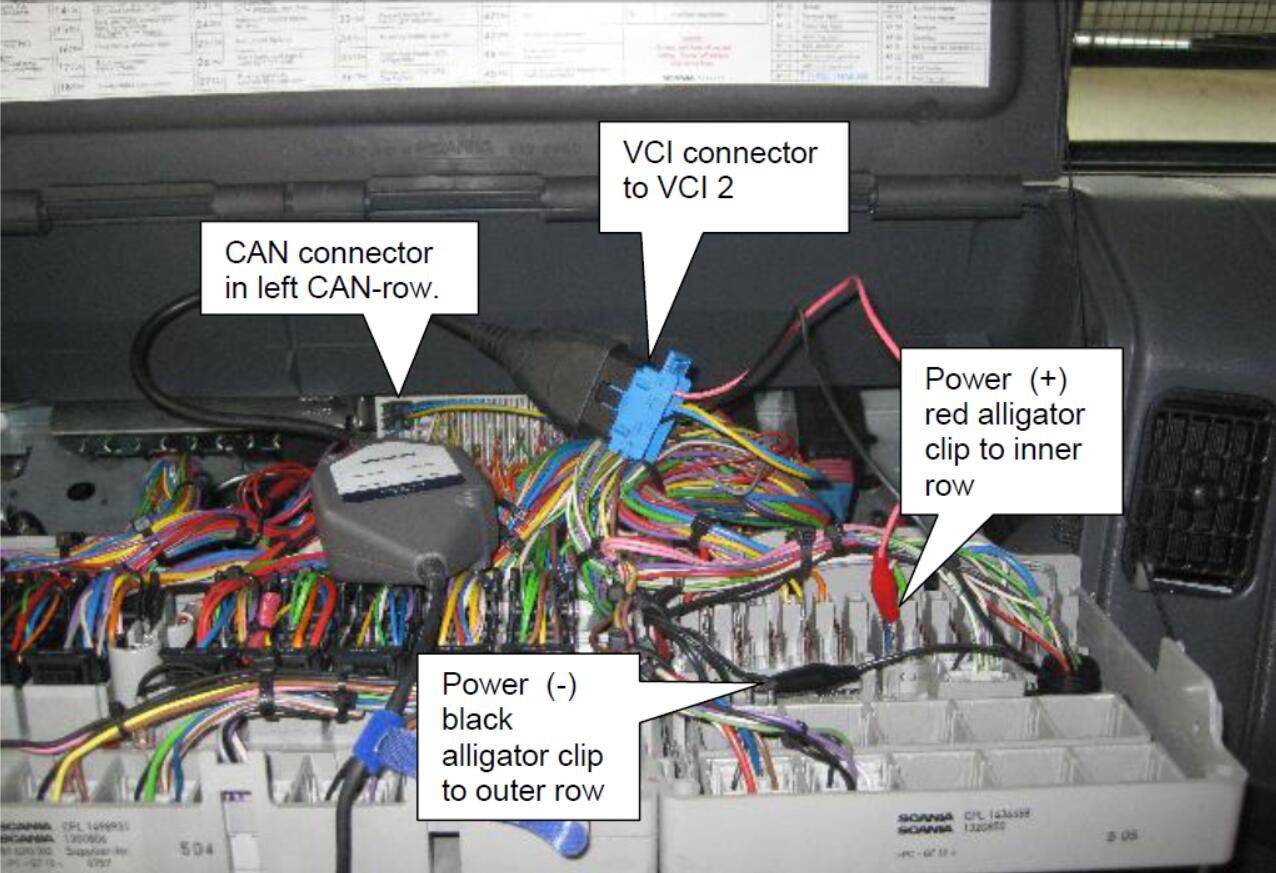
4.Connect the “Homemade” VCI cable to the vehicle under the fuse box. Connect VCI2 to the VCI connection.