This instruction show you guide on how to retrofit hight on-board computer for BMW 5 series E39 and BMW X5 E53 models.For more repair case of BMW,please check BMW Trouble Repair.
Related Contents:
2024.08 BMW Rheingold ISTA+ 4.48.40 4.23.14 ISTA-P 3.71 Free Download
Procedures:
1 Parts List
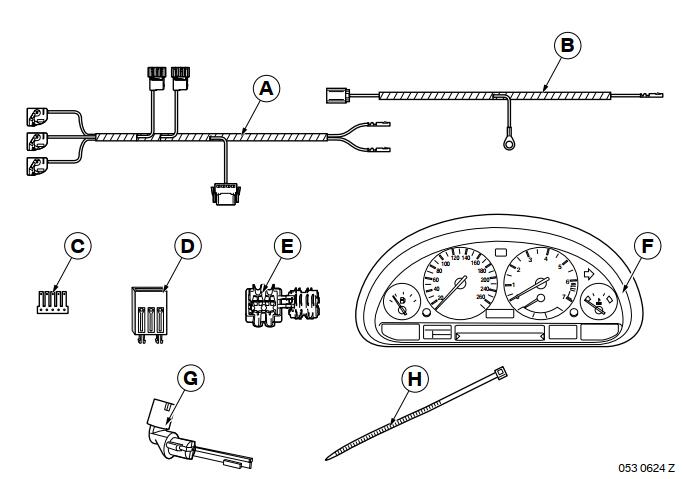
Legend
A Connection cable
B Connection cable
C Joint connector
D Casing
E Insulation-piercing connector
F Instrument cluster (not supplied with the retrofit kit)
G Coolant level switch (not supplied with the retrofit kit)
H Cable tie (20x)
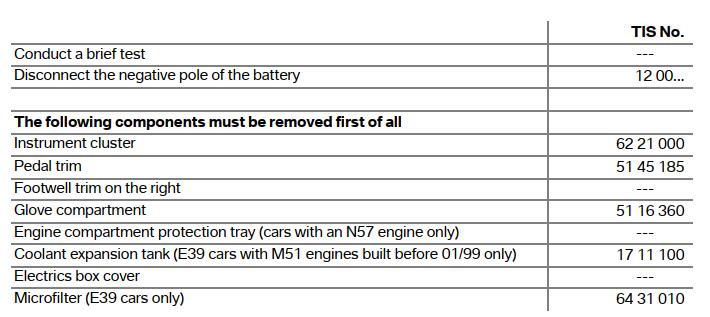
2 Preparations
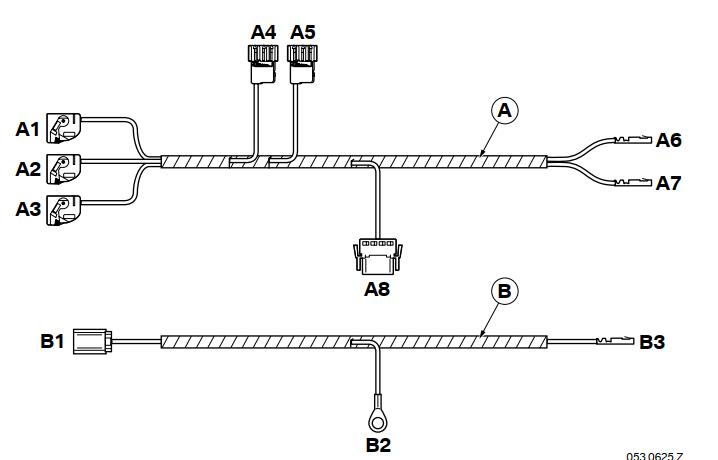
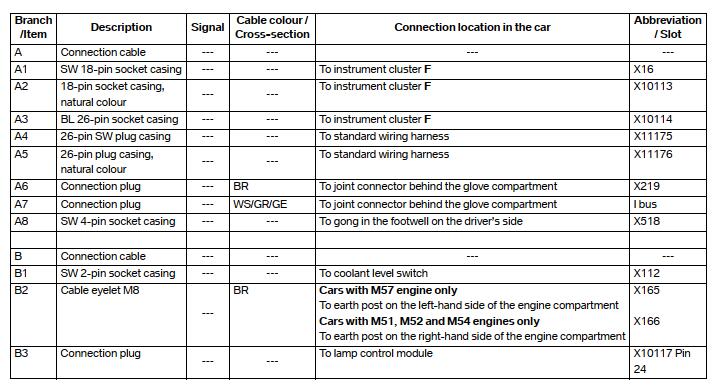
3 Connection diagram
4 Installation and cabling diagram for M51, M52 and M54 engines
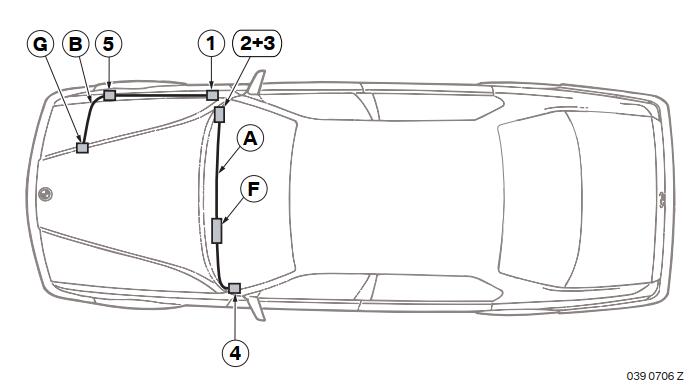
Legend
A Connection cable
B Connection cable
F Instrument cluster
G Coolant level switch
1 Lamp control module
2 Joint connector X939
3 Joint connector X219
4 Gong
5 Earth post connection X166
5 Installation and cabling diagram for M57 engine
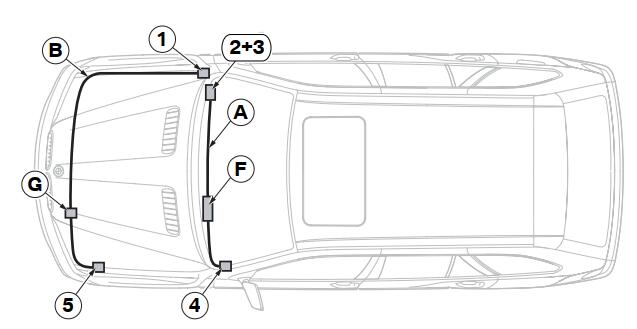
Legend
A Connection cable
B Connection cable
F Instrument cluster
G Coolant level switch
1 Lamp control module
2 Joint connector X939
3 Joint connector X219
4 Gong
5 Earth post X165
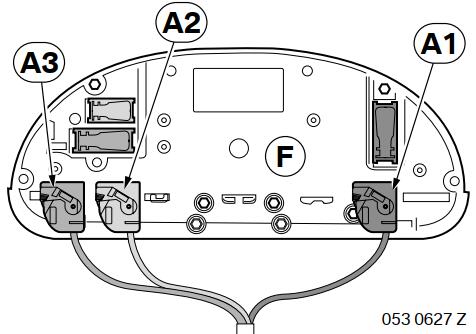
6 To install and connect the connection cable
Connect branches A1-A3 to the cables of the same colours on the instrument cluster F.
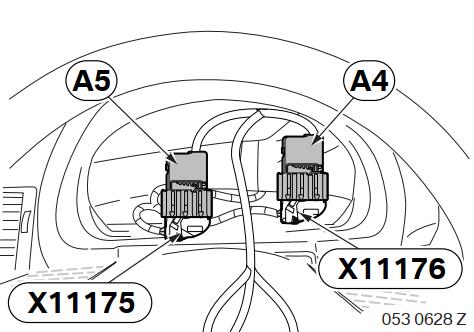
Connect branches A4 and A5 to the same coloured socket casings X11175 and X11176 on the standard wiring harness.
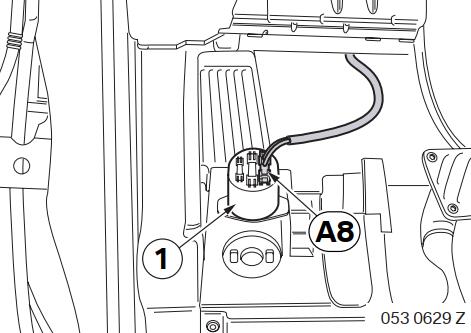
Route branch A8 into the driver’s footwell.
Connect branch A8 to the gong (1).
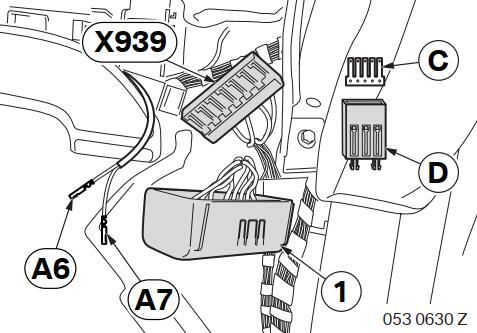
E53 only
Route branches A6 and A7 to the joint connector box (1).
Release joint connector X939 (WS/RT/GE and WS/GR/GE cables) from the joint connector box (1).
Disconnect all the WS/GR/GE cables from joint connector X939 and connect them with branch
A7 to joint connector C.
Connect joint connector C to the casing D and then to the joint connector box (1).
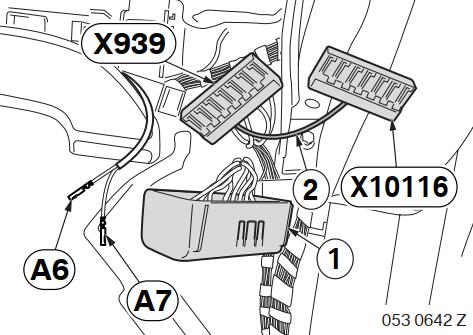
E39 cars only
Route branches A6 and A7 to the joint connector box (1).
Release joint connector X939, WS/GR/GE cable and joint connector and X10116, WS/RT/GE cable from the joint connector box (1).
Disconnect the connection cable (2) between joint connector X939 and joint connector X10116 (no longer required).
Connect branch A7 to joint connector X939,WS/GR/GE cable.
Connect joint connector X939 to the joint connector box (1).
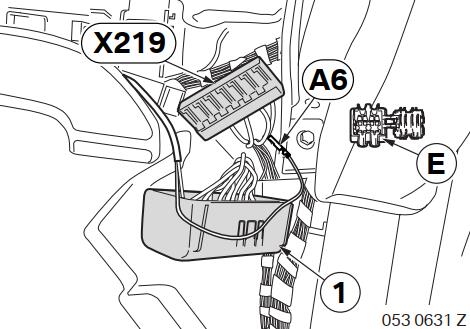
All cars
Release joint connector X219 from the joint connector box (1).
Connect branch A6 to joint connector X219.
If joint connector X219 is fully occupied,connect branch A6 using insulationpiercing connectors E.
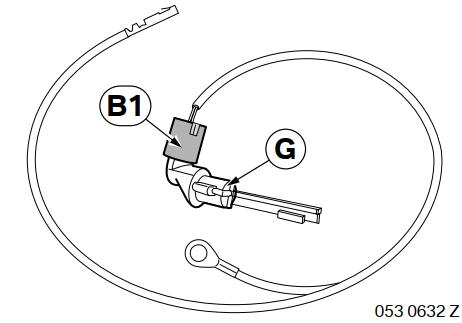
7 To install and connect the coolant level switch
The expansion tank must be replaced on cars with M51 engines built before 01/99.
Connect branch B1 to the coolant level sensor G.
Install the coolant level sensor G on the expansion tank.
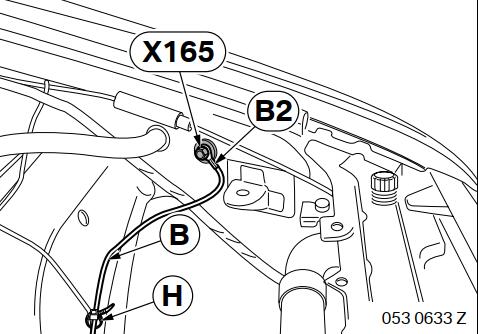
Cars with M57 engine only
Route branch B2 to earth post X165 in the engine compartment and secure it there.
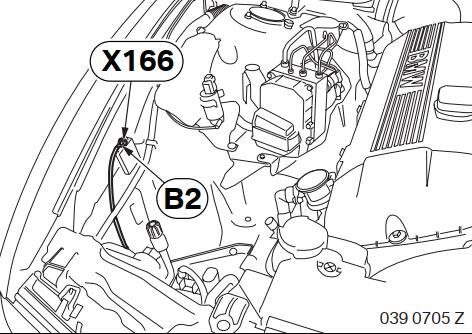
Cars with M51, M52 and M54 engines only
Route branch B2 to earth post X166 in the engine compartment and secure it there.
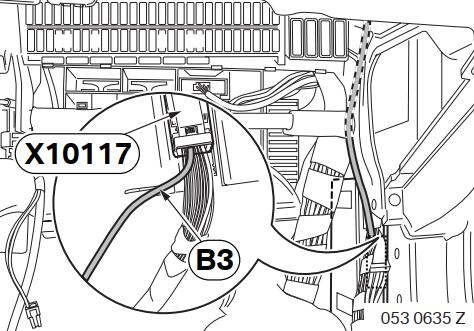
Route branch B3 through the grommets (1) and (2) into the interior.
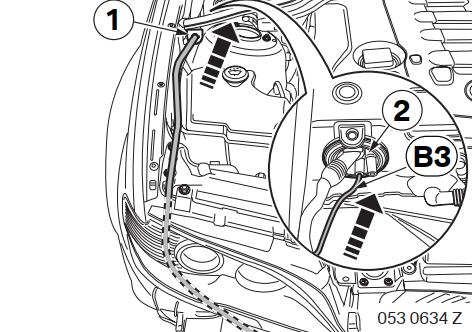
Route branch B3 to the lamp control module and connect is to the 54-pin SW plug X10117, Pin 24.
8 Concluding work
This retrofit system requires coding.
– Connect the battery
– Code the retrofit using DISPlus or GT-1 via path Retrofit
– Conduct a brief test
– Conduct a function test
– Re-assemble the car