My car is a 2015 M235xi with the harmon kardon audio package. One thing I’ve hated from the first test drive is the fake engine sounds piped into the cabin from the ASD system. I thought about coding it out, but didn’t feel like investing the cost and learning curve into the software and a cable. TechnicPnP offers an almost-plug-and-play solution to the problem. For $65 delivered off the website, I figured it was worth a chance. Ordered it the week before last, and it showed up on the Monday after Thanksgiving. With a beautiful December day this morning, I took the opportunity to install it.
EDIT:There’s another thread in the forum (http://www.2addicts.com/forums/showthread.php?t=1181343) that seems to be indicating that the ASD unit adds a noticeable hiss to the sound system. I did notice the hiss in my car before installing the harness, and I no longer notice it. I won’t swear the harness was the reason the hiss is gone, just that I noticed it often before I put the harness and amp into my car, and no longer can find a sign of it. It appears that if ASD is the source of the hiss, coding it out will not solve the problem, as that leaves the module active.
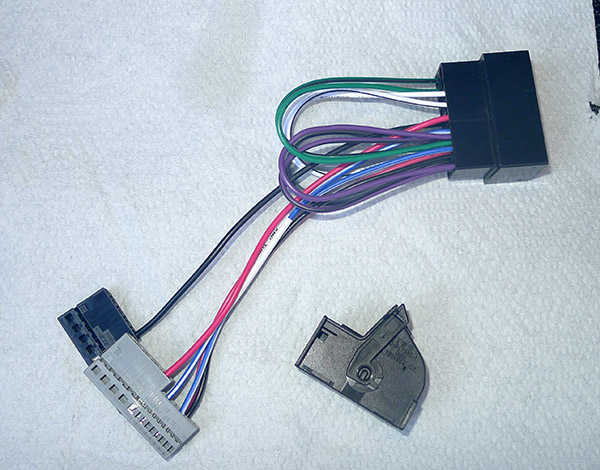
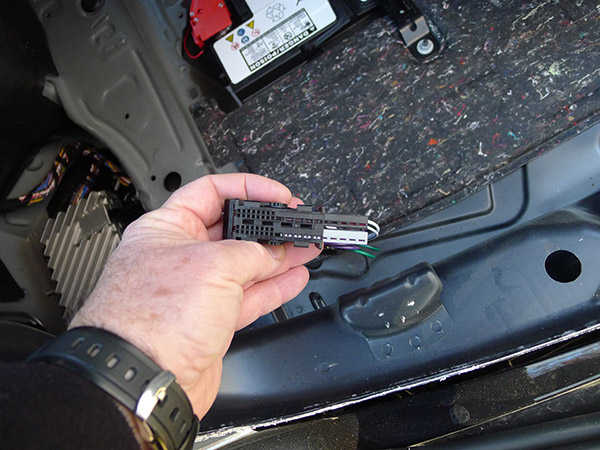
The cable comes almost ready to install, but it is necessary to swap the locking connector on the cable with the one in the car. It’s a trivial piece of work, and I assume it’s because the BMW OEM style lock is not available.
The cable comes with the connecting pads slid into the lock connector but not clipped in.
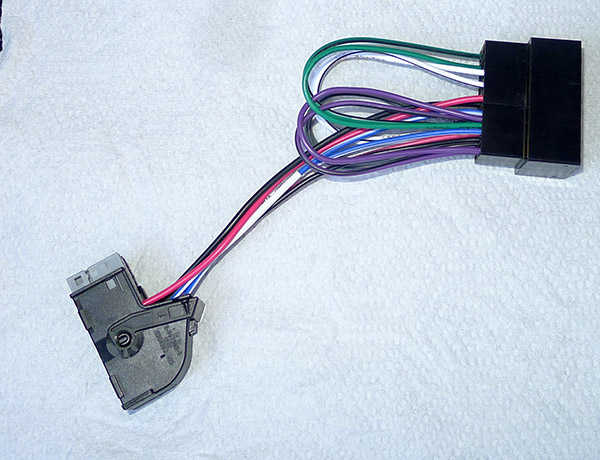
The electrical connectors are easily slid out. This frees up the lock to be used on the car’s harness, with the car’s lock being slipped onto the two connectors to tie it down to the ASD module in the trunk.
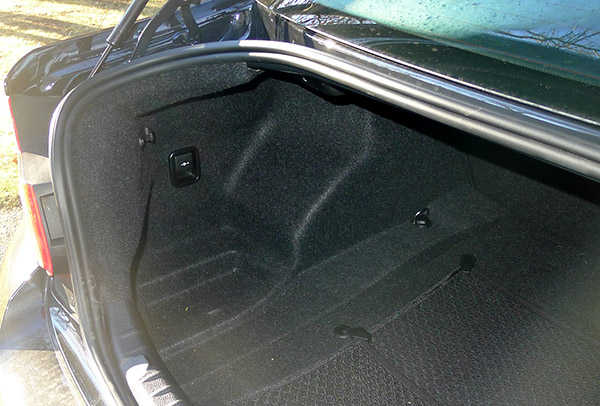
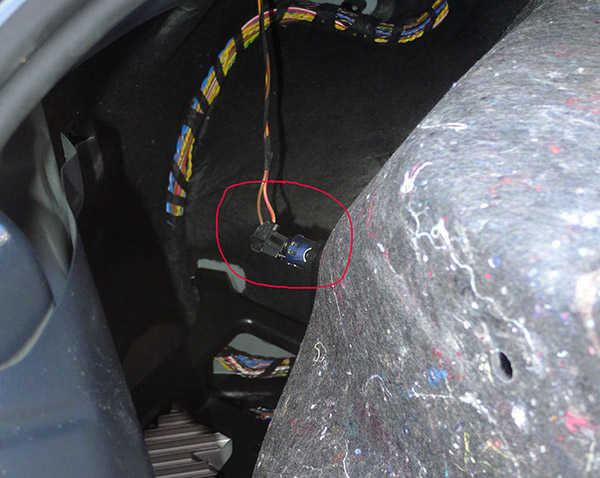
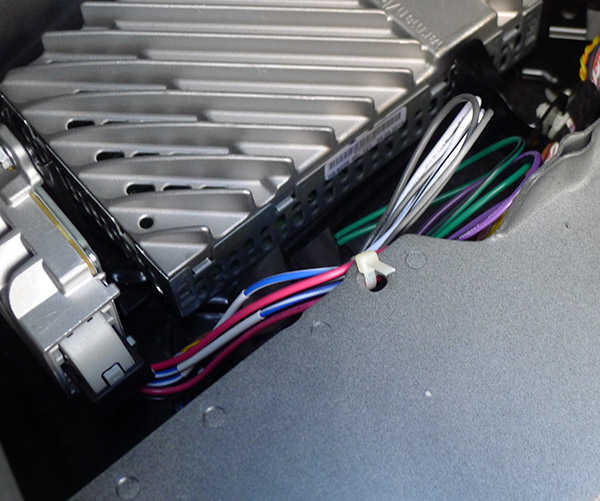
The amplifier and ASD are in the left side of the trunk, behind the liner.
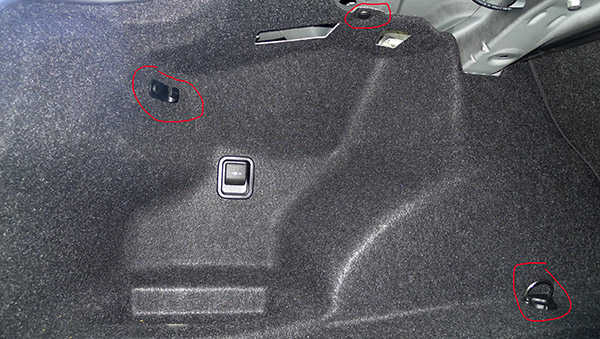
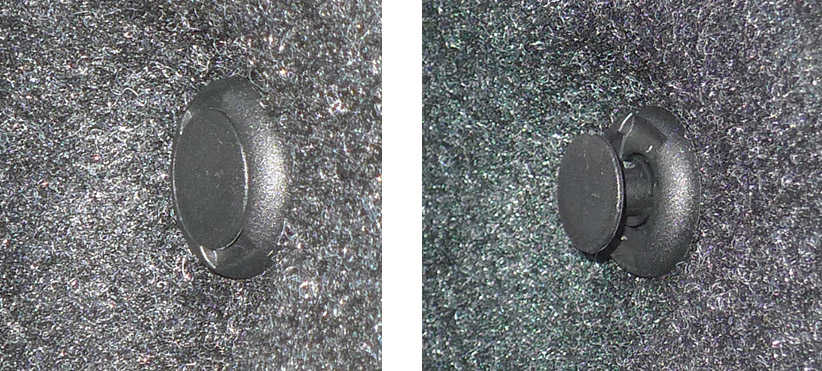
There are connectors in the trunk holding the inner liner to the body, one on a hook, one a straight pin connector, and one under the floor tiedown.
Biggest nuisance is removing the floor loop. The plastic cover is easily popped off, revealing a large Torx bolt underneath. Naturally, this is in an odd size that doesn’t match any of my Torx keys. Fortunately, it is easily grabbed with a small ViceGrip, and once it’s loosened a 1/4 turn, can be easily removed by hand.

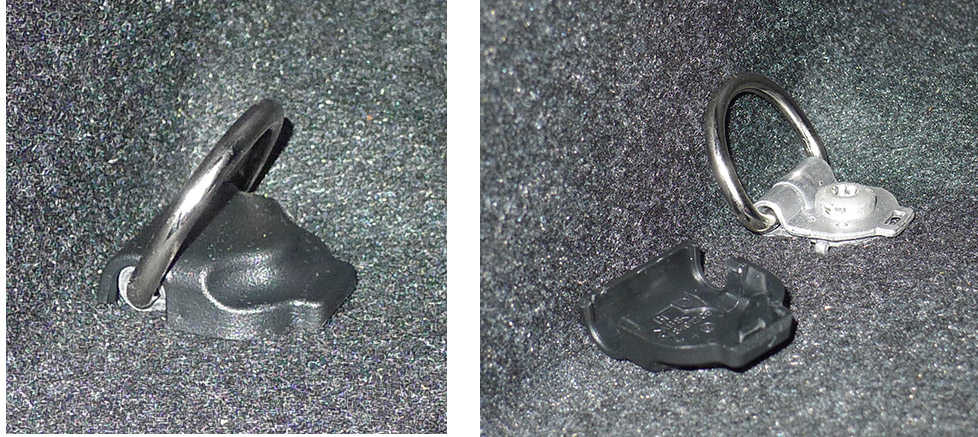
The pin and hook connectors are easily removed by pulling the center section out and then removing the entire connector from the liner. Take care to not break the tabs and the connector can be reused at assembly.

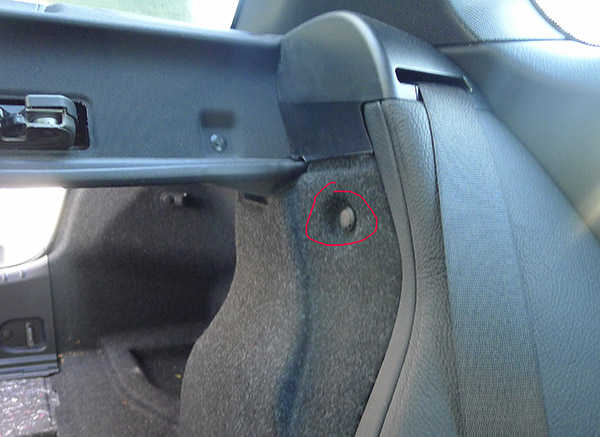
One more pin connector remains, hidden behind the folding seat. Drop the driver’s side rear seat to expose the connector, and remove it in the same manner as the others.
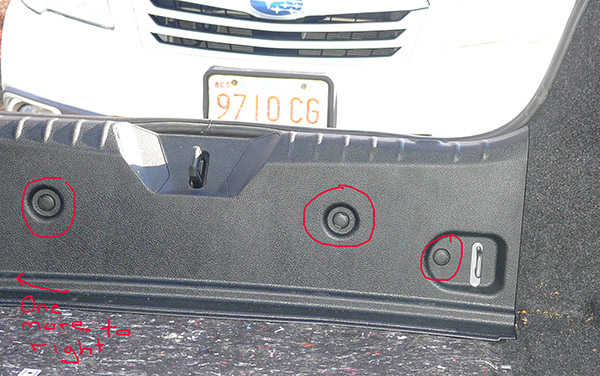
The back edge of the trunk at the latch now needs to be removed. Remove the four pin connectors from the cover plate, pull the trunk edge seal free, and remove the back plate.
Once the trunk edge plate has been removed and the trunk lip seal has been removed just past the edge of the trunk liner, the trunk liner can be moved away from the body of the car. Move it about 6″ away from the body, reach behind, and unplug the back connector on the trunk power socket. Then move the liner out of the way.
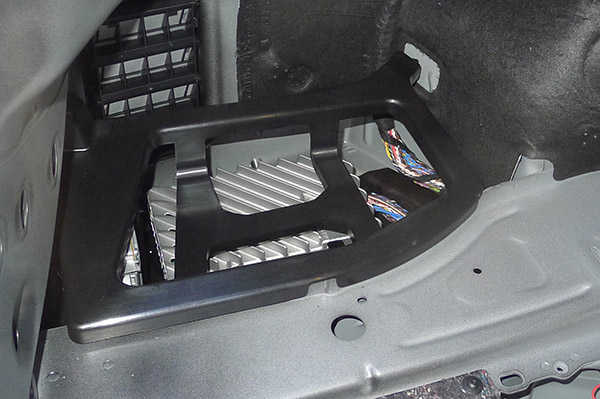
The amplifier and ASD module are under the plastic liner support. Lift the liner support out of the way, allowing access to the module.
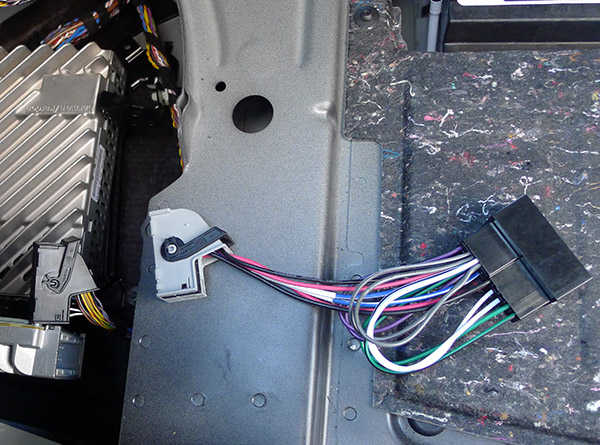
The ASD module stands vertically at the rear of the car. Press in the small grey tab and slide the black locking lever towards the top of the ASD unit, freeing up the ASD signal cable.
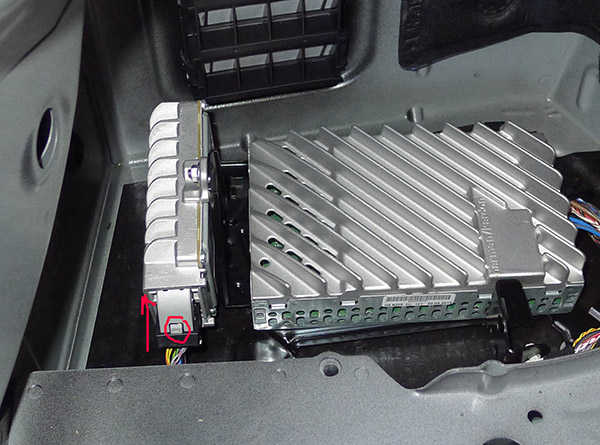
Using a small pick or awl, release the locking pins on each side of the ASD signal harness and slide the electrical connectors out of the locking connector.

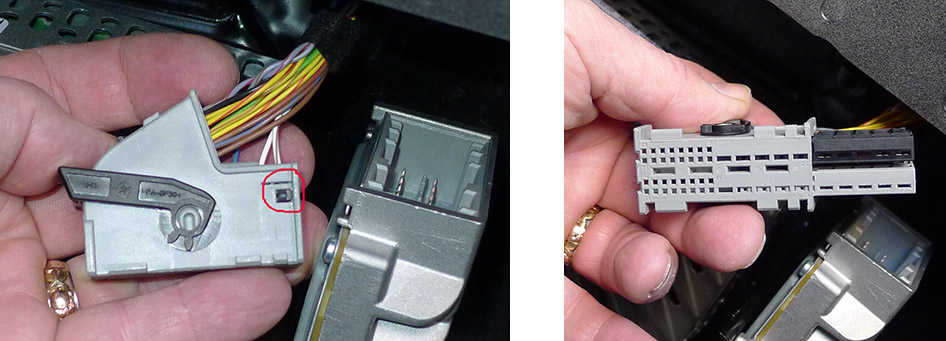
Take the black connector that was removed from the purchased cable back in picture 2. Slide the electrical connectors on the harness in the car into the black locking connectors. Push them all the way into the lock until they click into place.
Now take the grey locking connector you removed from the harness in the car and slide the electrical connectors on the Technic cable into the lock connector as done in the previous step. Press the connectors into place until they click. The black lock will now be on the harness in the car, and the grey lock will be on the cable that you purchased.
Plug the black lock connector on the car harness into the black socket on the Technic cable. Swing the black locking lever upwards until it clicks over the locking tab.
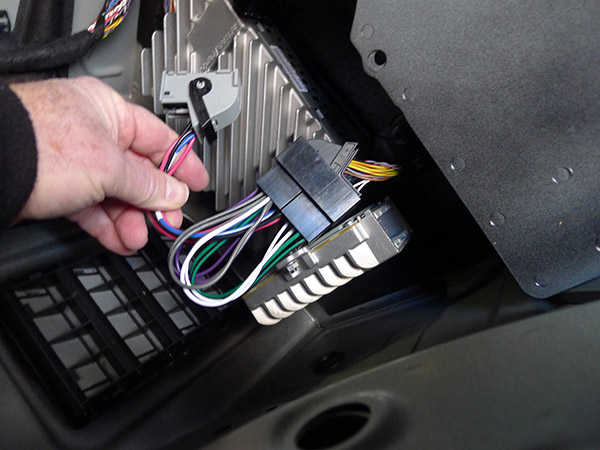
Plug the grey lock connector on the Technic harness into the socket on the ASD module in the car. Swing the black locking lever downwards until it clicks over the locking tab.
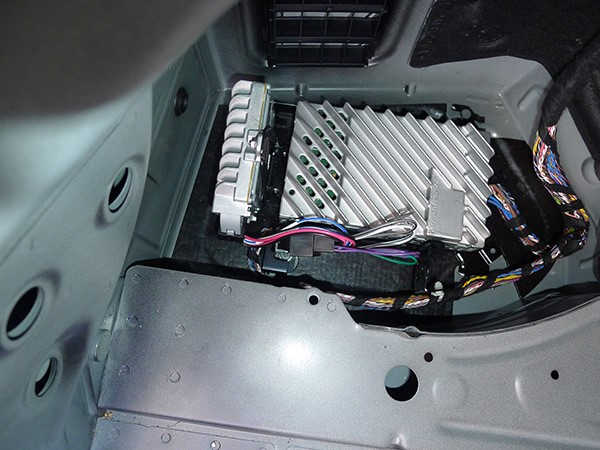
Use a small zip tie to secure the harness to the frame of the car so that it doesn’t shake back and forth to create a rattle behind the lining of your trunk.
That’s it. Test the radio to make sure it works. If there’s no sound, one of the connectors is not fully seated into its socket. Go back and reseat both.
Reassemble the trunk liner in the reverse order that you took it apart.
1.Place the support tray over the electronics.
2.Plug the power connector onto the back of the trunk power socket.
3.Slide the trunk liner back onto place.
4.Replace the 3 pin connectors and one screw connector that hold the liner in place.
5.Replace the trunk back panel cover at the back edge of the trunk over the trunk liner.
6.Replace the 4 pin connectors holding the trunk back panel.
7.Reseat the trunk lip edge seal onto the metal rim of the body and over the edges of the trunk liner and trunk back panel. This is an enormous pain in the neck to get into place properly. Work slowly and from the outer edges towards the center. Be prepared to swear mildly from time to time.
Total time was around an hour. Would have been much less if I didn’t keep stopping to take pictures.
The results are really nice. The background drone is gone on the highway, and flipping to sport mode doesn’t increase the level of noise in the cabin. Well worth the $65 and the time to put it in.
Couple of things to note on the exhaust sound. There’s absolutely NO change in exhaust volume flipping between SPORT and COMFORT when you do this on a car with the stock exhaust. You can argue that the deceleration burble is more pronounced, but I don’t think it is. Rather, because the engine is decelerating faster due to the more exponential throttle response, the frequency is higher, which makes it a bit more noticeable.
Article from:https://www.2addicts.com/forums/showthread.php?t=1202389