This instruction show you guide on how to remove and install equipment carrier for MTU 4000 series 12-14v diesel engine.
Related Contents:
2022 MTU DiaSys 2.74 2.72 Engine Diagnostic Software Free Download
MTU Diagnostic Tool USB-to-CAN with MTU Diasys 2.73
Procedures:
Removing equipment carrier
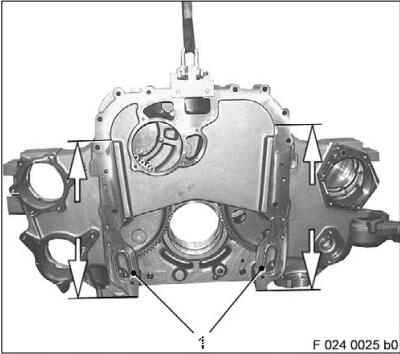
Screw two eyebolts (arrows) into equipment carrier.
Attach equipment carrier to crane with ropes and tension ropes equally.
Remove plugs (1) and (2).
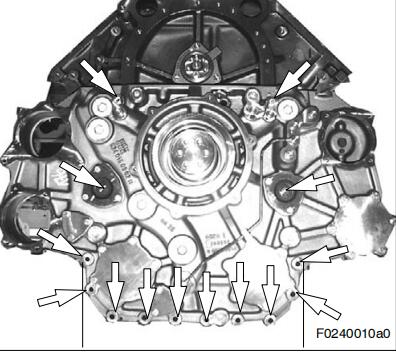
Remove hex screws through idler gear bores.
If the screws are inaccessible, rotate crankshaft accordingly.
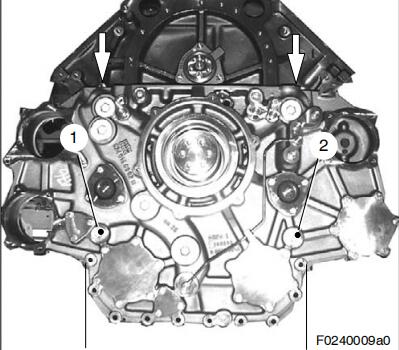
Mark all screws on equipment carrier circumference (arrows) (differing lengths) and remove.MTU Engine USB to CAN diagnostic adapter
WARNING
Suspended load.
Risk of injury!
Only use lifting device provided by manufacturer and observe lifting instructions.
Never stand beneath a suspended load.
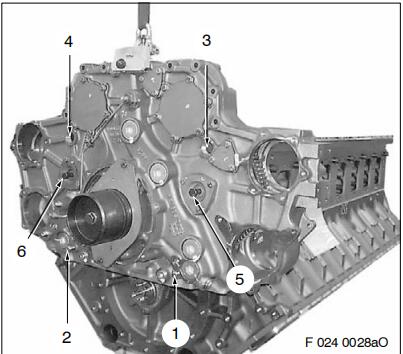
Release nuts (1), left and right sides of crankcase and remove with washers.
Carefully push equipment carrier (2), with the ropes pretensioned, in direction of free end until it is freed from crankcase.
Remove O-rings.

MTU DiaSys 2.73 Diagnostic Software Installation Service
Install equipment carrier
Note: Ensure that components and tools are particularly clean.
Install intermediate gears and axles.
Install delivery valve and pressure reduction valve.
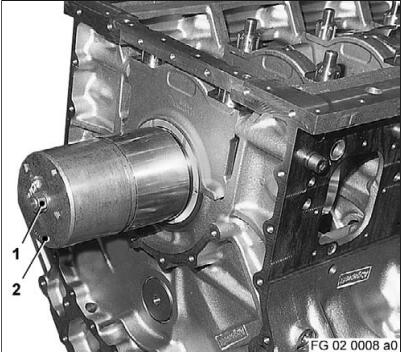
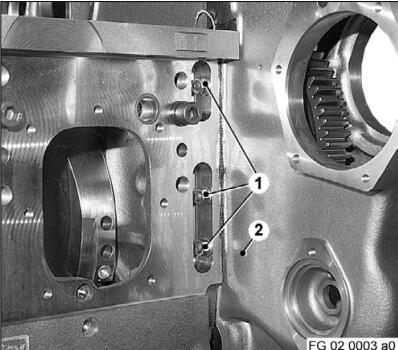
Coat alignment jig (2) and guide bush with engine oil and install with hex screws (1) on equipment carrier.
Note: Pay attention to “TOP/OBEN” marking, which must always face up, independently of the
crankcase position.
Remove guide bush after installing alignment jig
First install flange (see page 2) and then guide bush (2) with hex screw (1) on crankshaft stump.
Degrease mating face between arrows with Loctite 7063 cleaner and dry clean.
Using a spatula/roller, coat sealing surface of equipment carrier with surface sealant Loctite 518.
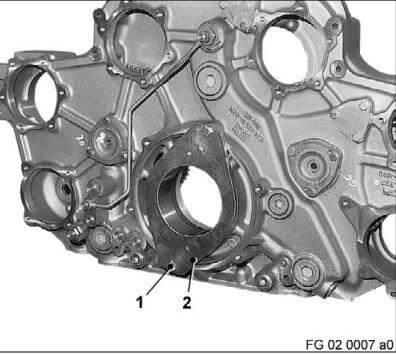
Insert O-rings (1) in groove on equipment carrier
Using lifting gear and rope, attach equipment carrier to crane.
Carefully move equipment carrier over crankshaft guide bush.
Check fit of studs and gear meshing in crankshaft gear.
Note: Make sure components are reinstalled in accordance with markings, and note that screws differ in length.
If necessary, rotate idler gears to be able to screw in screws behind the gears.
Attention: Relieve load on crane before tightening the screws.
Tighten screws in sequence 1 – 6 until final torque is reached.
Fit and tighten nuts (1) and washers for equipment carrier (2), left and right sides, remaining securing screws and plugs with new sealing rings.
Remove alignment jig, taking care not to affect the ease of movement.
Remove guide bush, flange, attachment ropes and eyebolts.
Attention: Final strength of surface sealant, after 72 h!
More repair case for MTU engine,please refer to:MTU Engine Trouble Repair