PCM is short call of power-train control module,is an automotive component, a control unit, used on motor vehicles.It is generally a combined control unit, consisting of the engine control unit (ECU) and the transmission control unit (TCU).
In some situations,you ever blanked your power-train control (PCM) incautiously or calibration update went wrong.So you need to recovery PCM,and this article talk about this topic.
Note:You need a part number of your PCM. Please mind if you type PCM from completely different model and there is calibration available it will still flash your PCM.
By giving any part number you getting into special mode and you will have an access to every modification possible for given PCM part number. Many thanks is given to a Ford expert Mr. nicwaze who provide the great tutorial.
What you need to perform Ford OCR?
- A laptop
- Ford IDS Software.(Ford IDS v106 Software Free Download)
Read:(Ford IDS Software Installation Guide (Original & Crack))
- A hardware to run Ford IDS,such as:VCM II,VXDAIG Ford…
Procedures of How to recovery Ford PCM:
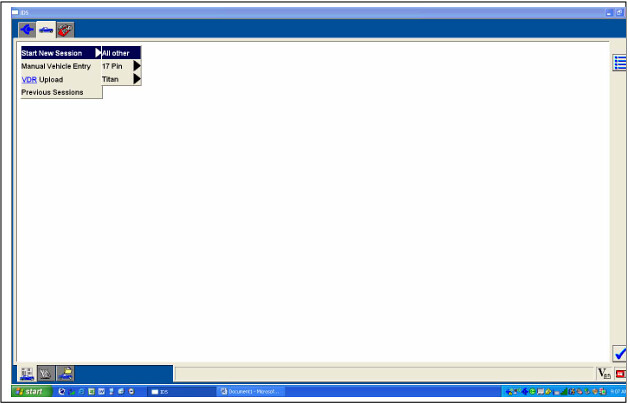
Select “Start New Session” “All Others” Press “Tick”. NOTE: Leave ignition switch in the
“OFF” Position.
Press tick

Progress Bar will go across and sit idle for approx. 2 min.

Select “NO”
Screen shows “set ignition switch to off position”, it is already off. Press tick.
Screen shows “set ignition switch to on position”, do not turn on just press tick.

Screen shows “set ignition switch to off position”, press tick.
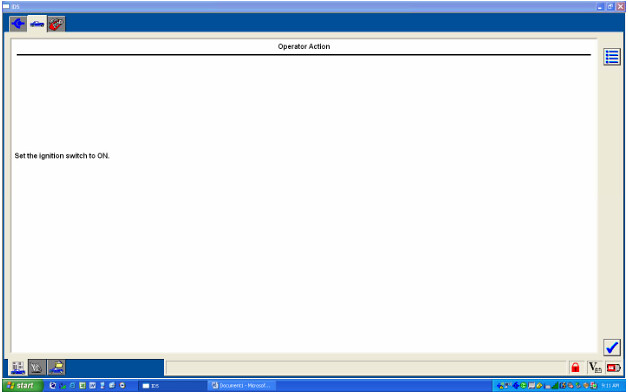
Screen shows “set ignition switch to on position”, do not turn on just press tick.
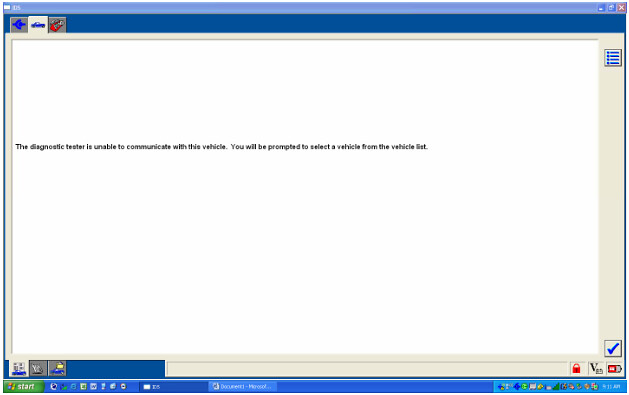
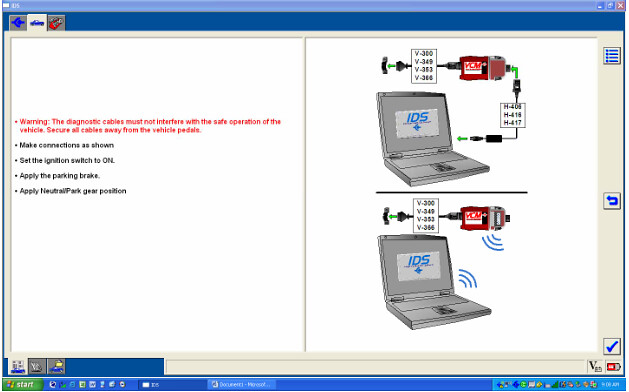
Screen shows “The diagnostic tester is unable to communicate with this vehicle. You
will be prompted to select a vehicle from the vehicle list”. Press tick.
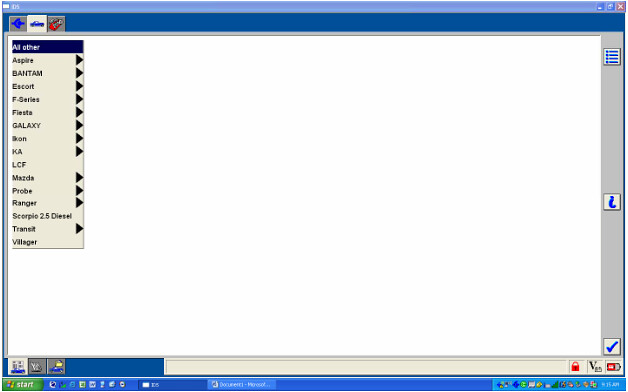
Select “All other” at top of the list. Press tick.
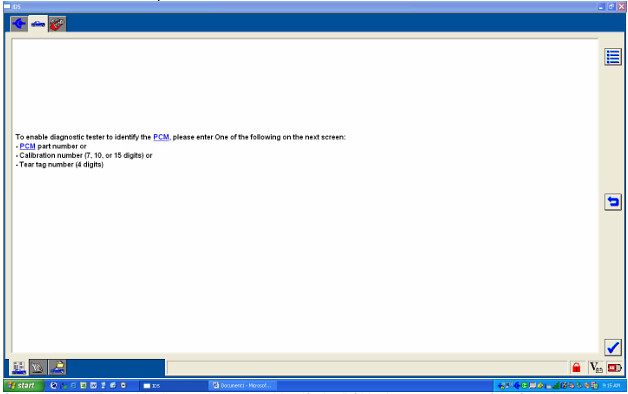
Screen shows “To enable diagnostic tester to identify the PCM, please enter one of the following on the
next screen, PCM part number, Calibration number or Tear tag number. Press tick.

Enter the first 4 digits and the last letter of the PCM part number printed on PCM. Press
tick. (See above)

Screen shows Vehicle specification screen, if all correct, select yes.
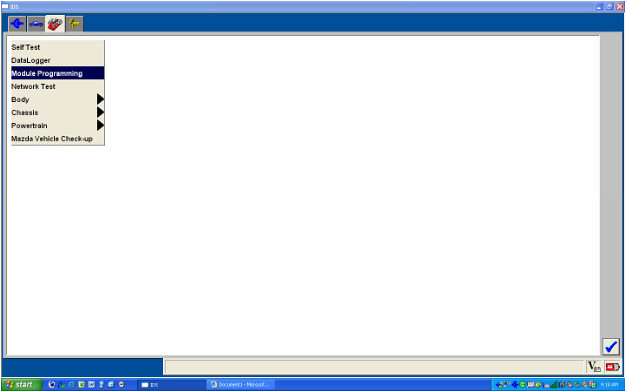
Select tool box icon at top of screen. Select module programming. Press tick.

Select Module Reprogramming, PCM, press tick.
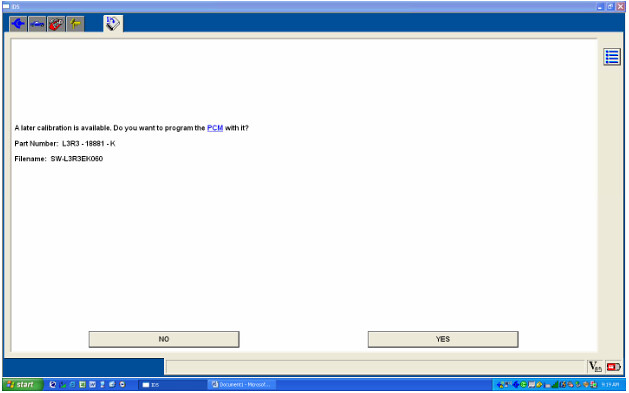
Screen shows “A later calibration is available. Do you want to program the PCM with it?”
Select “YES”
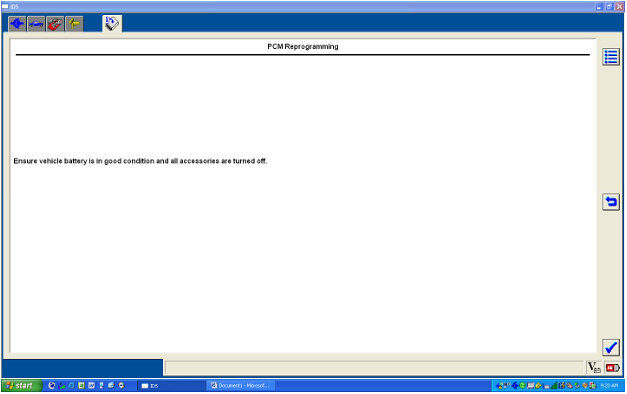
Screen shows “Ensure vehicle battery is in good condition and all accessories are
turned off.” Press Tick.
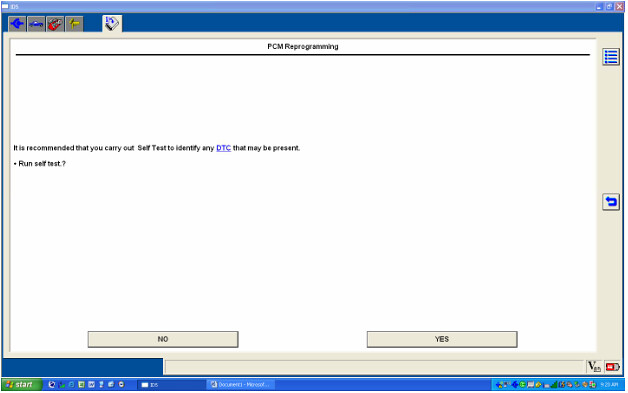
Screen shows “It is recommended that you carry out Self Test to identify any DTC that
may be present.” Select “NO”
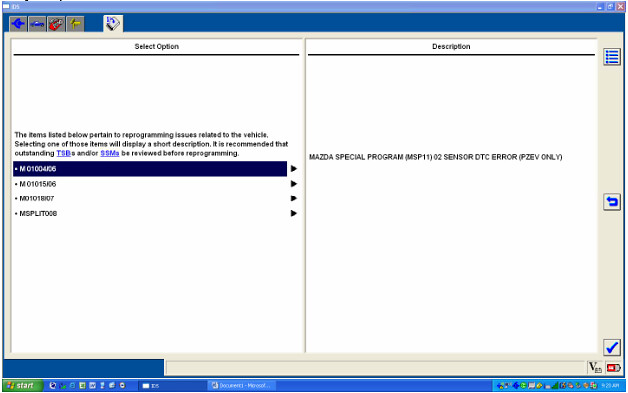
Screen may or may not show a list of reprogramming issues related to the vehicle.
Press Tick.

Screen shows “Set ignition switch to the off position” it is already off. Press Tick.
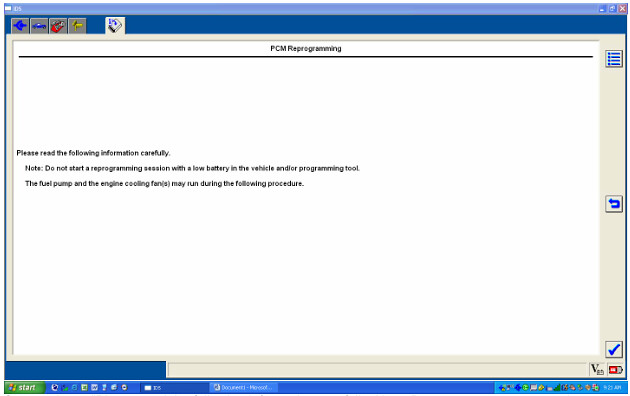
Screen shows “Please read the following information carefully. Note: Do not start a reprogramming
session with a low battery in the vehicle and/or programming tool. The fuel pump and the engine cooling
fan’s my run during the following procedure.” Press tick.
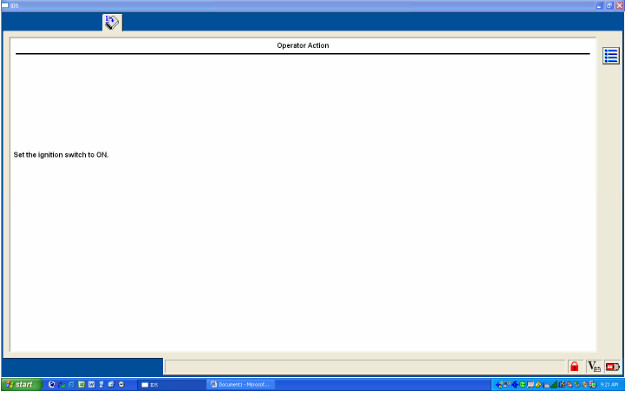
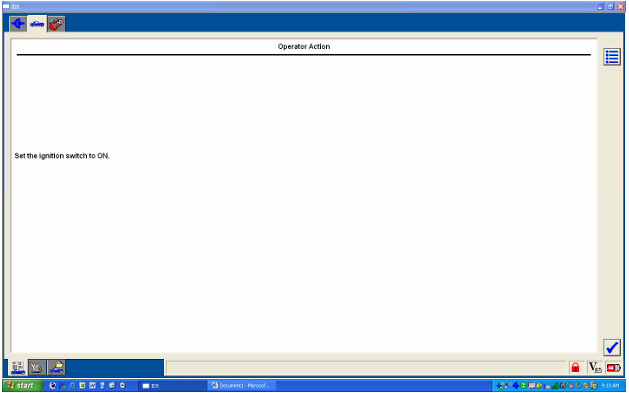
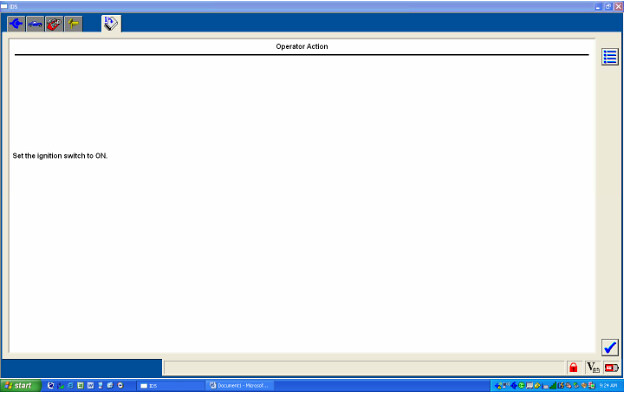
Screen shows “Set ignition switch to ON (Position 2)”. Do this and press tick.

Screen shows “Downloading data, PCM programming please wait.
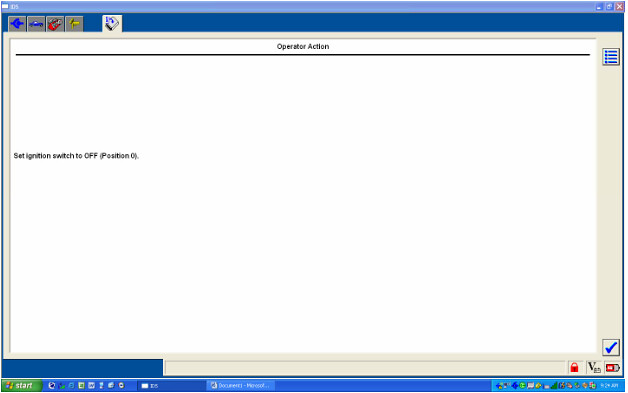
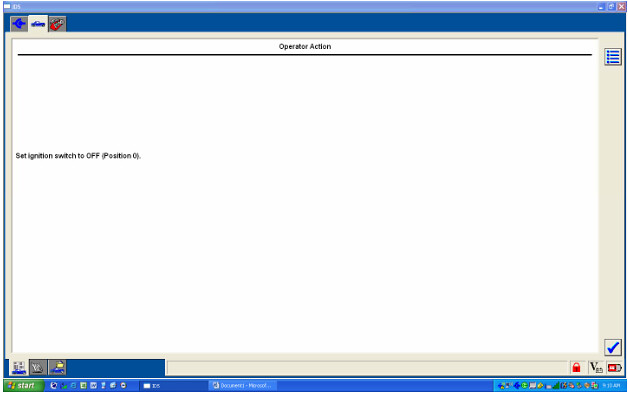
Screen shows “Set ignition switch to OFF (Position O)”. Do this and press tick.

Screen shows “Module Programming, Operation in progress”.
Screen shows “set ignition switch to on position”. Do this and press tick.

Screen shows “set ignition switch to off position”. Do this and press tick.

Screen shows “Calibration has been loaded and checked”. Press tick.
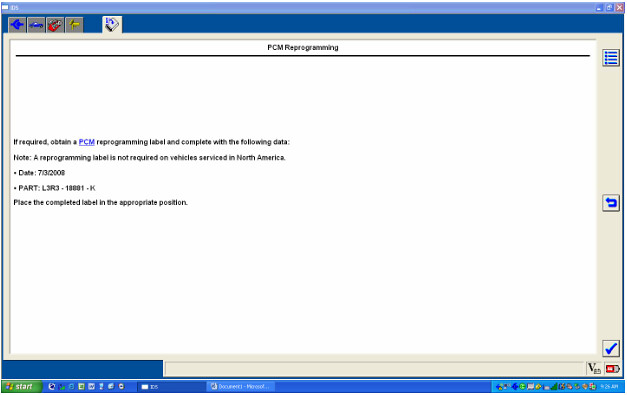
Screen shows “If required obtain a PCM reprogramming label and complete with the
following data “Date” “Part #”. Press tick.
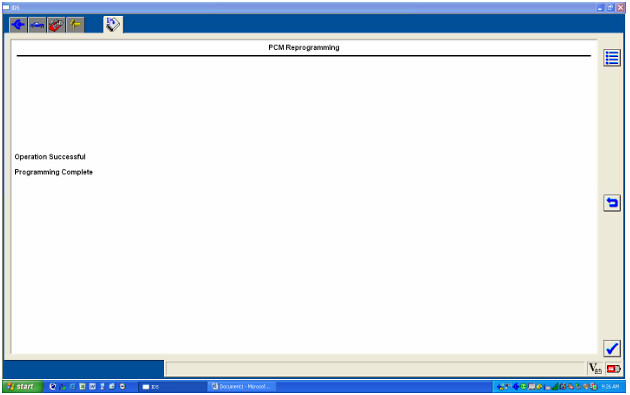
Screen shows “Operation successful, Programming complete”. Press tick.

Screen shows “Set ignition switch to ON”. Do this and press tick.

Screen shows “Clearing fault codes”.
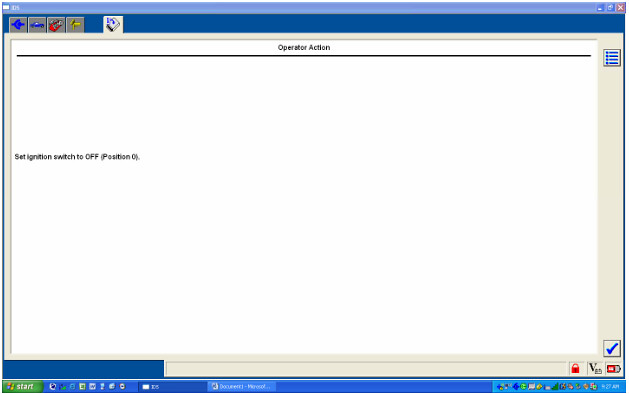
Screen shows “Set ignition switch to OFF (Position 0)”. Do this and press tick.
PCM Module recovery is now complete.