This instruction show you guide on how to change the shaft seal on the drive wheel unit for Still RX20 wheel unit.For more Still truck forklift repair case please refer to:Still Steds Forklift Navigator 8.19 R2
Related Content:
STILL STEDS Forklift 8.19 8.18 2019 EPC & Diagnostics Free Download
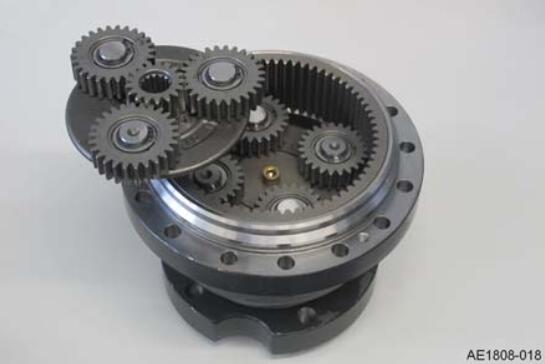
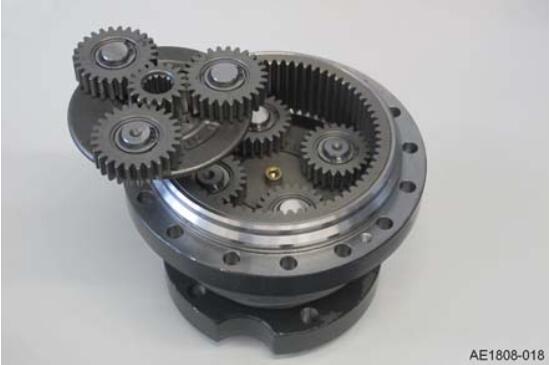
Disassembling the planetary transmission
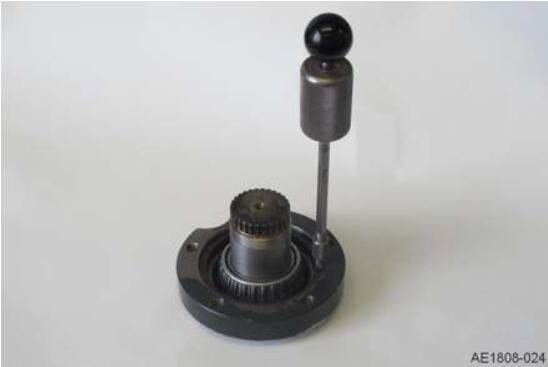
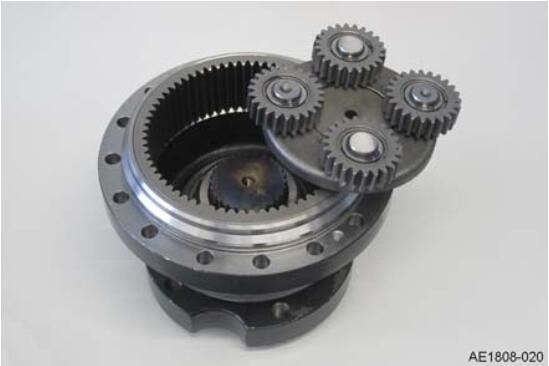
Lift the first planetary gear set out of the annular gear.
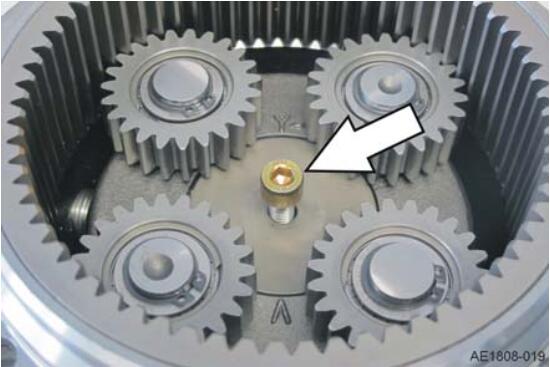
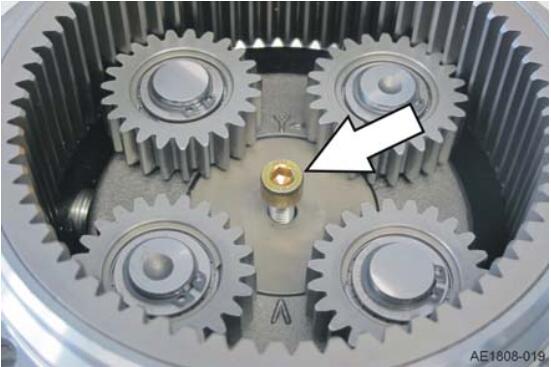
Loosen and unscrew the mounting screw from the second planetary gear set.
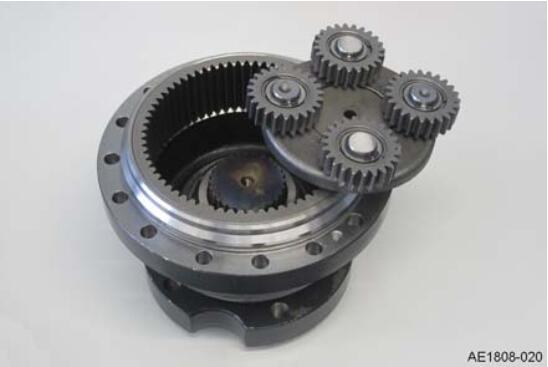
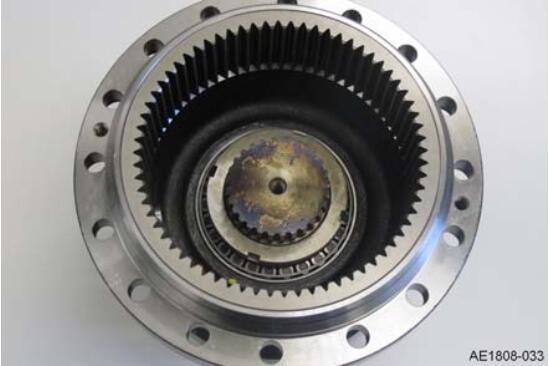
Pull the second planetary gear set out of the housing.
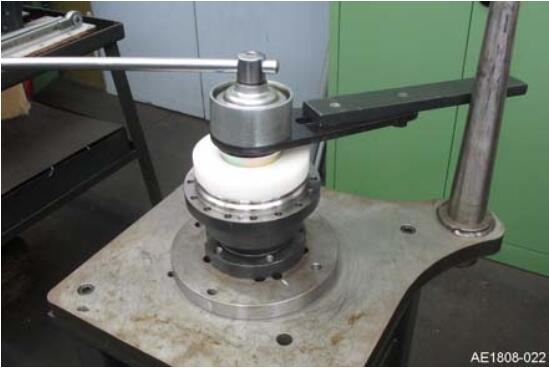
Secure the drive wheel unit on a suitable fixture.
Warm the slotted nut to release the Loctite.
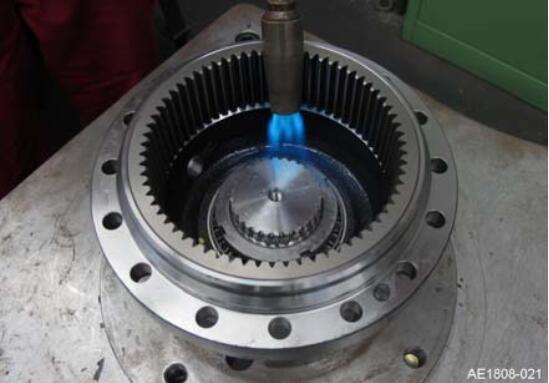
WARNING
The hot slotted nut can cause burns.
Wear suitable protective gloves.
Loosen the slotted nut using a slotted nut spanner and torque multiplier.
– Remove the slotted nut.
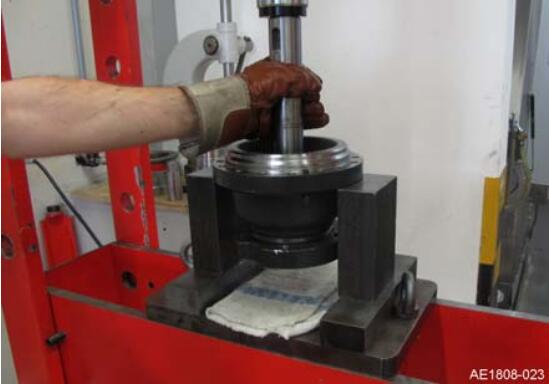
– Support the drive wheel unit in order to press the wheel shaft out downwards.
– Press out the wheel shaft.
– Drill a hole in the shaft seal, cut the thread and then pull it out using ejector rod WM109.
Assembling the planetary transmission
– Coat the inside of the new shaft seal between the sealing lip and the dust lip with lithium soap grease. Fill the space to a maximum of 50%.
NOTE
The grease must not be added to the spring chamber.
– Position the shaft seal on insertion tool WM455.
– Apply Loctite 243 to the outside of the shaft seal.
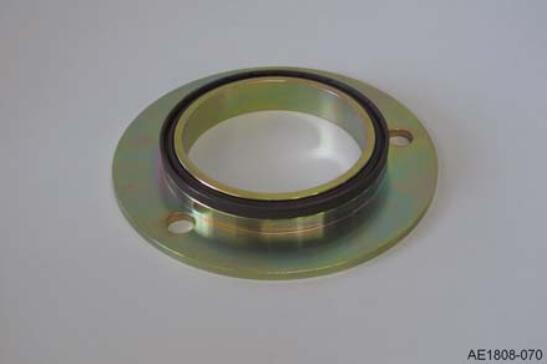
– Position the shaft seal on the wheel shaft with insertion tool WM455.
– Attach insertion tool WM455 to the wheel shaft using three wheel screws.
NOTE
The shaft seal is fitted in the wheel shaft by tightening the wheel screws. Tighten the wheel screws alternately to prevent the shaft seal from canting.
– Remove the wheel screws and insertion tool from the wheel shaft.
– Remove Loctite residues from the slotted nut and the thread of the wheel shaft. Use brake cleaner if necessary.
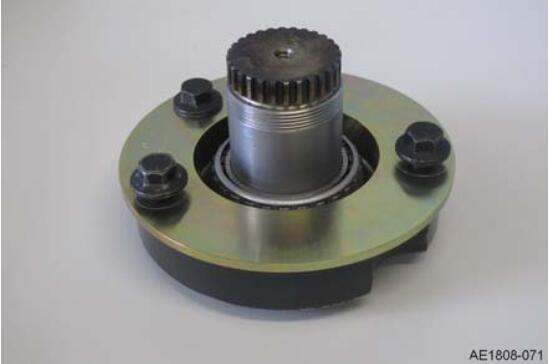
– Position the drive wheel unit on the wheel shaft.
– Insert the spacer ring.
– Insert the tapered roller bearing.
– Coat the thread of the slotted nut with Loctite 270. Screw in the slotted nut and tighten by hand.
– Secure the drive wheel unit on a suitable fixture and tighten the slotted nut using the slotted nut spanner and torque multiplier to a tightening torque of 650 +20 Nm.
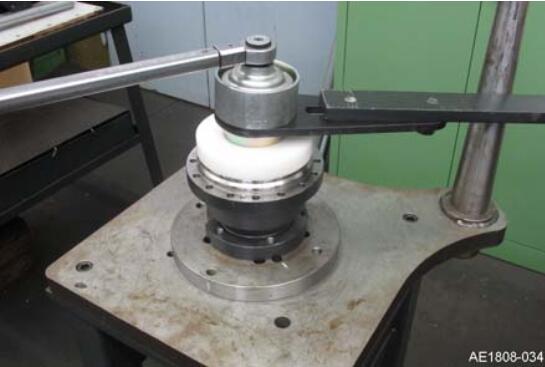
– Turn the drive wheel unit by 10 revolutions and retighten the slotted nut to a tightening torque of 650 +20 Nm.
– Insert the second planetary gear set.
– Coat the second planetary gear set mounting screw with Loctite 270; screw in and tighten the mounting screw to a tightening torque of 23 Nm.
– Insert the first planetary gear set into the housing.
Refitting the drive wheel unit
NOTE
- Observe tightening torques and screw qualities
- Observe gearbox oil quality and quantities
- See “general technical data” for values.
– Oil and fit a new O-ring (1).
– Attach the drive wheel unit with filler plug (2) facing upwards and screw in the 7 mounting screws (3) on the drive wheel unit.
– Tighten the mounting screws crosswise.
– See the section on “Filling with oil” for instructions on filling with gearbox oil.
– Attach the wheel and tighten the wheel bolts
– Lower the truck.
– Check tightening torques
– Connect the battery male connector
– Perform a function check.
