This instruction guide show you how to change the support rollers in the lift mast for Still RX20 forklift truck.More topics about Still trucks,please refer to:Still Forklift Repair
Related Contents:(all workshop manual included in below software)
STILL STEDS Forklift 8.19 8.18 2019 EPC & Diagnostics Free Download
Procedures:
Preparing
– Park the truck securely.
– Apply the parking brake.
– Remove the fork carriage; see the chapter entitled “Fork carriage”.
– Move the lift mast to its vertical position.
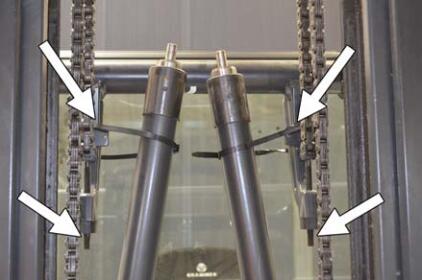
– Remove the outer cylinders. Tilt the outer cylinders inwards and secure them against slipping using long cable ties. See the chapter entitled “Removing/installing outer cylinders”.
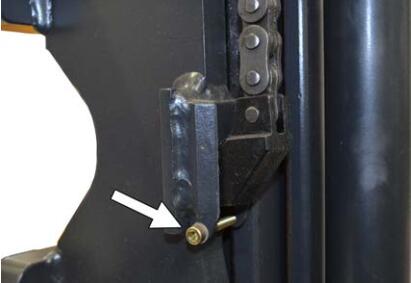
– To ensure that the chain ends (threaded rods) are free when the inner mast is lowered, remove the safety caps from the load chains on both sides.
Support rollers: bottom of inner mast and top of outer mast
– Lower the inner mast until the lower supporting rollers on the inner mast are exposed.
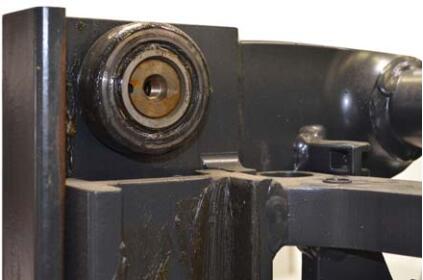
– Remove the wear strips on both sides. Pull out the support rollers from the bearing pins.
– Clean the bearing pins. Fit the new support rollers and use shim rings if necessary.
– Check the wear strips for wear and replace them as necessary.
– As the inner mast has been lowered, the upper support rollers on the outer mast are also exposed.
– Pull out the support rollers from the bearing pins on both sides.
– Clean the bearing pins. Fit the new support rollers and use shim rings if necessary.
– Adjust the play of the support rollers. See the chapter entitled “Support roller play”.
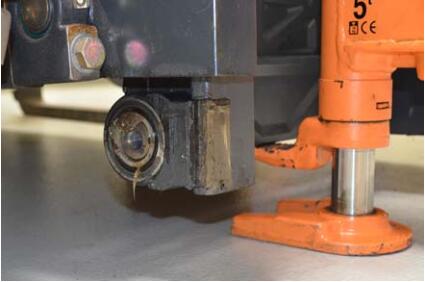
– Lift the inner mast using the hydraulic jack until the support rollers and wear strips are completely within the profile of the outer mast.
NOTE
To ensure that the wear strips in the mast profile do not bend, position the hydraulic jack in the centre of the lower crossmember.
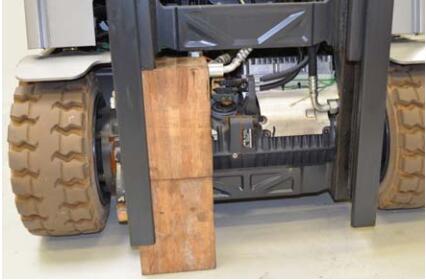
– Raise the inner mast until the bottom locking screws on the hydraulic cylinders are exposed. Lower the inner mast onto supporting blocks.
– Install the outer cylinders. See the chapter entitled “Removing/installing outer cylinders”.
– Fit the fork carriage. See the chapter entitled “Fork carriage”.
– Adjust the load chains and tension them evenly. See the chapter entitled “Adjusting the load chains”.
– Carry out a functional test and check for leak tightness.
Outer load chains and chain rollers
Removing the outer load chains and chain rollers
– Park the truck securely.
– Apply the parking brake.
– Move the lift mast to its vertical position.
– Lift the lift mast until the load chain anchors are easily accessible. Unscrew both locking devices for the load chain.
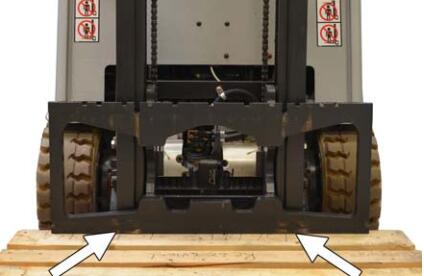
– Lower the fork carriage and rest it on a europallet or supporting blocks.
– Secure the fork carriage on the outer mast using safety chains.
– Lower the inner mast. Remove the load chains from the guides.
– Unscrew the right-hand hose guide for the auxiliary hydraulics 1.
– Unscrew the left-hand hose guide for the auxiliary hydraulics 2.
– Unscrew the hose guide and electric cables for the auxiliary hydraulics 3 and 4.
– Unscrew the chain guides from the chain rollers on both sides.
– Unscrew the load chains from the outer mast at the top.
– Remove the load chains from the chain rollers.
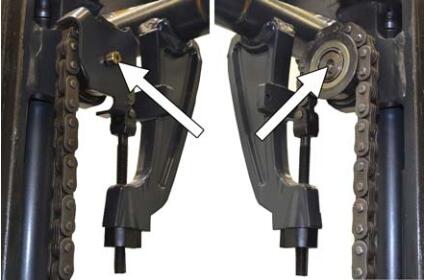
– Remove the chain roller from the bearing pin, using a puller if necessary.
Installing the outer load chains and chain rollers
– Clean the bearing pins. Wet with multipurpose oil.
– Position the chain rollers on the bearing pins.
Using a hammer, carefully tap the inner ring.
– Place load chains over the chain rollers.
Tighten the tensioning nuts.
NOTE
Observe the mounting direction of the load chains!
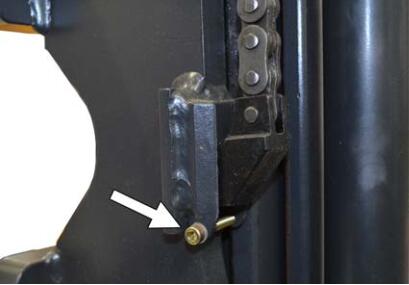
–Tighten the load chains at the top of the crossmember of the outer mast with clamping bolts. Do not install the safety caps yet.
– Attach the chain anchor for the load chains at the bottom of the fork carriage. Secure it with the locking screw.
– Screw on the chain guide, together with the hose guide if necessary.
– Screw on the right-hand hose guide for the auxiliary hydraulics 1.
– Screw on the left-hand hose guide for the auxiliary hydraulics 2.
– Screw on the hose guide and electric cables for the auxiliary hydraulics 3 and 4.
– Lift the fork carriage slightly. Remove the safety chain. Lower the fork carriage.
– Remove the europallet or supporting blocks from underneath the fork carriage.
– Adjust the outer load chains; see the chapter entitled “Adjusting the outer load chains”.