This instruction show you guide on how to disassemble engine for Doosan DL250-5 excavators.
Related Contents:
Doosan Data Monitoring System DMS-5 DMS-3 Free Download
Daios Doosan EPC Excavator Part Catalog 2017 Download & Installation
Procedures:
1 Drain coolant.
- Check that the engine and radiator is sufficiently cooled down.
- Place a container in front of the coolant drain plug.
- Remove the radiator cap.
- Open the drain valve on the bottom of the radiator to drain coolant.
- Remove the coolant drain plugs from the cylinder block and oil cooler.
- Drain coolant into the prepared container.
- After draining coolant, install the drain plug.

2 Separate the dipstick.
- Pull out the dipstick.
3 Drain engine oil.
- Place a container under the engine to collect drained engine oil.
- Loosen the drain plug and drain engine oil into the prepared container.
- Remove the oil filler cap.
- Remove the engine oil filter.
- After draining engine oil, install the engine oil filter and tighten drain plug.

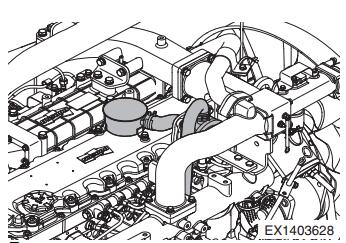
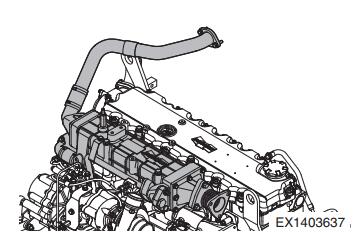
4 Remove the intercooler.
- Remove all the hoses and air pipes from the intercooler.
- Unscrew the intercooler mounting bolts to remove the intercooler.
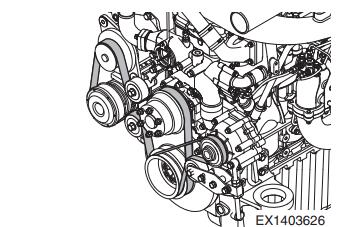
5 Remove the belt.
- Unscrew the tension adjusting bolts and mounting bolts of the A/C compressor, air compressor and alternator.
- Remove the belt.
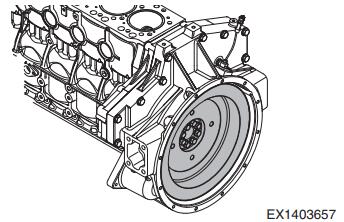
6 Remove the engine from the machine.
7 Disconnect the cables and harnesses of the engine from each sensor.
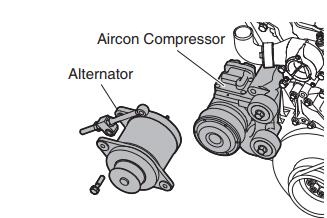
8 Remove the alternator and A/C compressor.
- Unscrew the mounting bolt to remove the alternator.
- Unscrew the idle puller mounting bolt to remove the A/C compressor.
9 Remove the breather.
- Unscrew the mounting clamp screw to disconnect the rubber hose.
- Remove the breather valve assembly.
10 Disconnect the air pipe and remove the air heater.
- Unscrew the mounting bolt to disconnect the air pipe and remove the air heater.
11 Remove the fuel filter.
- Unscrew the hollow screw from the fuel filter and disconnect the fuel hose.
- Unscrew the fuel filter mounting bolt to remove the fuel filter.
12 Disconnect the intake stake.
- Unscrew the mounting bolt to disconnect the air hose.
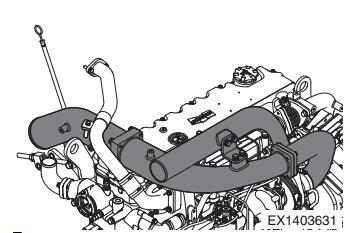
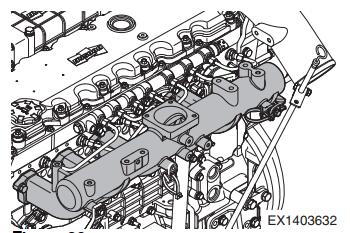
13 Separate the intake manifold.
- Unscrew the intake manifold mounting bolts to remove the intake manifold from the cylinder block.
- Remove the gasket and clean the gasket mounting surface thoroughly with a scraper
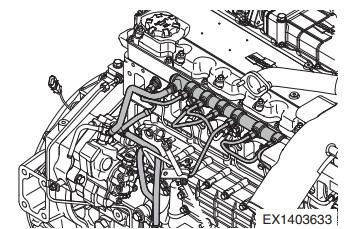
14 Remove the common rail and high-pressure pipe.
- Disconnect the high-pressure pipe between the fuel high-pressure connector and common rail.
- Unscrew the common rail mounting bolts to remove the common rail.
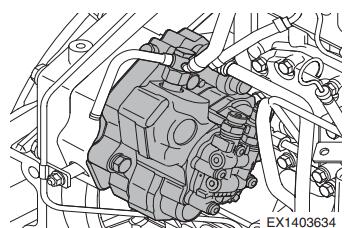
15 Remove the fuel high-pressure pump.
- Unscrew the fuel high-pressure pump mounting bolts to remove the fuel high-pressure pump.
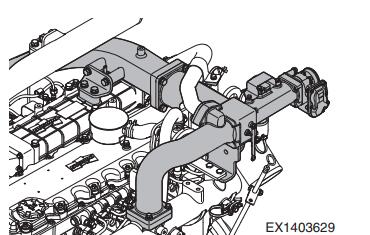
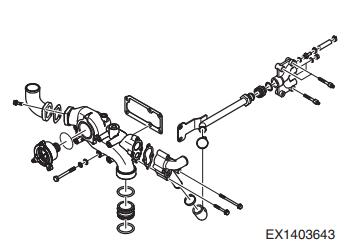
16 Remove the EGR valve.
- Unscrew the EGR valve mounting bolts to remove the EGR valve and exhaust manifold.
- Unscrew the mounting bolts to remove the exhaust pipe from the EGR cooler.
- Disconnect the coolant pipe from the EGR valve
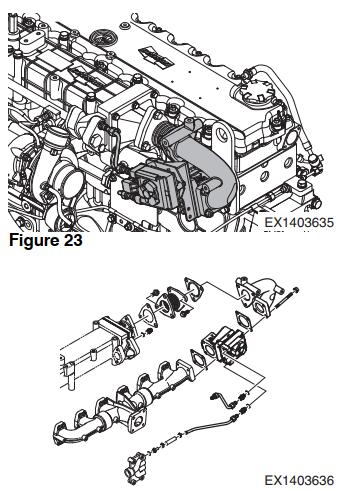
17 Remove the EGR cooler.
- Unscrew the EGR cooler and bracket connecting bolt to separate the EGR cooler.
- Disconnect the pipe and hose from the EGR cooler.
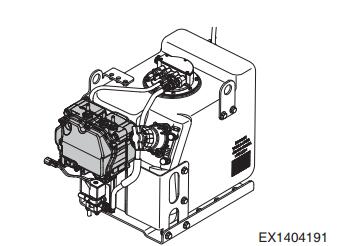
18 Remove dosing module.
Unscrew the mounting bolt of the dosing module to remove it from the UREA tank.
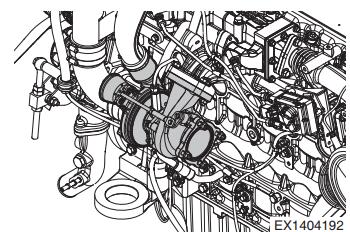
19 Remove the turbocharger.
A.Disconnect the intake stake from the turbocharger.
B.Disconnect the coolant hose from the turbocharger.
C.Disconnect the oil feed pipe and oil drain pipe between the cylinder block and turbocharger.
D.Unscrew the turbocharger mounting bolts to separate the turbocharger from the exhaust manifold.
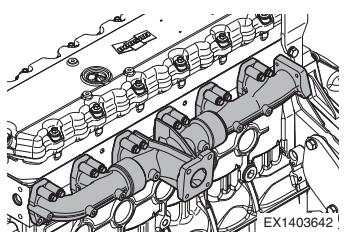
20 Remove the exhaust manifold.
- Unscrew the exhaust manifold mounting bolts to remove the exhaust manifold.
21 Disconnect the coolant pipe and thermostat.
- Unscrew the coolant pipe mounting bolt to disconnect the coolant pipe from the thermostat housing.
- Remove the coolant thermostat and O-ring.
- Clean the gasket mounting surface of the coolant pipe with a scraper thoroughly.
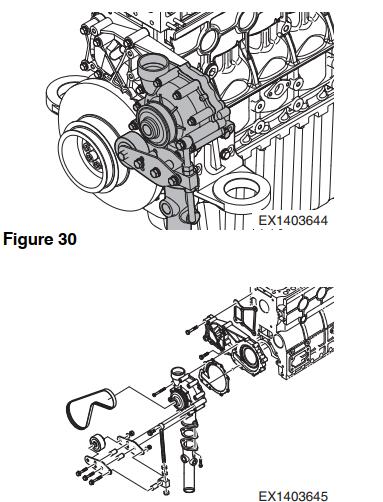
22 Remove the coolant pump.
- Unscrew the bracket mounting bolts for the coolant pump and oil cooler.
- Unscrew the bolt (1 ea) for the oil cooler.
- Unscrew the coolant pump mounting bolts to remove the coolant pump.
- Remove the O-ring for the coolant pump.
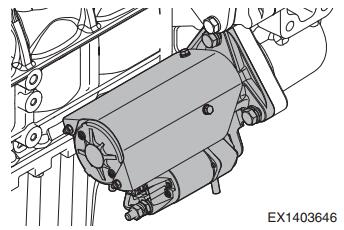
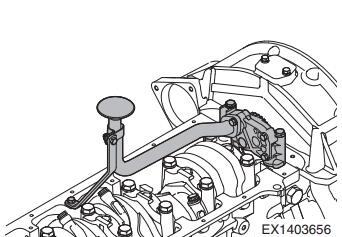
23 Remove the start motor.
- Unscrew the start motor mounting nut and remove the start motor with care. Be careful not to damage it sgear.
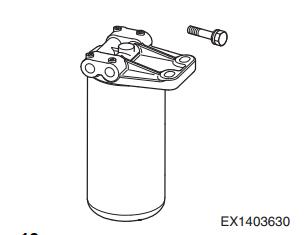
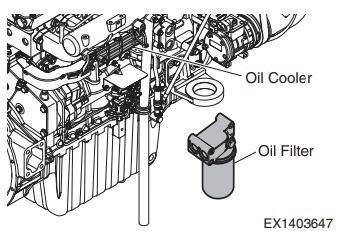
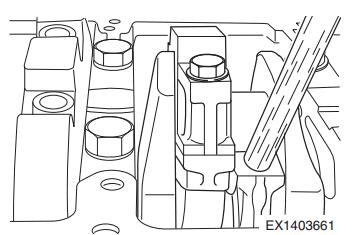
24 Remove the oil filter.
- Remove the oil filter cartridge using a special service tool
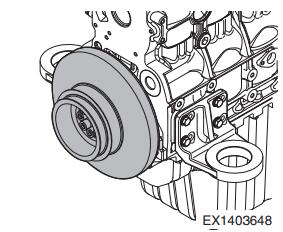
25 Remove the vibration damper.
- Unscrew the mounting bolts of the vibration damper and crank pulley in the reverse order to remove the vibration damper assembly.
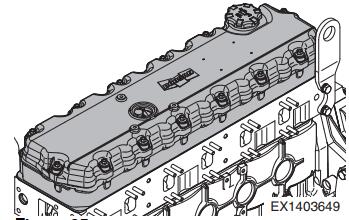
26 Remove the cylinder head cover.
- Unscrew the cylinder head cover mounting bolts to remove the cylinder head cover.
- Unscrew the intermediate cover mounting bolts to remove the intermediate cover.
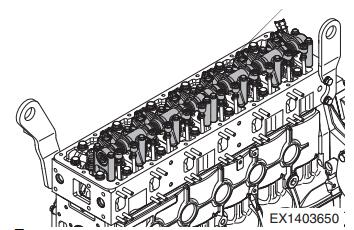
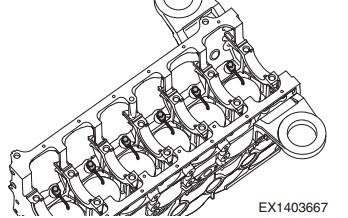
27 Remove the rocker arm.
- Unscrew the rocker arm bracket mounting bolts in the reverse order to remove the rocker arm assembly.
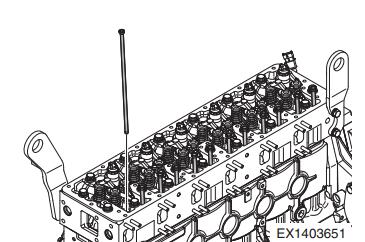
28 Remove the push rod.
- Remove the push rod.
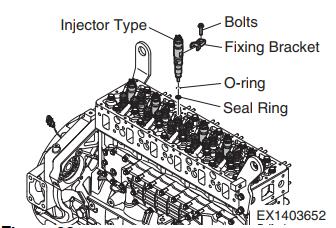
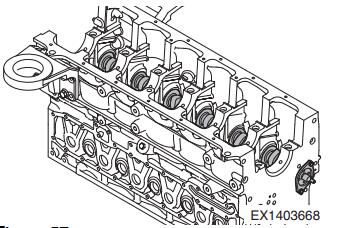
29 Remove the fuel injector.
- Unscrew the fuel high-pressure connector mounting bolts to disconnect the fuel high-pressure connector.
- Remove the harness from the injector.
- Unscrew the injector mounting bracket bolts to remove the injector.
- Remove the seal ring from the nozzle hole from the cylinder head.
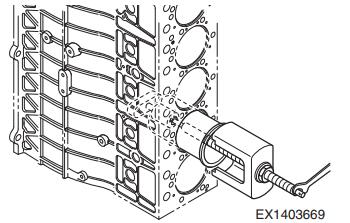
30 Remove the cylinder head.
- Unscrew the cylinder head bolts in the reverse order of tightening to remove the cylinder head.
– Step 1: Unscrew the bolt for 1 to 2 threads.
– Step 2: Unscrew the bolt completely to remove it.
- Remove the cylinder head bolts in these two steps.
- Keep the removed bolts in order with care, being careful not to damage their threads.
- Remove the cylinder head gasket.
- Remove foreign materials from the surface of the cylinder head and block.
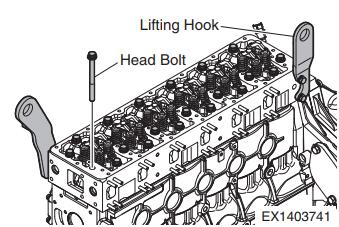
- Unscrew the mounting bolt of the lifting hook from the cylinder head to remove the lifting hook.
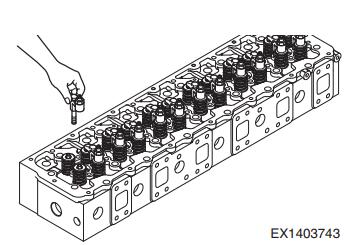
31 Remove the valve and valve stem seal.
- Press the valve spring and retainer with the valve spring compressor to remove the valve cotter.
- Remove the valve spring and retainer.
- Remove the calipers.
- Use a general service tool to remove the valve stem seal.
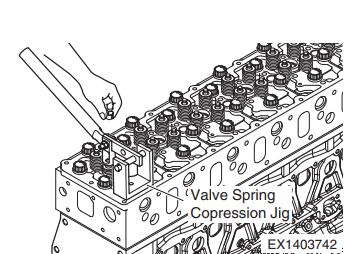
- Remove valve.
- Unscrew the mounting bolt of the lifting hook from the cylinder block to remove the lifting hook.
32 Remove the oil cooler.
- Unscrew the oil cooler mounting bolts to remove the oil cooler.
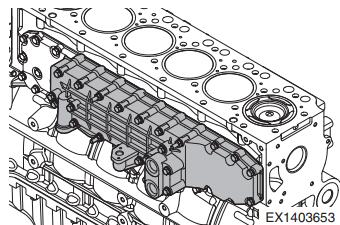
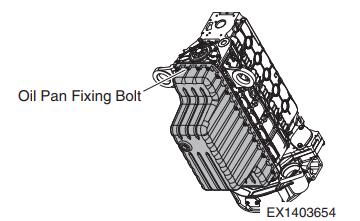
33 Remove the oil pan.
- Unscrew the oil pan mounting bolts to remove the oil pan.
- Remove the oil pan gasket.
34 Remove the front oil seal and cover.
- Remove the oil seal using a oil seal removing tool.
- Unscrew the gear case cover mounting bolt to remove the oil seal cover.
35 Remove the oil pump and disconnect the pipe.
- Unscrew the oil suction pipe mounting bolt to remove the bracket.
- Unscrew the oil pump pipe mounting bolts to disconnect the suction pipe and feed pipe.
- Unscrew the oil pump mounting bolts to remove the oil pump.
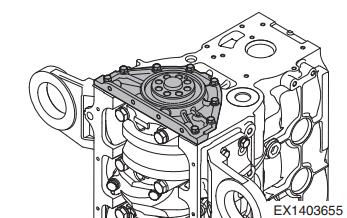
36 Remove the flywheel.
- Unscrew the flywheel mounting bolts and install the guide bolt to remove the flywheel.
- Unscrew the bolts in the reverse order of the irtightening to remove the flywheel.
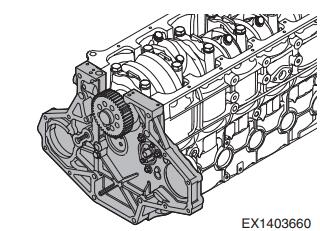
37 Flywheel housing
- Unscrew the flywheel housing mounting bolts to remove the flywheel housing.
- Remove the flywheel housing oil seal.

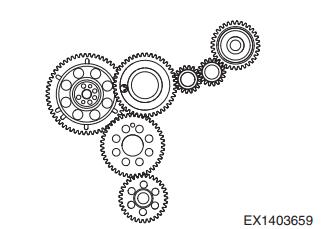
38 Remove the cam gear and idle gear.
- Unscrew the camshaft gear mounting bolts to remove the camshaft gear.
- Unscrew the idle gear mounting bolts to remove the idle gear.
39 Remove the timing gear case.
- Unscrew the timing gear case mounting bolts.
- Tap the left and right sides on the back of the contact surface of the timing gear case with a urethane hammer gently to remove the timing gear case.
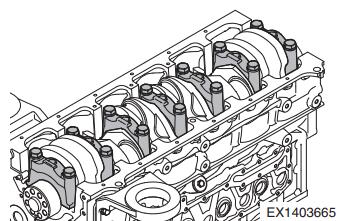
40 Remove the piston and connecting rod.
- Unscrew the connecting rod cap bolts in the reverse order of their tightening.
NOTE: Unscrew these bolts in two steps as the cylinder head bolts.
- Tap the top and bottom of the connecting rod cap with a urethane hammer lightly to remove the bearing cap and bearing.
- Push the connecting rod from the oil pan side to ward the cylinder head with a wooden stick to separate the piston assembly.
- Keep the removed pistons in the corresponding cylinder order and make sure that they are not hit by each other.
- Install the connecting rod caps to their corresponding connecting rods loosely. Be careful not to mix them.
41 Remove the piston.
- Remove the snap ring of the piston pin using pliers.
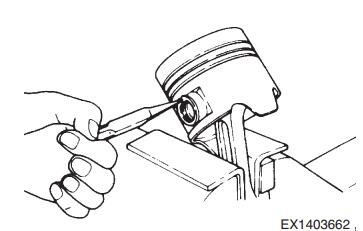
B.Tap the piston pin with a wooden stick gently to remove the piston.
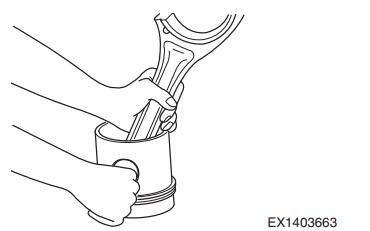
- Remove the piston ring using piston ring pliers.
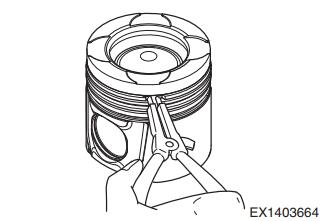
- Remove carbon from the piston completely and clean it.
42 Remove the bearing cap.
- Unscrew the bearing cap mounting bolts in the reverse order of their tightening to remove the bearing cap.
NOTE: Unscrew these bolts with the same method for the cylinder head bolts.
- Keep the bearing caps in order.
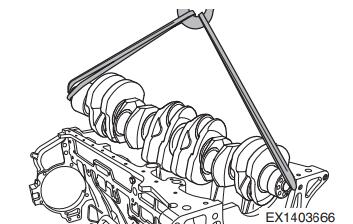
43 Remove the crankshaft.
- Fit the bolts to both sides of the crankshaft temporarily.
- Connect a rope to the bolts and lift the crankshaft with a crane. Be careful not to damage the crankshaft.
- Store the removed crankshaft on a safe special shelf so that it is not deformed or damaged.
- Remove and store the main bearings in order.
44 Remove the oil spray nozzle.
- Unscrew the oil spray nozzle valve mounting screw to remove the oil spray nozzle.
45 Remove the camshaft and tappet.
- To prevent damage of the camshaft, pull it out while turning it.
- Store the removed camshaft on a safe special shelf so that it is not deformed or damaged.
- Remove the tappet.
46 Remove the camshaft and tappet.
- To prevent damage of the camshaft, pull it out while turning it.
- Store the removed camshaft on a safe special shelf so that it is not deformed or damaged.
- Remove the tappet.