Several days ago,I introduce how to active Wurth WoW software.This post also focus on how Wurth WoW sotware on how to use Wurth Wow software.
Program functions
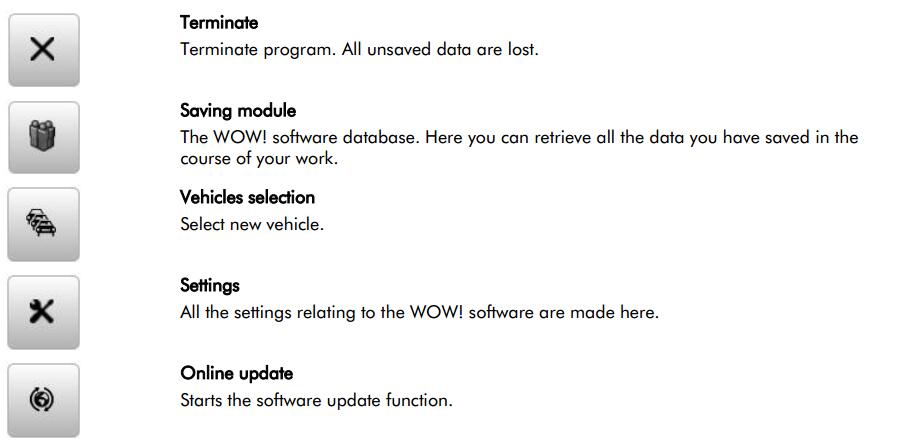
Saving module
With the memory module you have the option of saving vehicle data and test verifications of exhaust emissions tests and fault diagnoses carried out. These can be called up again and printed out where necessary or accepted in Vehicle selection.
You can select by way of the selection window whether or how the data of the exhaust emissions tests are saved.
The following settings can be performed:
Memory module off:No data are saved.
Save vehicle with client data:After each exhaust emissions test, you are prompted to assign the test record to a client or to create a new client. The record is rejected if no details are given.
Save vehicle without client data:Only the record with the vehicle data is saved.
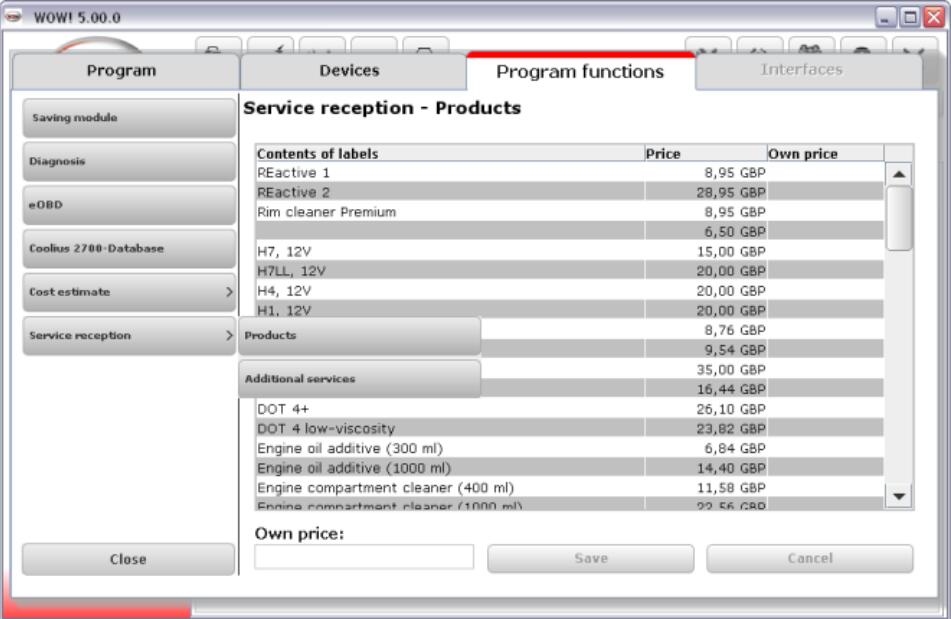
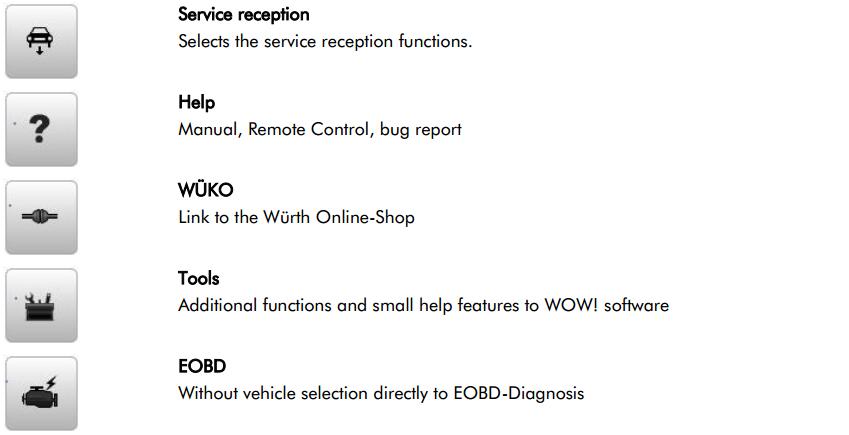
Service reception
Database for products and additional services Products and services which can be selected in the
service reception process are already stored in the database. You can adapt the prices quoted for the individual additional services to your own prices.To do so, highlight the data record you would like to edit and then enter your own price. Click on Save to accept the data record.
Inspection
The content of the printout of the service schedules can be adapted in the Inspection area.
Interval:
Changeover from kilometres to miles.
Service schedule adaptation
Working times of the service items with printouts
YES = The working times are displayed in the service schedule.
Always display customer data
The customer data – if available – are displayed on the printout.
Diagnosis
Program settings connected with vehicle diagnosis.
Vehicle data – Always display
When the test record is being printed, a dialogue window is displayed in which you can enter the
vehicle data.
Only print scanned systems
The system scan queries which systems are installed in the vehicle. If this setting is checked/ticked,only those systems which have also been read out and have responded appear in the printout.
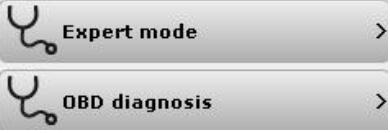
Expert mode
IMPORTANT! This diagnostic mode is only recommended for trained persons since it is necessary to select the diagnosis record exactly in order to obtain meaningful results. We recommend that you use this mode only in cooperation with the Technical Hotline.
To avoid damage in the control unit (caused by incorrect activation), the Coding and Adjustment
functions are not accessible in Expert mode.
Several records may be available for the vehicle. Several vehicle variations will appear in the list in
this case. Please select the applicable vehicle/record by clicking on the relevant line.
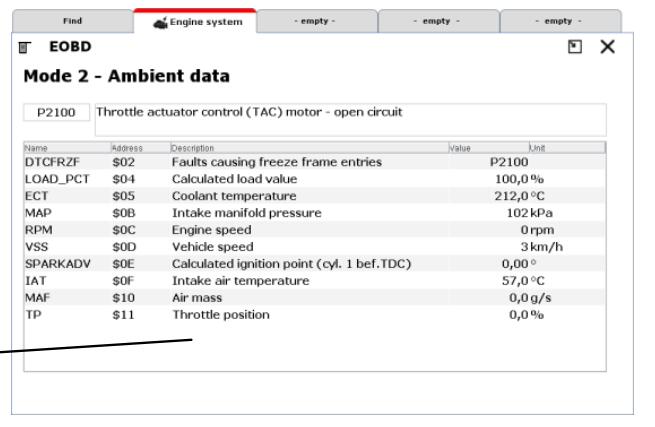
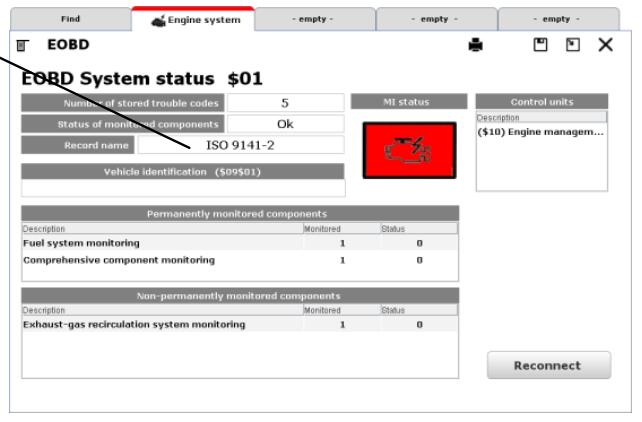
EOBD
Program settings connected with EOBD vehicle diagnosis.
View
Changeover between Mode and Normal views.
Vehicle data – Always display
When the test record is being printed, a dialogue window is displayed in which you can enter the vehicle data.
Cost estimate
Currency management
With the Currency management option you store other national currencies for your cost estimates and invoices.
1.To create a currency, click on the New button and then enter the values in the corresponding boxes.Accept the new currency in the list with the Save button.
2.To edit a currency, highlight it in the list and then click on the Edit button.
3. If you have highlighted a currency and click on the Calculation principle button, this
currency becomes the standard currency (default for the cost estimate). This is used to convert all
other currencies with the stored factor.
Cost estimate settings
Here you define your hourly cost rate and the applicable value-added tax. Both settings are accepted in your cost estimate.
1.If you have defined other currencies with Currency management and select these here, the hourly rates are converted with the stored factor.
2.You can select at “Expenditure basis” whether the working time is to be displayed in hours or in flat rate units (FRUs).
3.To create a new hourly rate, click on the New button and then enter the values in the corresponding boxes. Accept the new hourly rate in the list with the Save button.
4.To change an hourly rate, highlight it in the list and then click on the Edit button. Make your
changes in the entry boxes and close these with Save.
5.Remove the highlighted hourly rate from the list with the Delete button.
6.Make the highlighted hourly rate the default value with the Standard rate button.
NOTE: When drawing up a cost estimate, you can also select a different hourly rate for each
item.
NOTE: Changes which were not confirmed with Save will be lost.
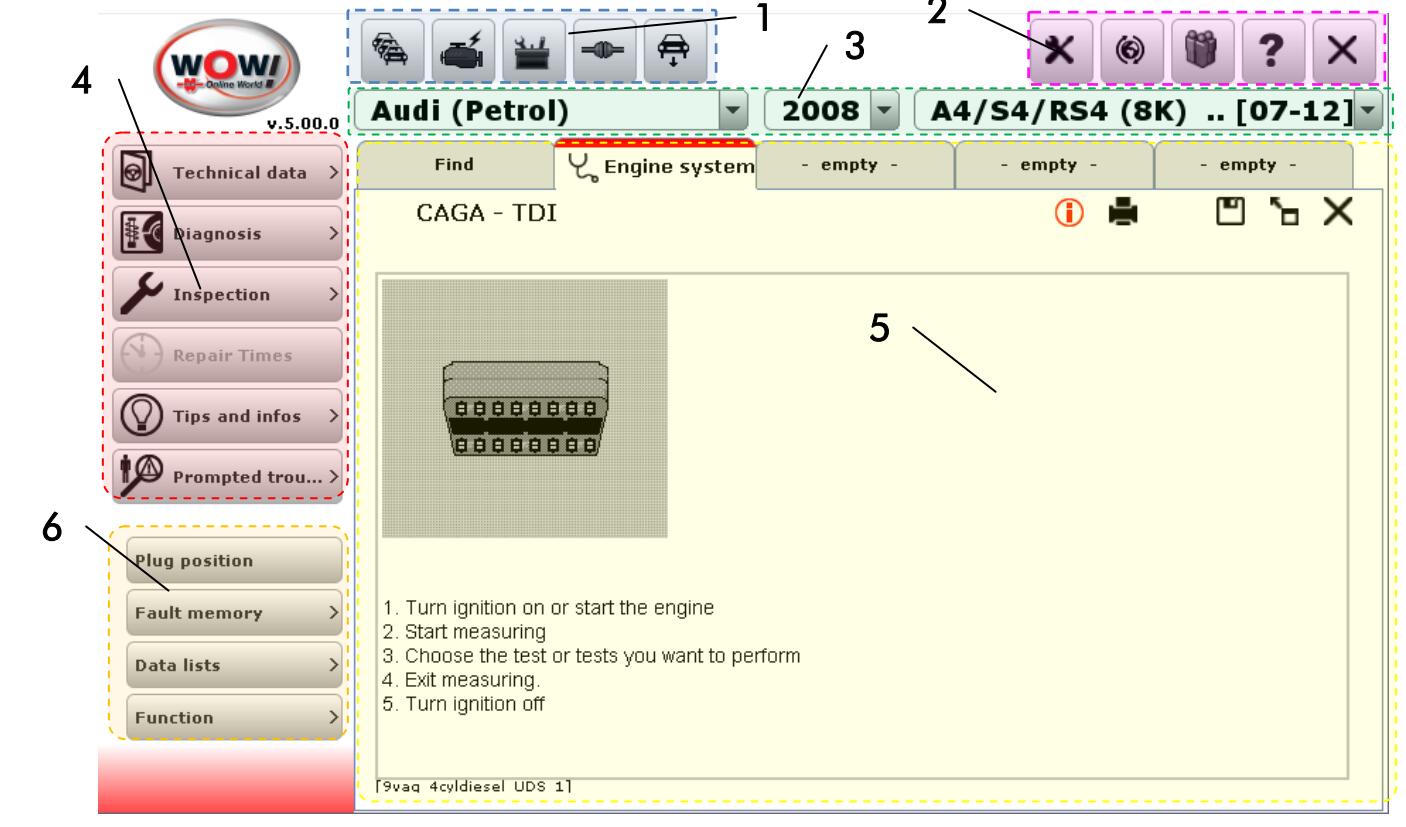
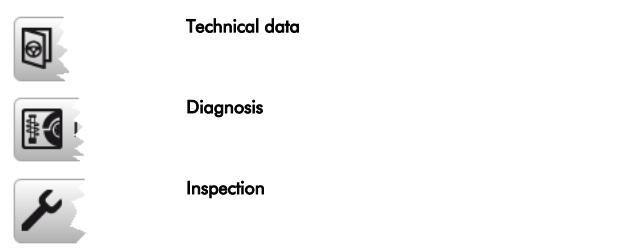
User interface overview
| 1. Directly Module selection |
The main software functions, such as e.g. Service reception or A/C diagnosis, are called up here. |
| 2. Program functions | Includes all functions to manage and adjust the software. |
| 3. Vehicle selection | You can determine the required vehicle in successive steps by means of vehicle selection. Manufacturer, Type, Displacement, Model year. This continues to narrow down the selection. In the Find tab you can also search for a vehicle by way of an entered text. |
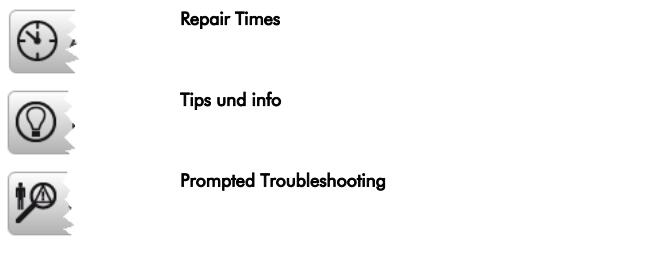
| 4. Function selection or overview area |
This area provides you with an overview of the possible diagnosis types or the available content and technical data. Click on a button to expand these and display the contained content. |
| 5. Register or Info area | The selected contents or functions are opened in up to five registers. If all the registers are being used, you will be prompted when opening a new function to close a register first. The different registers enable you to carry out several jobs simultaneously and thereby to work faster. Example: When you are performing a service reception, you can perform a service scan in parallel in the next register. You can always switch between the registers. |
| 6. Action area | Here you will find the buttons for starting actions. Example: Start or stop the service scan |
Buttons and their functions
Module bar
Feature selection
Register / Information area

Vehicle Selection
The redesigned Vehicle Selection is divided into two areas, Classic vehicle selection and Interactive search.
Classic vehicle selection

Function:
Select the required vehicle via the drop-down menus as usual by manufacturer, model year and model.Enter the first letter to navigate quickly to the required manufacturer or model.
Then from the displayed list select the required engine version and click on the arrow to the right of it.
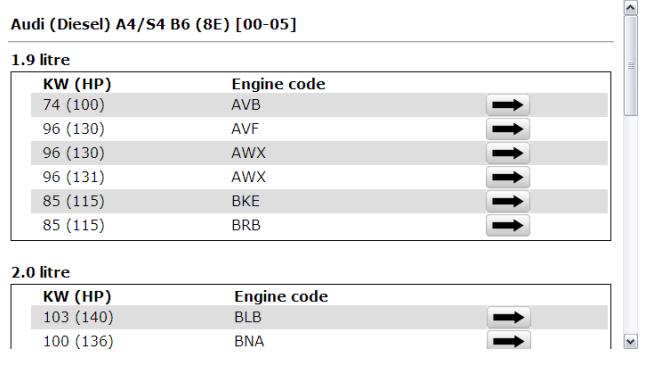
The selected vehicle is displayed.
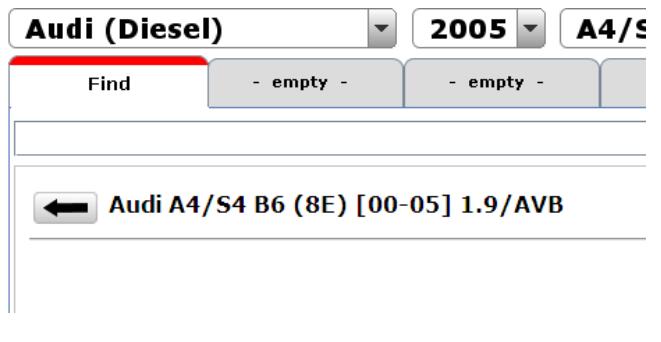
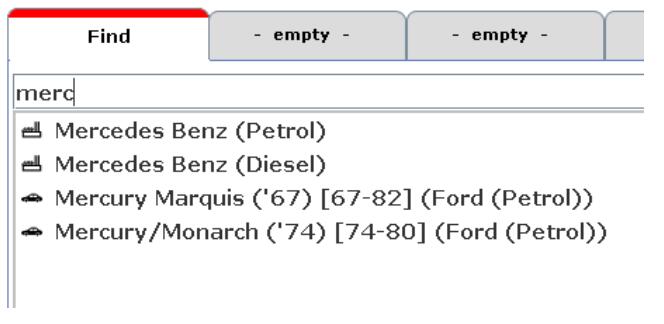
Interactive search

The new Interactive search functions along similar lines to the search functions on Internet search sites.Suggestions for the entered text are displayed here.
Function:
Enter in the search box the order as for a classic search, starting with the manufacturer text.
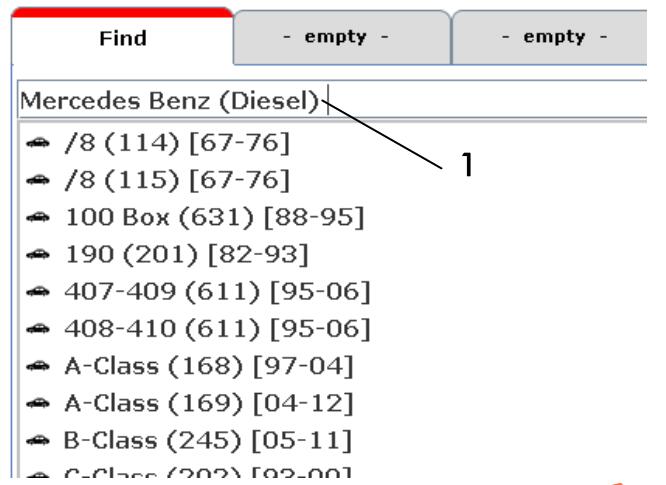
Click on a search result in the list or navigate downwards with the arrow key to adopt it in the search box. Then enter a space (1).
The search list now displays the available models for this manufacturer.Now enter the model designation or navigate with the arrow key.Then enter a space (2) after the model designation.
In order then for example to search for the service schedules, enter an “s”.Select the maintenance schedules and confirm with ENTER.
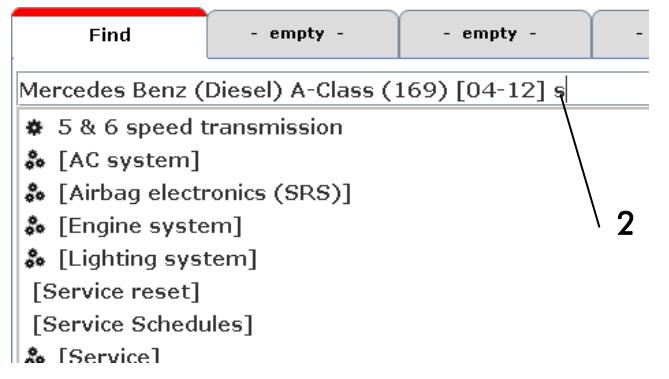
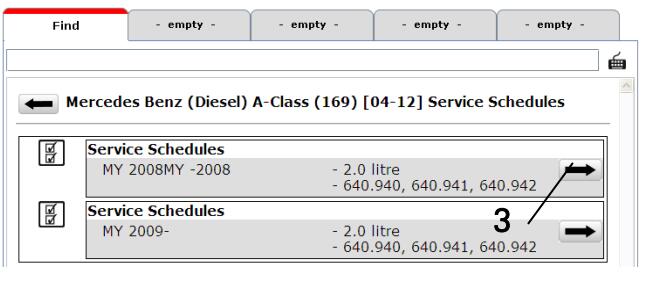
The selection “Service Schedules” is displayed.Click on the arrow pointing to the right (3) to open the selected service schedule in a new data tab.To carry on searching, switch back to the data tab
Find and enter the search text.
Fault reporting
To improve and progress the WOW! Software for you, we have a tool to recording and documentation of errors. These documentations will transfer to our Support team, with the next on-line update.
1. If a problem arises during diagnosis or when working with the software, click on the button
in the program functions.
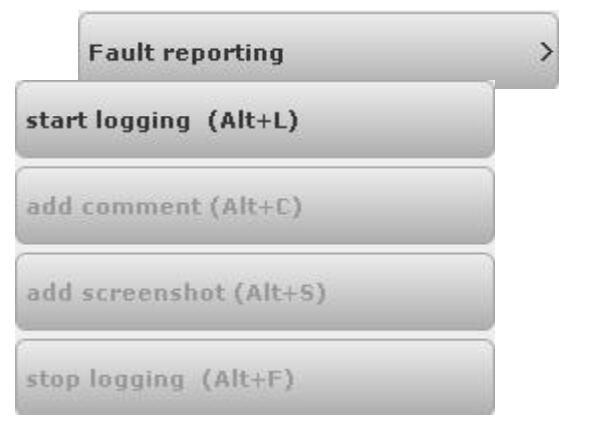
2.In the context menu select Fault reporting and start logging with start logging
(Alt+L)
NOTE: Observe the key combinations of the buttons, since the buttons cannot be accessed in
the diagnosis sequence.Logging runs invisibly in the background
3.If you like to add a comment or a Screen Shot with comment, choose the relevant key combination.(Alt+C or Alt+S)
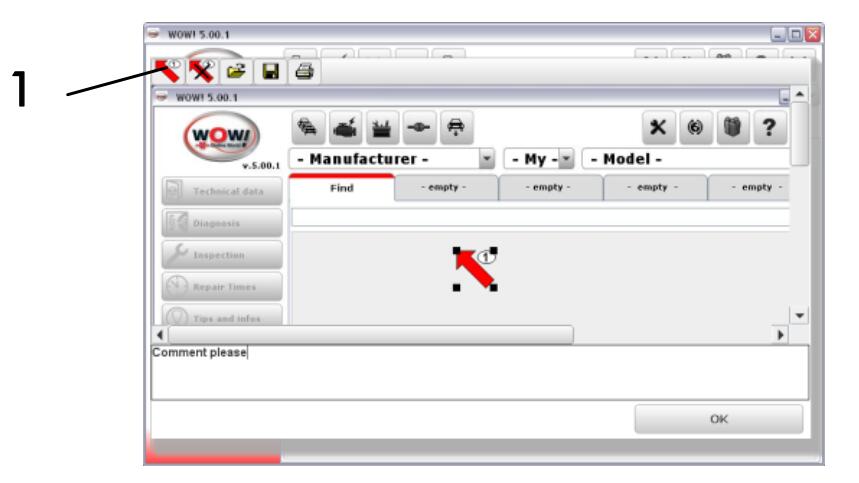
4.With a Screen Shot you click on new arrow (1) and pull this then at the point in the picture you
would like to describe. Add then your comment and click on OK.The log files are transmitted during the next online update.
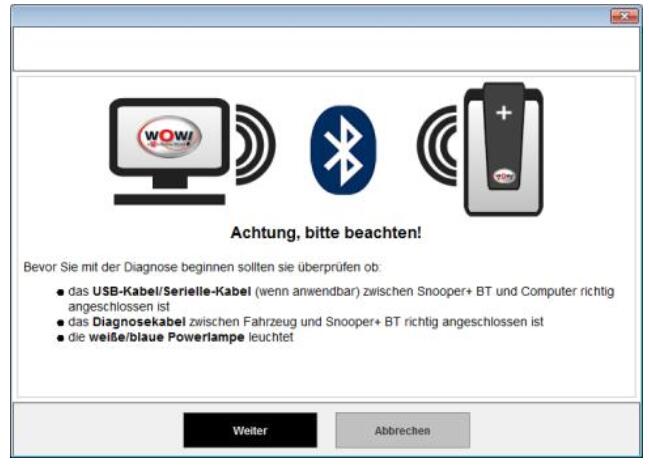
Using the Flight Recorder in the Snooper+
Background:
Data recording while driving for supported values
Selection from all available data lists
Setting of trigger points while driving in order to find events in the recording again
Evaluation on a PC, storage of the recorded values in the memory module
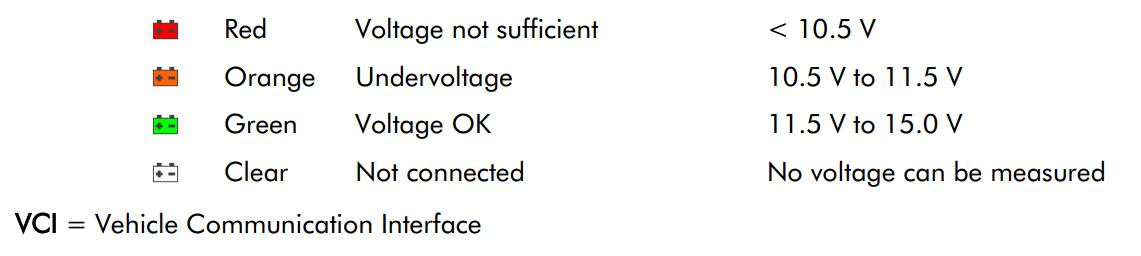
Battery indication in the WOW program:
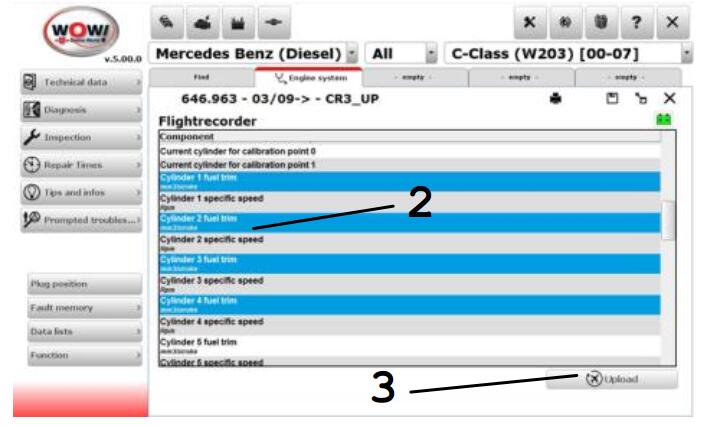
Selecting and transferring values
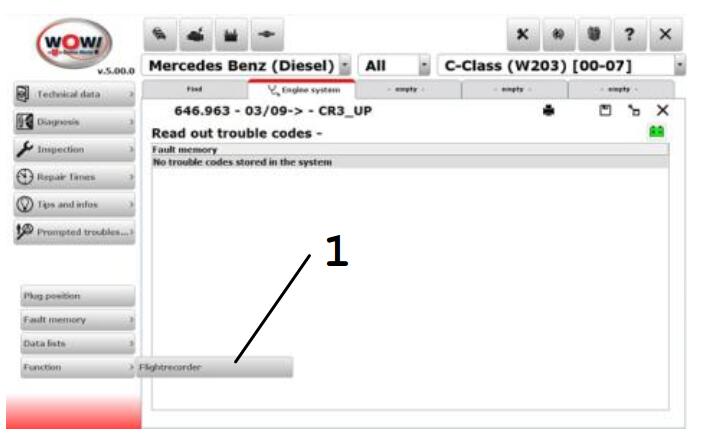
1.Select the system to be tested.Click on Flightrecorder (1).
2.Follow the notes and instructions in the program.
3.Select the required values by clicking (2).(The control unit data rate varies, depending on the number of selected values).
4.Select Übertragen (3).
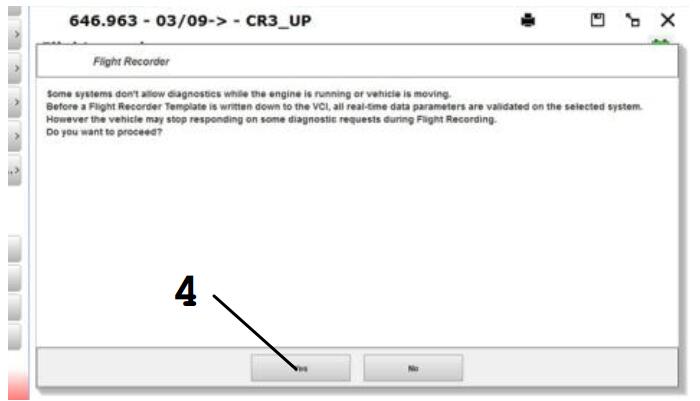
5.Before the data are transferred, a check is conducted to ascertain whether the control unit supports the data list values,the Snooper+ must be connected to the selected vehicle.
If the data transfer fails, check the correct functioning of the data in the data list view.Follow the instructions in the program (4)
6.Now transfer the values to the Snooper+ (5)
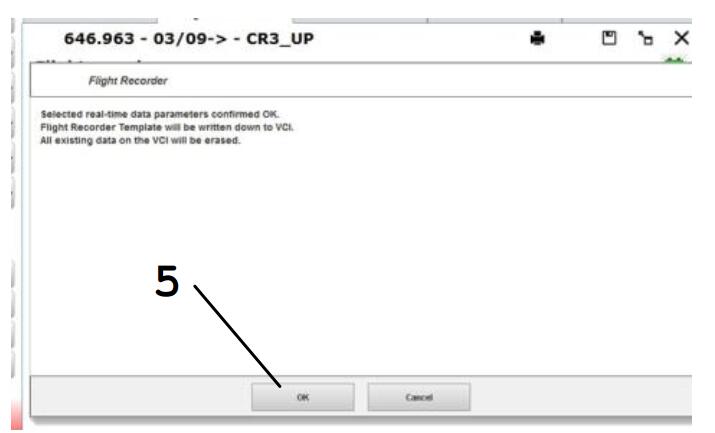
7.The Snooper+ has been successfully configured for recording.You can now start data recording.
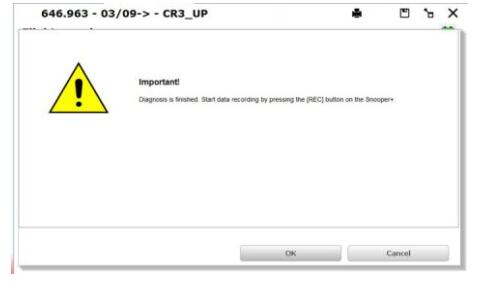
Data recording
1.Start the vehicle
2.Pressing the REC button (3 seconds) starts the Flight Recorder.The display colour of the multicolour LED changes to Yellow and a sequence of sounds can be heard.
Recording starts and the display turns into a sequence light.Briefly press the REC button to set a marking/highlighting (trigger point) in the data recording.
Press the REC button for a longer time (3 seconds) to terminatethe recording.

Loading recording data
1.Open the Flight Recorder
The Snooper+ must be connected to the power supply and to the PC (USB or BT)
2.Load (1) the recorded data
3.Highlight the Flight Recorder session (2)
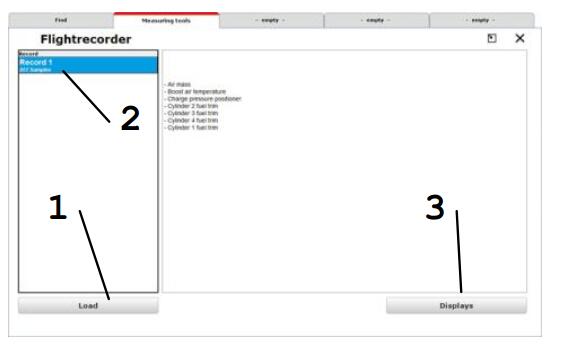
4.Click on Anzeigen (3) to open the data
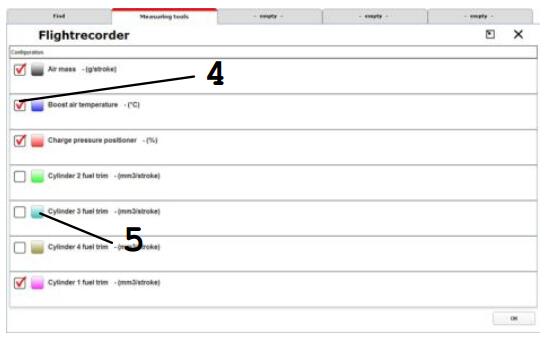
5.Always the first two values are preselected; these can be extended and changed (4).
6.Click on the colour coding (5) to open a menu for colour selection.
Evaluating data
1.The values can be individually displayed on top of each other,next to each other or in a system of coordinates. The selection is made via the symbols (1)
2.The control symbols (2) (Enlarge, Reduce, Jump, etc.) are intuitively comprehensible and supported by context menus.
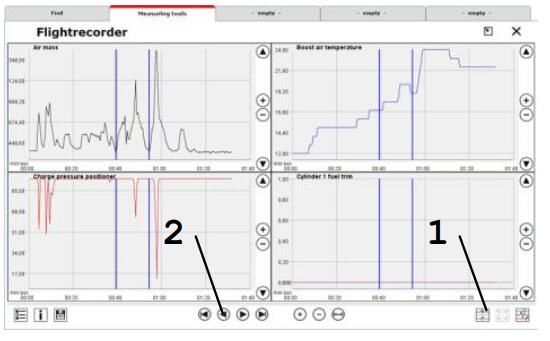
3.The control symbols in the bottom left corner of the window serve to:
save the recording in the customer memory module ![]()
display the data descriptions 
reselect the selected values 

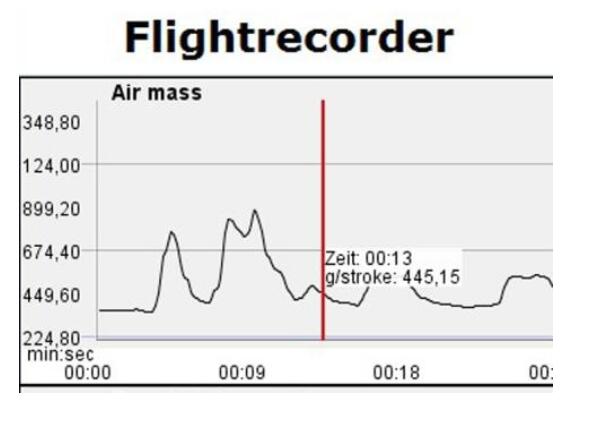
Trigger points
As already mentioned, during data recording you can set markings/highlightings in the form of trigger points in the data. In this way you create the “blue” vertical marking lines in the data display (1). These markings are set simultaneously in all the data lists so as to ensure that the event moment in all the data is comprehensible and retraceable.
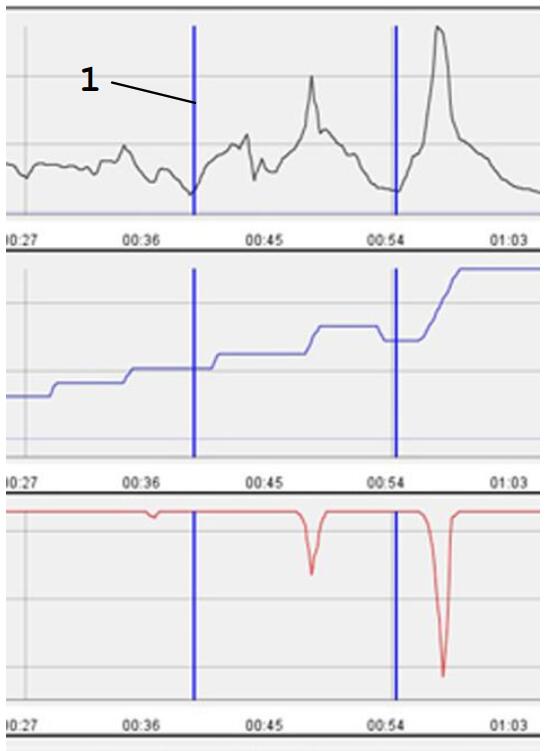
Click once with the left mouse button to create a vertical “red” line in the graphical representation. The created “event horizon” can be moved and reflects the current measured values. The event horizon is simultaneously displayed in all the graphs, regardless of which form
of data representation has been selected. This ensures that the data are comparable.
Click once with the right mouse button in the graphical representation to make the line disappear again.