This instruction show you guide on how to remove and install cylinder head for MTU 12-16V 4000 diesel engine.
Related Contents:
2022 MTU DiaSys 2.74 2.72 Engine Diagnostic Software Free Download
MTU Diagnostic Tool USB-to-CAN with MTU Diasys 2.73
Procedures:
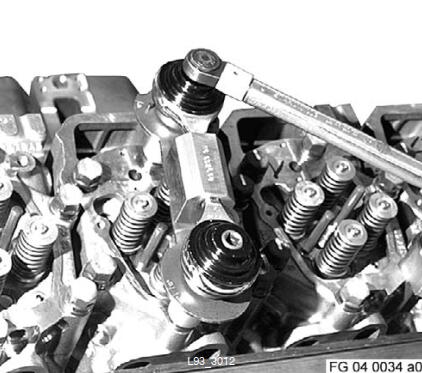
Removing cylinder head
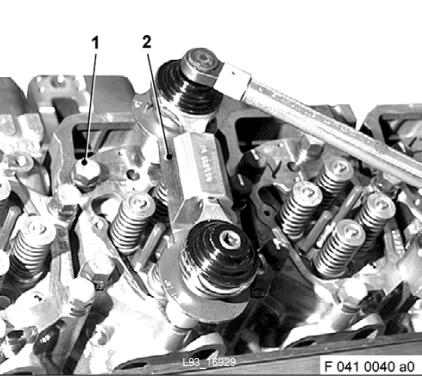
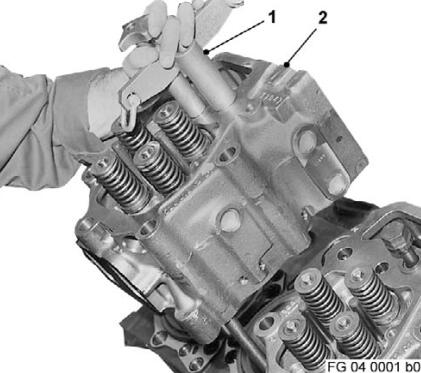
Using a large ratchet or power assist (2), remove hex screws (1) evenly.
Before removing cylinder head, seal oil supply line to valve gear in crankcase as follows:
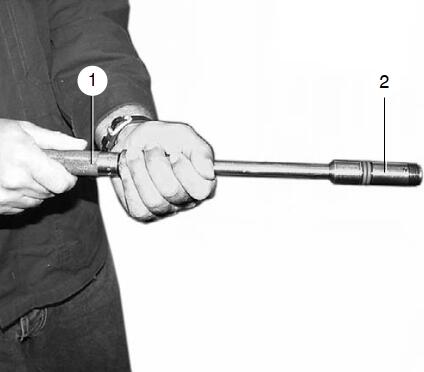
Fit blanking plugs (2) on installation/removal tool and lock slightly in position with the retaining grip (1).
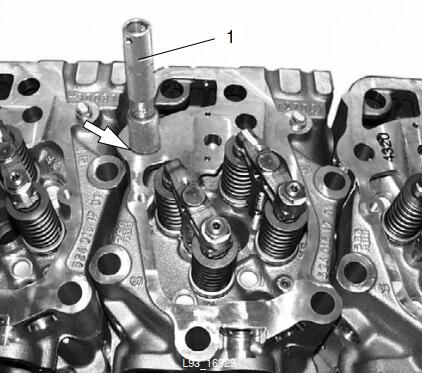
Screw blanking plugs with installation/removal tool (1) into oil supply line (arrow) in crankcase (
10 o’clock position) and spread.
Unscrew installation/removal tool from blanking plug and remove.
Caution:Components have sharp edges.
Handle components only when wearing protective gloves.
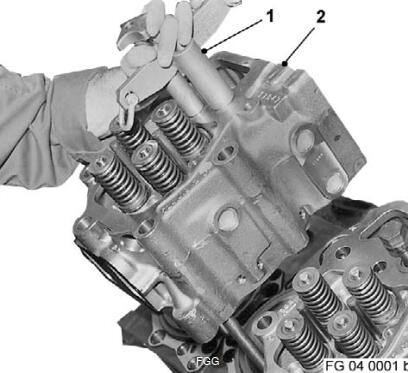
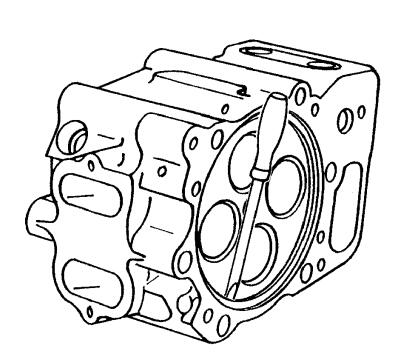
Using the lifting device (1), lift the cylinder head (2) out of the crankcase and place it on a suitable base.
Note: With injector installed, place cylinder head to the side. Injector protrudes at bottom of cylinder head.
Remove cylinder head gasket from crankcase mating face.
Remove blanking plug from oil supply bore for valve gear.
Using a screwdriver, carefully lever sealing ring (1) out of cylinder head lower section.
Install cylinder head
Note: Prior to installation, remove all plugs and ensure oil bores are perfectly clean.
Check that cylinder head mating face and crankcase partition surface are in perfect condition. Wipe and clean as necessary.
Note: Always use new cylinder head gaskets.
Fit cylinder head gasket (1).
Install adjusting mandrel (2) for positioning cylinder head gasket and cylinder head in crankcase.

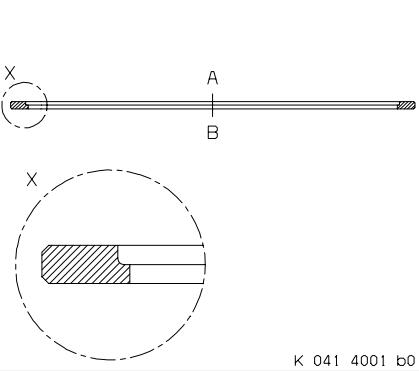
To improve clamping effect of sealing ring in cylinder head, tap sealing ring with a plastic mallet to produce a slight oval shape.
Insert sealing ring in groove on combustion chamber side of cylinder head.MTU Engine USB to CAN diagnostic adapter

Ensure that sealing ring is fitted correctly:
A = Cylinder head side
B = Piston side
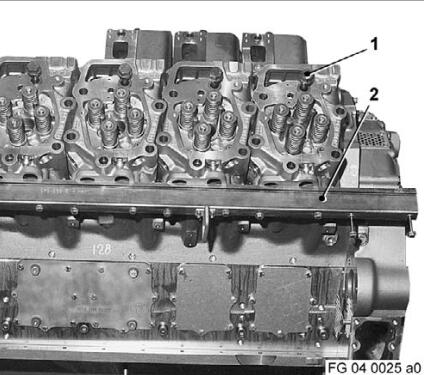
Using lifting equipment (1), install cylinder head (2) on crankcase.
Coat thread, head and shaft of cylinder head screws (1) with engine oil.
Ensure correct allocation of cylinder head screws (engine lifting eye)
Install cylinder head screws with thrust washers manually in crankcase.
Fit alignment tool (2) on inlets of cylinder heads and tighten.
Attention: Carry out cylinder head alignment carefully, otherwise deformation and cracks may result in exhaust and intake pipework.
Tighten cylinder head screws in steps to specified pretightening torque in accordance with the tightening sequence
Mark screw heads.
Using a large ratchet or power amplifier, tighten cylinder head screws to angle of rotation in specified sequence as per tightening specifications.
Remove alignment tool.
More repair case for MTU engine,please refer to:MTU Engine Trouble Repair