This instruction show you how to use MUT-III driver recorder function to record the data.For more topics about MUT-III,please refer to:MUT-III Projects
Preparations:
2021 MUT-3 MUT-III Mitsubishi Diagnostic Software Free Download
MUT-III ECU Rewrite ROM Data from 2009 to 2021
Recording
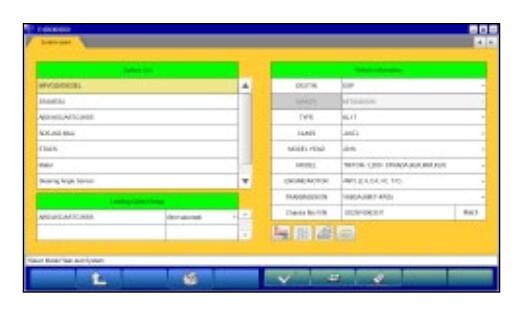
1.Select a system for which the drive recorder is to be used on the System Selection screen.
-The following explanation describes how to set the drive recorder settings of the MPI/GDI/DIESEL system as a representative example.
Click button after selecting vehicle information and MPI/GDI/Diesel.
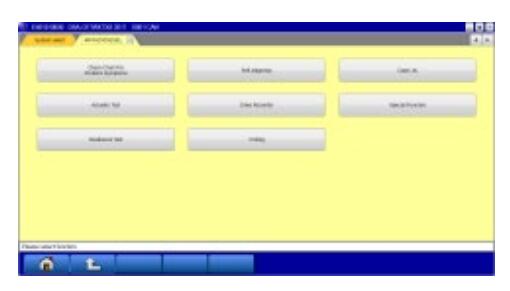
2.Selection of function.
Click Drive Recorder button.
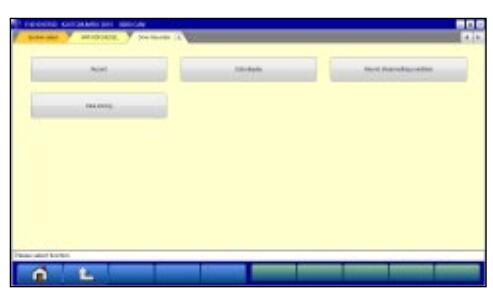
3.Drive Recorder Function Select
Click Record button on the Drive Recorder function menu.
Note:Data display — Displays the recorded data.
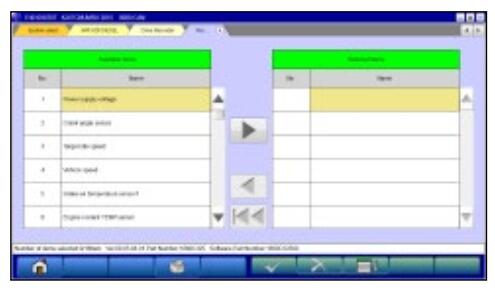
4.Item Select
The Item list is shown. Select an item you want to record,click button.
— Inserts the item selected in “Available items list” into the selected area of “Selected items list”.
— Inserts the item selected in “Selected items list” into the lowermost area of “Available items list”.
— Inserts all the items from “Selected items list” into the lowermost areas of “Available items list”.
— Changes the order in which the items are displayed in “Selected items list” and “Available items list”, in the sequence of default setting
Note:
• A maximum of 16 items can be recorded.
• It is possible even to use drag and drop of an item name.
• It can select multiple items simultaneously when you click
an item while pressing Ctrl key or Shift key.
| Ctrl key Shift key |
:Select the items clicked :From the item selected just before till the item clicked finally |
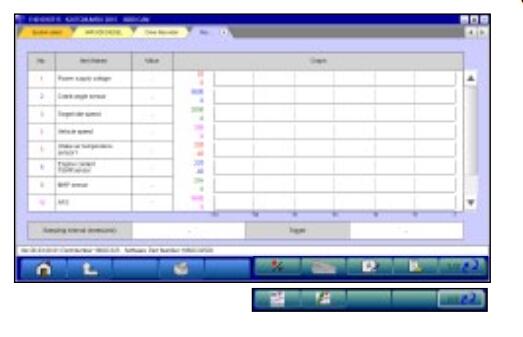
5.Start the Record
Set the condition and start the record.
— Start the record in accordance with the setting.
— Manual Trigger occurs.
— Enter the record information (memorandum)–to (6)
— Set the condition. — to (7)
— Apply the trigger when the specific diagnostic code is generated. — to (8)
— Apply the trigger when the condition meets the set threshold.– to (9)
— Switch of the individual function button (View 1/2)
— Switch of the individual function button (View 2/2)
6.Enter the record information (memo)
Input recorded information (memo) within 50 characters for your reference after recording, click button.

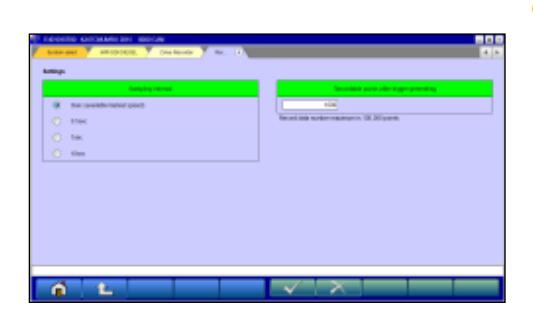
7.Set the Record condition
• The sampling interval time indicates the data-recording interval for one item. Possible to select one of the intervals in 0sec(Fastest)/0.5sec/1sec/10sec.
• Possible to set the number of point to be able to record after the trigger occurred.
(The actual interval in the case of 0sec(Fastest) is approximately 20msec in CAN communication although it varies according to conditions such as the processing of record items. The amount of data available is up to 100,000 points, then possible to record for approximately 30min. (about 20msec x 100,000) under the condition of the fastest interval.
8Diagnosis Code Trigger – Item Select When click button in (5) Start the Record screen, the left screen appears. Select an item to be the trigger and click button.
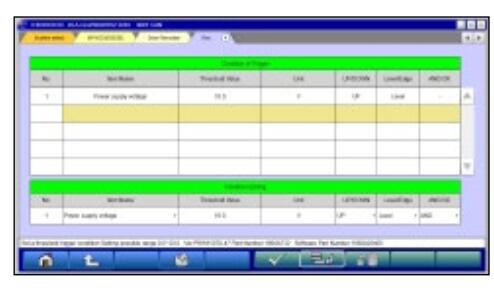
9.Set the Threshold Trigger
• When click button in (5) Start the Record screen, the left screen appears.
• Select an item and edit conditions in Condition Editing table appearing at the bottom of the screen, first.
Condition Editing table
“UP/DOWN”: Threshold or higher / Threshold or lower “Level/Edge”: Matching data / Data as of the time when it turns to be matching from not matching
“AND/OR”:-Data matching with both of this condition and the other one upper row on Condition of Trigger table /-Data matching with either of this condition or the other one upper row on Condition of Trigger table
- Then, click button to set the condition into selectedarea of Condition of Trigger table.(Condition of Trigger table can include up to 8 conditions.)
• When completed the setting, click button.
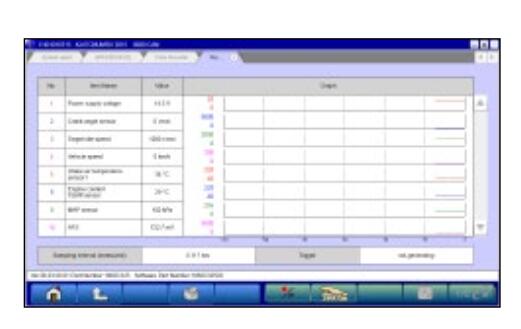
10.Recording Data Screen
• Click button in (5), it saves the items with the record condition in the file, showing maximum 8 items at the same time on the graph. Even the items that are not displayed are recorded as well.
— Data record end — to (11)
— Manual Trigger occurs
Note:
• Record is continued until button is clicked, even if trigger occurs.
• A red solid line on the graph shows a trigger point.
• The actual measurement of the sampling interval is shown to the screen lower left.
• The availability of the hard disk of the PC is checked after record screen display and before record start. When the availability is 100MB or less, a message is displayed and record is stopped.
• When the number of point after the trigger would reach to ones set in (7), the message appears and end the record.
• When an error occurs during data recording, the data has being recorded till then is saved if there might.
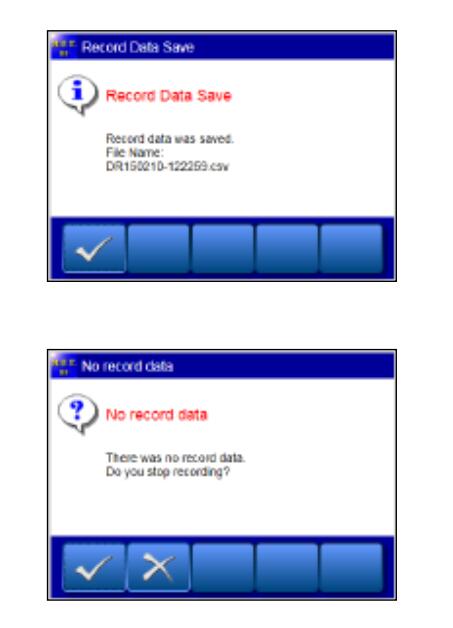
11 Save record data
Click button in (10), end the recording, save the data and a dialog mentioned completion of saving for the record data is shown.
— OK– to Drive Recorder Function Select menu
Note:
In case there is no record data, a dialog is displayed confirming whether to stop the recording.
— OK– to Drive Recorder Function Select menu (3)
— Cancel — to (10) to start recording again.