The motronic ECU’s are used in a lot of cars. This document may cover information that is the same for other motronic series. The motronic 1.7 has one 27C256 UV EPROM inside. It has a DIL28 package and is mounted in a socket, so removing it is easy.So this article show a guide on how to remap/flashing Bosch Motronic 1.7 ECU,hope it helps!
WinOLS Video+PDF Tutorial Download
Note:
All information and values given in this document may be used at own risk. I do not stand in for
any problems. Thanks to the members from www.ecuconnections.com I hope you enjoy it.
The rev limiter:
The rev limiter works by cutting the fuel off. When the rpm has dropped below the rev limit there will be applied fuel again to the engine. How much fuel is injected after a cut-off is regulated by the “deceleration injection after cut-off” map.
So we want to change rev limiter to 7100RPM. Open WinOLS and search for value 01 01 54.
When you found it deselect it. Skip one value and select next two and create map.
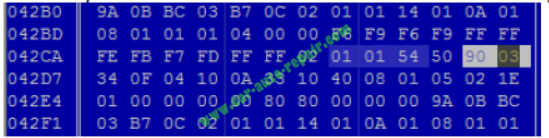
Calculation steps:
1) 90 03
2) 03 90
3) Convert to DEC = 912
4) 52200 – (912*50) = 6600
5) 52200-7100=45100
6) 45100/50=902
7) Convert to HEX = 03 86
8) 86 03
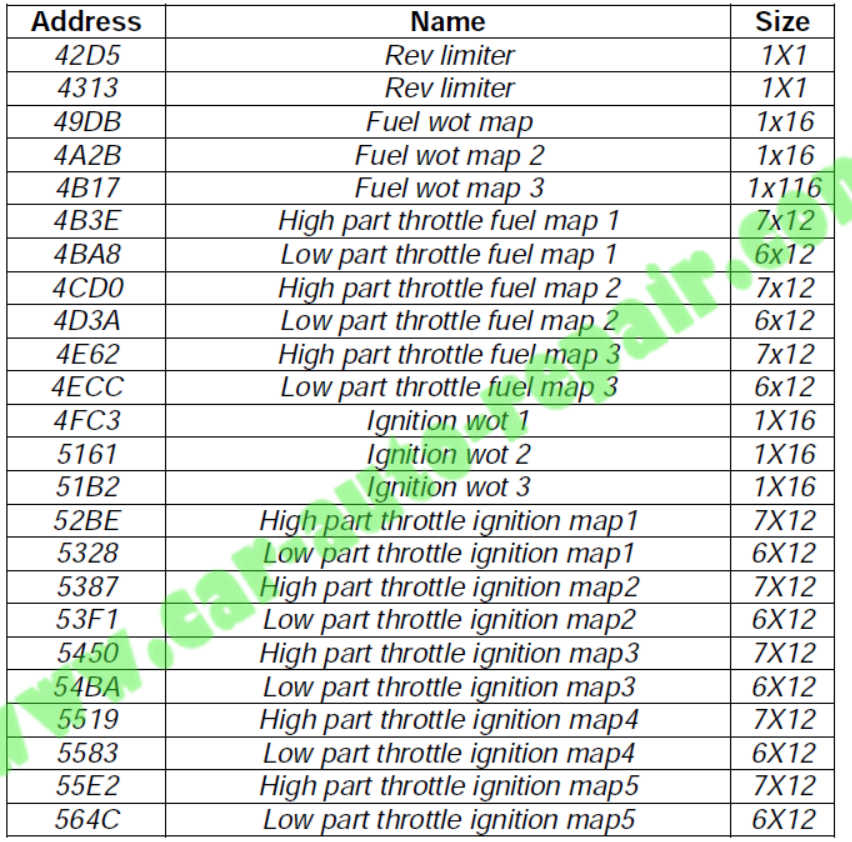
Injection maps
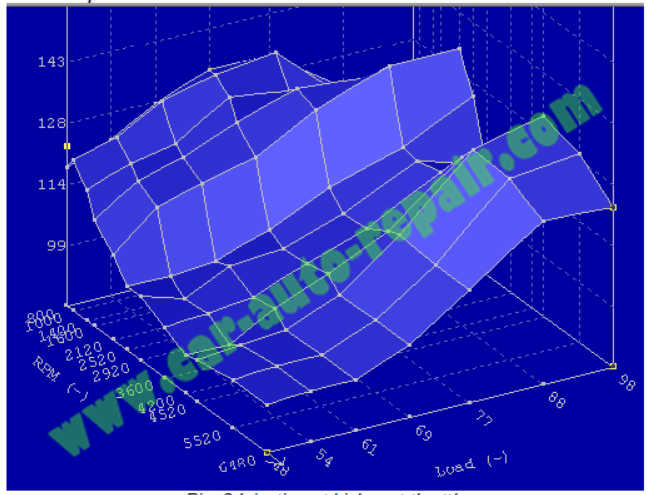
Injection at Part Throttle
In M1.7 are two tipes of maps: High part and low part throttle.
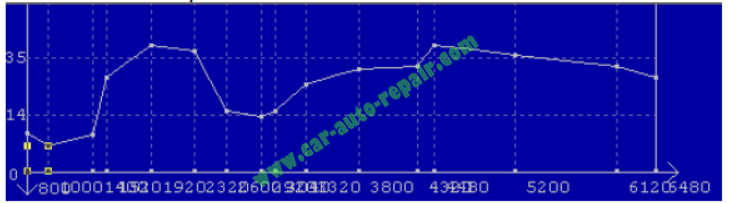
High part throttle is 7×12 map and looks like this
Low part throttle is 6×12 and looks like this
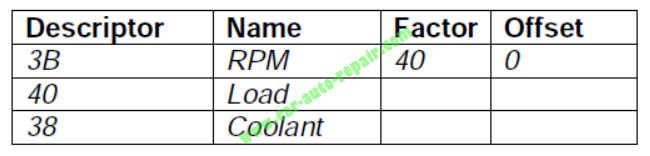
The factor for RPM is 40, and the offset 0. The injection map does not have absolute values in it. The values are the correction-values for the, by the ECU, calculated injection pulse length.
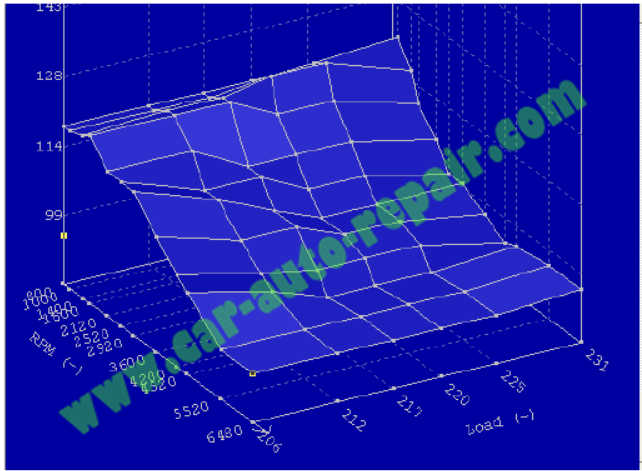
Injection at Wide Open Throttle
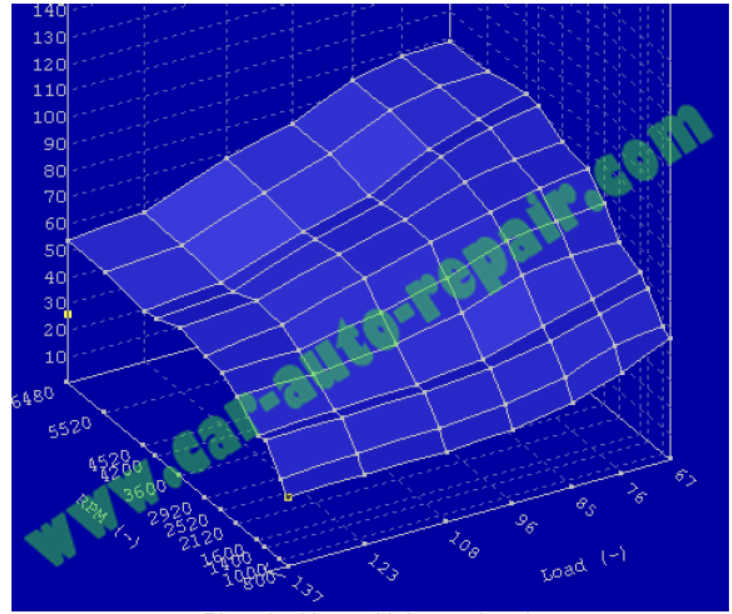
The Injection at WOT is a 1×16 map which looks like this
The factor for RPM is 40, and the offset 0. The injection map does not have absolute values in it. The values are the correction-values for the, by the ECU, calculated injection pulse length. Just like the closed and part throttle maps. To change this map in a good way you need a wideband lambda sensor (or a dyno) to achieve the proper Air Fuel Ratio (AFR).
Ignition at part throttle
Ignition at part throttle just like in injection at part throttle, is two maps: high part and low part throttle.
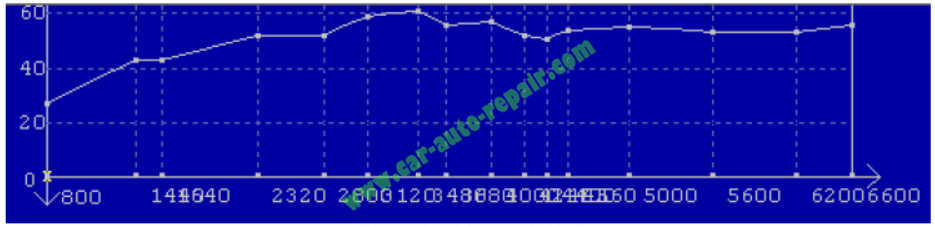
High part throttle is 7×12 and looks like this
Low part throttle map is 6×12 and looks like this
The factor for RPM is 40, and the offset 0. If you change this map I suggest adding not more than 10%
ignition advantage. Also in that case using fuel with the highest possible octane number is
recommended (95-101). When you “over tune” this map it will result in damage to the engine.
For proper tuning knock-detection equipment is needed.
Ignition at wide open throttle
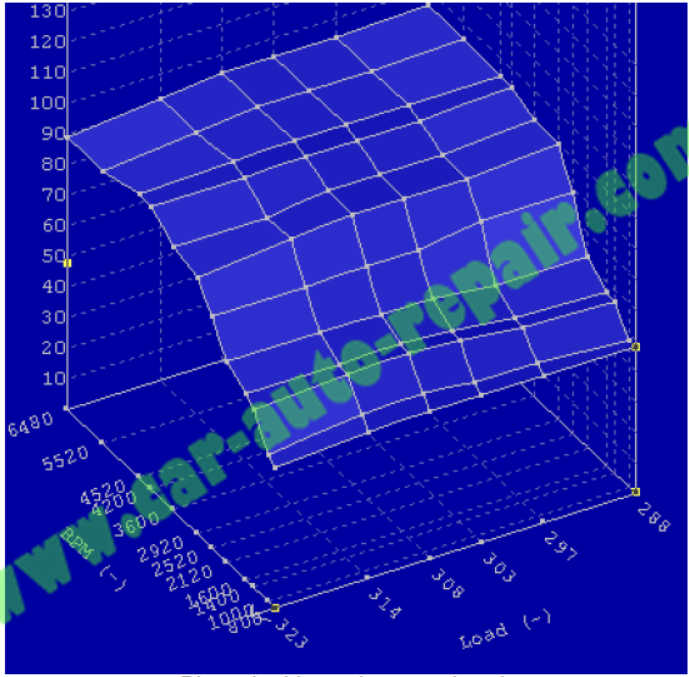
The Ignition at WOT is 1×16 and looks like this
The factor for RPM is 40, and the offset 0. If you change this map I suggest adding not more than 10% ignition advantage. Also in that case using fuel with the highest possible octane number is
recommended (95-101). When you “over tune” this map it will result in damage to the engine.
For proper tuning knock-detection equipment is needed.
Goodies for the 175 computer owner
Since I wrote this file using the 175 computer from a BMW e30 318is with software
214 I found almost all usefull maps. Here they are:
Checksum correction
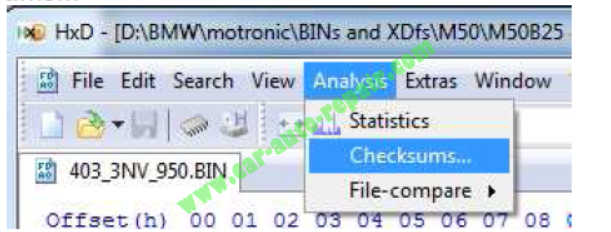
Before writing the bin file into the chip you need to correct the checksum. For this procedure you need
hex editor. You can download one from http://mh-nexus.de/en/hxd/
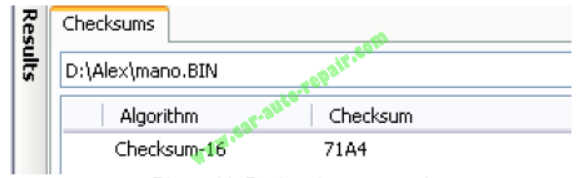
Open HxD and load your original bin file.
Now press Analysis> Checksums…
Choose Checksum-16 and press OK
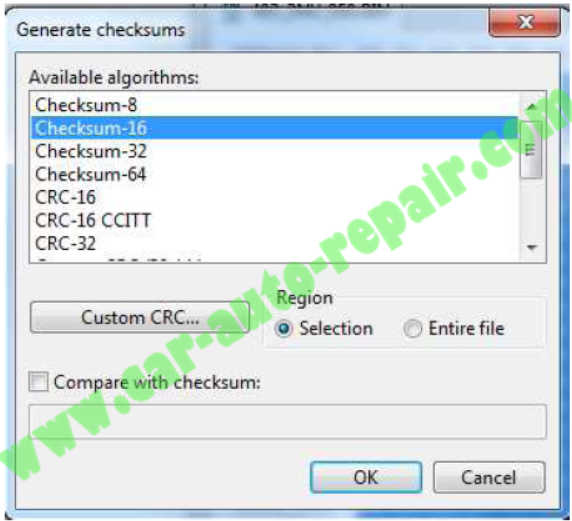
Check out the result
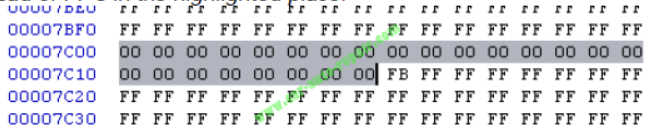
Now load your tuned file and do the same
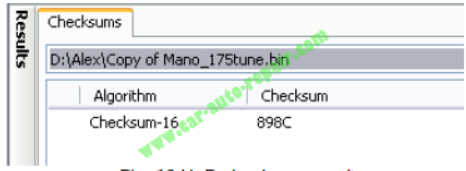
My original file has 71A4 checksum and my tuned file has 898C checksum. Tuned file’s checksum must mach to original file’s checksum. So we need correct it. Open your calculator and set on scientific and on hex
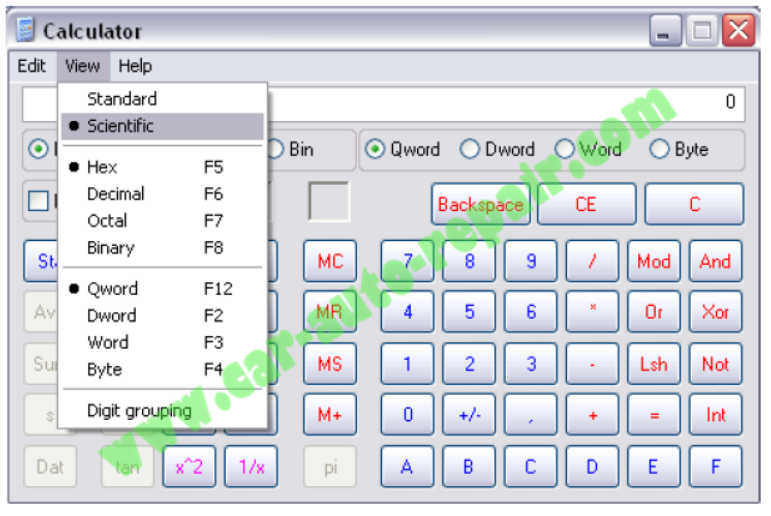
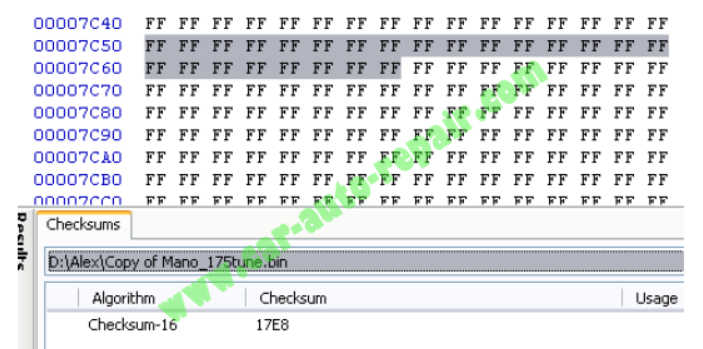
You need to calculate the difernce between those two checksums. 898C-71A4=17E8
Go in WinOLS. Correction must be done in darker places with FF’s
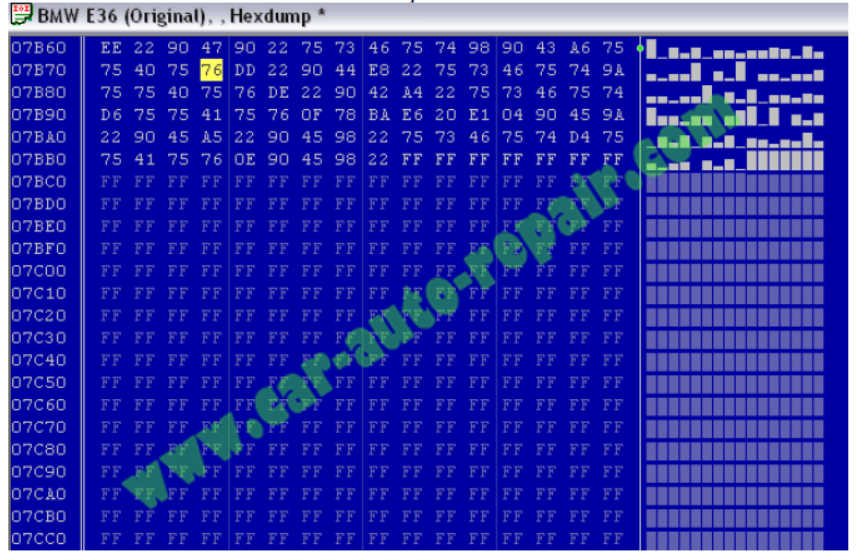
Now when you know where correction must be done, go into HxD. Highlight FF’s and do the checksum till you get right value 17E8
How to Make Checksums for ECU Files with WinOLS
Now write 00’s instead of FF’s in the highlighted place.
Now do the checksum again
If it is a match to original the you are done! You can write the file into the chip now.
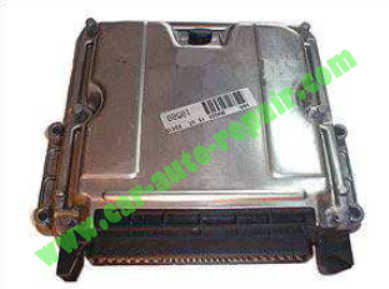
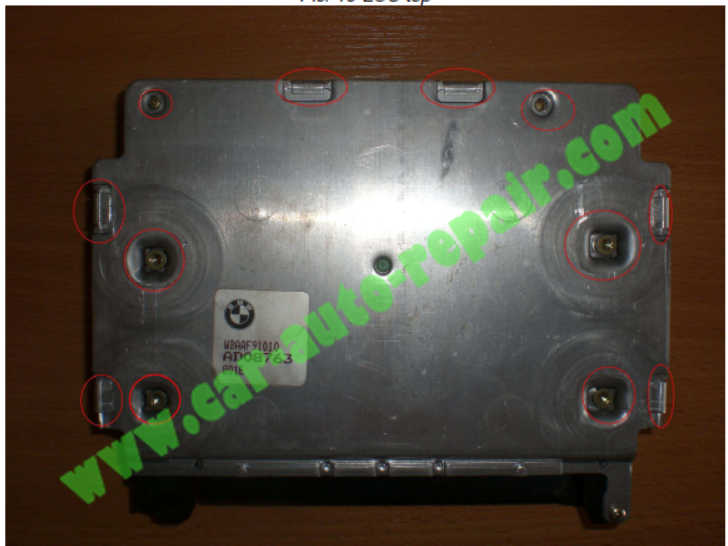
Chip installing
When you wrote the bin into the chip you can install it know.
Unscrew the marked screws and bend the marked metal.
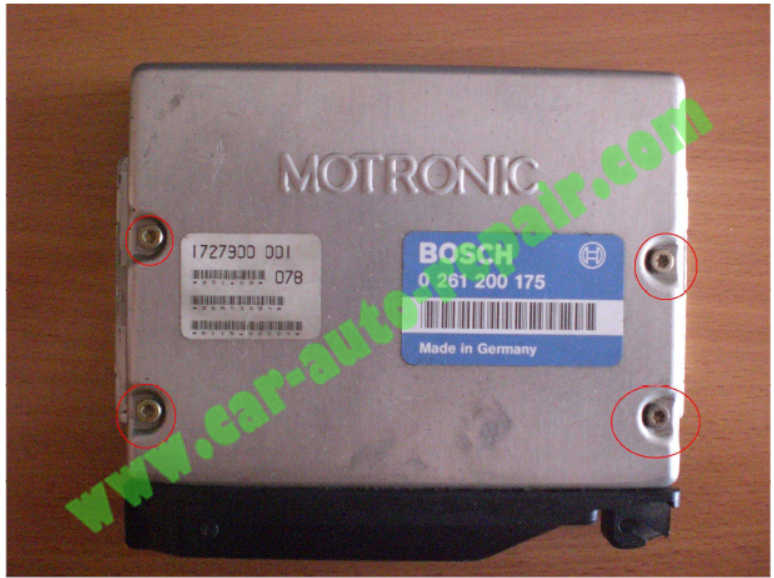
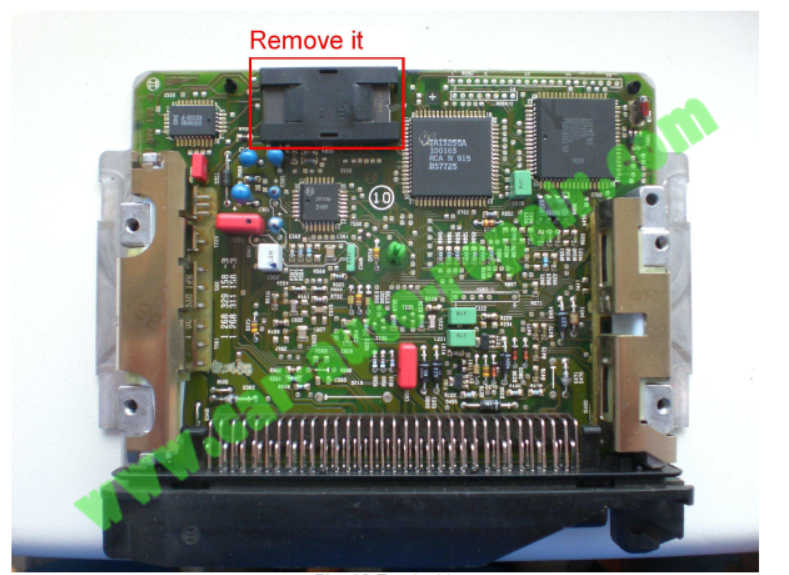
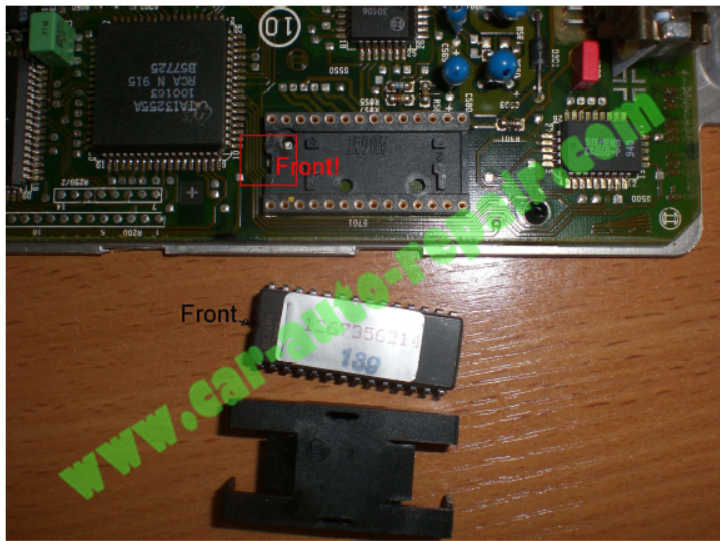
Open the case. You will see the black (not always black) plastic cover. Remove it and you will see the chip
Carefully remove it and install yours.
Done!