This instruction show you guide on how to solve Perkins 1106 electric power generation can not reach top engine RPM.If this fault occurs only under load, refer to Troubleshooting, “Low Power”
Related Contents:
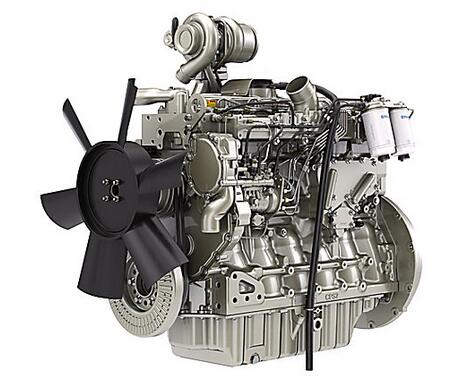
Perkins EST 2024A & 2023A & 2019A Software Free Download
Perkins SPI2 2018A EPC+Service Manual Free Download
Probable Causes
• Diagnostic codes
• ECM parameters
• Signal for the Speed demand input
• Air intake and exhaust system
• Valve lash
• Turbocharger
• Fuel supply
• Low compression (cylinder pressure)
• Individual malfunctioning cylinders
• Electronic unit injectors
Recommended Actions
Diagnostic Codes
Check for active diagnostic codes on the electronic service tool. Troubleshoot any active codes before continuing with this procedure.
ECM Parameters
1.Ensure that the fault is not an incorrectly programmed parameter.
2.Ensure that the correct mode was selected by using the electronic service tool.
3.Use the electronic service tool to verify the correct engine rating for the engine.
4.Use the electronic service tool to verify the maximum engine speed limit.
5.Use the electronic service tool to reset the parameters to the OEM specifications.
6.Ensure that the repairs have eliminated the poor performance.
If the repairs have not eliminated the faults proceed to “Throttle Signal for the Speed Demand Input”.
Signal for the Speed Demand Input
1.Use the electronic service tool and observe the signal for the speed demand input.
2.If the signal is erratic, refer to Troubleshooting,“Speed Control (Analog) – Test” or refer to
Troubleshooting, “Speed Control (Digital) – Test”.
3.If the fault has not been eliminated, proceed to “Air Intake and Exhaust System”.
Air Intake and Exhaust System
1.Check the air filter restriction indicator, if equipped.
2.Ensure that the air filter is clean and serviceable.
3.Check the air intake and the exhaust system for the following defects:
• Blockages
• Restrictions
• Damage to the air intake and exhaust lines and hoses
4.Make all necessary repairs to the engine.
5.Ensure that the repairs have eliminated the fault.
6.If the fault has not been eliminated, proceed to “Valve Lash”.
Valve Lash
1.Check the valve lash and reset the valve lash, if necessary. Refer to Systems Operation, Testing
and Adjusting, “Engine Valve Lash – Inspect and Adjust”.
2.If the repair does not eliminate the fault proceed to “Turbocharger”.
Turbocharger
Note: The turbocharger that is installed on this engine is a nonserviceable item. If any mechanical fault exists, except for the wastegate actuator, then the turbocharger must be replaced. The waste gate actuator can be replaced.
1.Ensure that the mounting bolts for the turbocharger are tight.
2.Check that the oil drain for the turbocharger is not blocked or restricted.
3.Check that the compressor housing for the turbocharger is free of dirt, debris and damage.
4.Check that the turbine housing for the turbocharger is free of dirt, debris and damage.
5.Check that the turbine blades rotate freely in the turbocharger.
6.Ensure that the wastegate on the turbocharger is adjusted correctly. Refer to Systems Operation,Testing and Adjusting, “Turbocharger – Inspect”.
If the wastegate actuator is faulty, replace the wastegate actuator. Refer to Disassembly and Assembly, “Turbocharger – Disassemble” and Disassembly and Assembly, “Turbocharger –
Assemble”.
7.If necessary, replace the turbocharger. Referto Disassembly and Assembly, “Turbocharger
– Remove” and Disassembly and Assembly,“Turbocharger – Install”.
8.Check that the repairs have eliminated the faults.
9.If the repairs have not eliminated the fault proceed to “Fuel Supply”.
Fuel Supply
1.Visually check the fuel tank for fuel. The fuel gauge may be faulty.
2.Ensure that the fuel supply valve is in the full OPEN position.
3.If the temperature is below 0 °C (32 °F), check for solidified fuel (wax).
4.Visually inspect the fuel supply lines for restrictions.
5.Check that the low pressure fuel lines are tight and secured properly.
6.Remove the fuel filters. Inspect the fuel filters for contamination. Install new fuel filters. Refer to the Operation and Maintenance Manual, “Fuel System Filter- Replace and Fuel System Primary Filter (Water Separator) Element – Replace”. Determine the cause of the contamination.
7. Check the diesel fuel for contamination. Refer to Systems Operation, Testing and Adjusting, “Fuel Quality – Test”.
8.Check for air in the low pressure fuel system. Refer to Systems Operation, Testing and Adjusting, “Air in Fuel – Test”.
9.Ensure that the fuel system has been primed.Refer to Systems Operation, Testing and Adjusting, “Fuel System – Prime”.
Check the fuel pressure. Refer to Systems
Operation, Testing and Adjusting, “Fuel System Pressure – Test”
Contact with high pressure fuel may cause fluid penetration and burn hazards. High pressure fuel spray may cause a fire hazard. Failure to follow these inspection, maintenance and service instructions may cause personal injury or death.
NOTICE
Contact with high pressure fuel may cause personal injury or death. Wait 60 seconds after the engine has stopped to allow fuel pressure to purge before any service or repair is performed on the engine fuel lines.
11 If the high pressure fuel lines have a leak, the high pressure fuel lines must be replaced. Refer to Disassembly and Assembly, “Fuel injection lines -Remove and Fuel injection lines – Install”.
12 If the repairs do not eliminate the fault, proceed to “Low Compression (Cylinder Pressure)”.
Low Compression (Cylinder Pressure)
1Perform a compression test. Refer to Systems Operation, Testing and Adjusting, “Compression
– Test ”.
2 If low compression is noted on any cylinders,investigate the cause and rectify the cause.
Possible causes of low compression are shown in the following list:
• Loose glow plugs
• Faulty piston
• Faulty piston rings
• Worn cylinder bores
• Worn valves
• Faulty cylinder head gasket
• Damaged cylinder head
3 Perform all necessary repairs.
4 Ensure that the repairs have eliminated the faults.
5 If the repair does not eliminate the fault refer to “Individual Malfunctioning Cylinders”.
Individual Malfunctioning Cylinders
1.With the engine speed at a fast idle, use the electronic service tool to isolate one cylinder at a time. Note if there is any reduction in engine speed. If a reduction in engine speed is not noted,
the isolated cylinder is not operating under normal conditions. If the isolation of a particular cylinder results in a reduction of engine speed that is less than normal, this may indicate that the cylinder is operating below normal performance. Investigate the cause of the fault on any cylinder that is not operating. Investigate the cause of the fault on any cylinder that is operating below normal performance.
2.If all cylinders have been checked and no faults were detected proceed to “Electronic Unit Injectors”.
Electronic Unit Injectors
1.With the engine speed at a fast idle, use the electronic service tool to isolate one cylinder at a time. Note if there is any reduction in engine speed. If a reduction in engine speed is not noted, the isolated electronic unit injector is not operating under normal conditions. If the isolation of a
particular cylinder results in a reduction of engine speed that is less than normal, this may indicate that the electronic unit injector is operating below normal performance.
2.Remove the electronic unit injector from the suspect cylinder. Refer to Disassembly and Assembly, “Electronic Unit Injector – Remove”.
3.Install a new electronic unit injector. Refer to Disassembly and Assembly, “Electronic Unit Injector – Install”.
4.Repeat the test in 1. If the fault is still apparent,remove the replacement electronic unit injector and install the original electronic unit injector.
Refer to Disassembly and Assembly, “Electronic Unit Injector – Remove” and Disassembly and Assembly, “Electronic Unit Injector – Install”.