ISUZU trucks exists in 2018, 2019 and 2020 model year FTR vehicles wholesaled before June 19, 2019FTR vehicles wholesaled before June 19, 2019.The jam nut for the steering stopper bolt on the left-front knuckle may loosen and allow the bolt to back away from the steering knuckle. This could result in an increase in the turning radius of the vehicle in left turns. A change in turning radius could make it difficult to make sharp turns. If the vehicle’s turning radius is increased, there is an increased risk of a crash.
Related Contents:
ISUZU US-IDSS II 2024 2019 Diagnostic Software Free Download
NOTE: It is not necessary to open a TAL case or generate a health report in order to submit a warranty claim.
Important: Dealers are to confirm vehicle eligibility prior to beginning repairs by using the Isuzu Vehicle Inquiry System (IVIS).
For dealers with involved vehicles, a report of involved vehicles containing the complete vehicle identification number has been or will be provided. Dealers will not have a report available if they have no involved vehicles currently assigned.
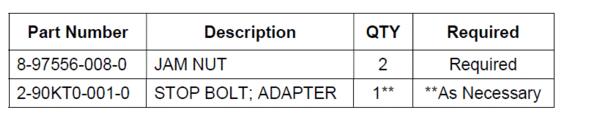
PARTS INFORMATION
An initial supply of jam nuts and Loctite® 263* was previously shipped to dealers. Additional jam nuts may be ordered from American Isuzu Parts Distribution Network (AIPDN). Please refer to your “involved vehicles listing” before ordering parts. Normal (non-emergency) orders should be placed on a Stock Order. In an emergency situation, parts should be ordered on a VOR (Vehicle Off Road) Order.
Additional Loctite® 263 may be sourced locally. One bottle of Loctite® is able to service approximately 40 vehicles.
Loctite® 263 should be utilized within thirty (30) days of first opening the container. Make sure to keep the cap on any time it is not actually being applied. Store in a cool, dry location out of direct sunlight.
SERVICE PROCEDURE
1.Apply the parking brake and block the rear wheels.
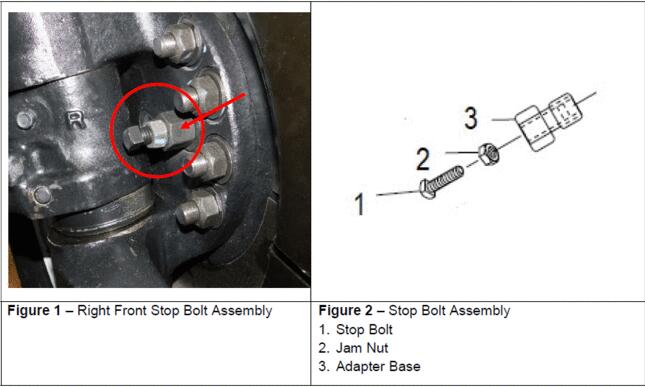
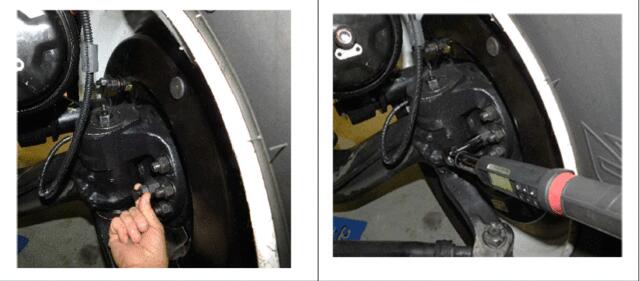
2.Start the engine and turn the steering wheel all the way to the left in order to access the right (passenger side) stop bolt. (See Figures 1 and 2.) Shut the engine off after turning the steering wheel.
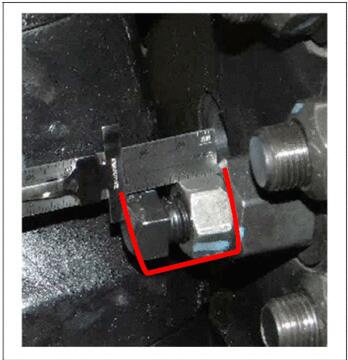
3.Use an engineer’s ruler to measure the distance that the stop bolt protrudes out from the adaptor base. (See Figure 3.) Record this measurement.
4.Use a 3/4” open end wrench to loosen the jam nut, then remove the stop bolt and jam nut from the adaptor base. Remove the jam nut from the stop bolt. Discard the jam nut.
5.Use a wire brush and brake cleaner to thoroughly clean the stop bolt threads. Using brake cleaner and a shop towel clean the inside threads of the adaptor base.
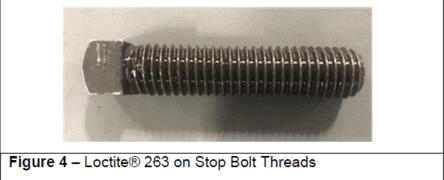
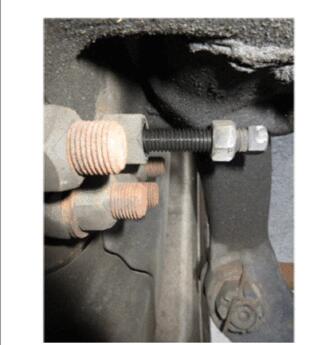
6.Apply Loctite® 263 to the entire length of the stop bolt threads. (See Figure 4.)
IMPORTANT:The Loctite® will start to set within 30 minutes.
7.Clean the new Grade 8 jam nut with brake cleaner and a clean shop towel, install it on the stop bolt and thread the stop bolt back into the adaptor base.
8.Slightly hand tighten the jam nut to the adaptor. (See Figure 5.) Adjust the stop bolt until it is the same distance from the adaptor base measured and recorded in Step 3 (use a 1/2” open end wrench as necessary). Using a 3/4” deep well socket and a torque wrench, tighten the jam nut to the specified torque. (See Figure 6.)
Tightening Torque: 128 N•m (94 lb ft).
9.Start the engine and turn the steering wheel all the way to the right in order to access the left (driver side) stop bolt. (See Figure 1.) Shut the engine off after turning the steering wheel.
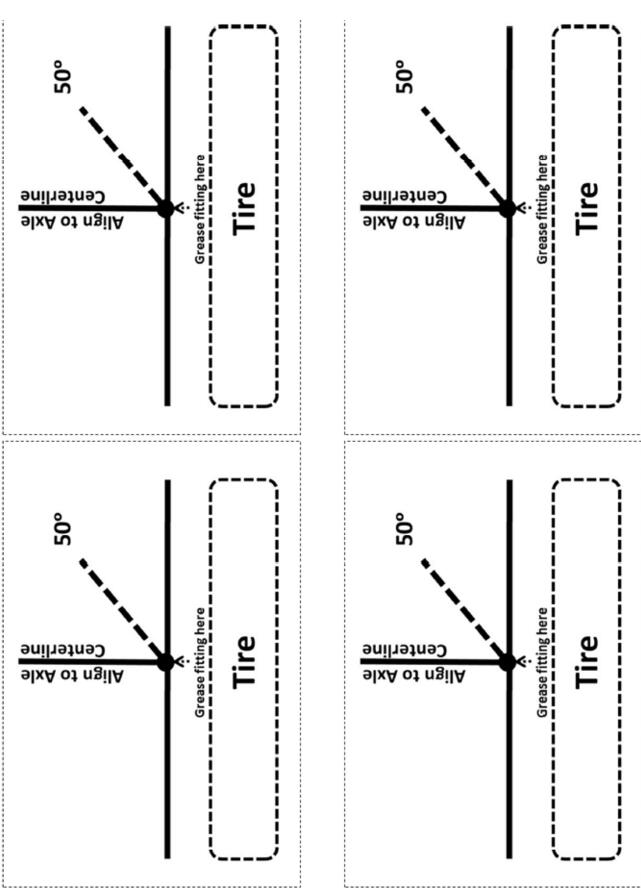
10.Inspect the stop bolt jam nut to determine whether (a) it is loose (i.e., if you can turn the stop bolt and jam nut by hand) or, worse, (b) the stop bolt has backed out of position, become bent or missing completely. See Figure 7. If the jam nut is loose or in any other worse condition, print the template on the next page for the steering bolt adjustment, and proceed directly to Step 11 in this procedure to replace the stop bolt adapter assembly. If the stop bolt and the jam nut are in place and tight, go to Step 3 and repeat this service procedure through Step 8 for the left (driver) side. Once both sides have been completed, proceed to Step 26.
Print the template for the steering bolt adjustment. Cut out one template for use. The remaining templates may be used on future applications.
TEMPLATE FOR STEERING BOLT ADJUSTMENT
11.Per the instructions in the applicable Work Shop Manual (WSM), safely tilt the cab and install the safety lock pin.
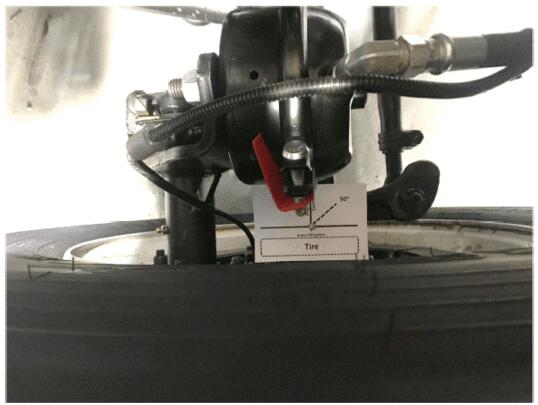
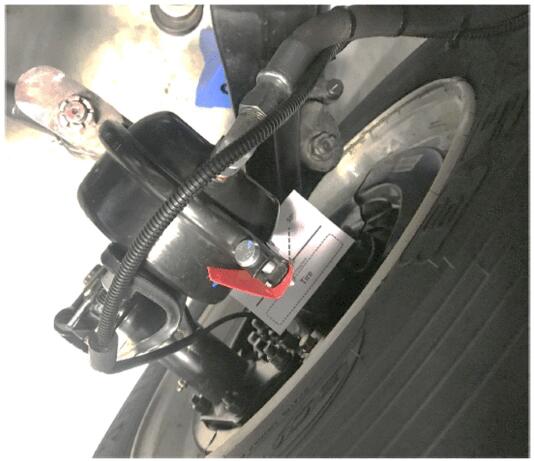
12.Press the template over the left (driver side) upper kingpin grease fitting at the mark indicated. Orientate the template as shown in Figure 8. Make sure the area on the template marked “Tire” is parallel with the tire as shown.
13.Start the engine and turn the steering wheel in order to access the left (driver side) stop bolt assembly. Turn off the engine.
14.Remove the stop bolt assembly using a 1” deep well socket. Discard the old stop bolt assembly.
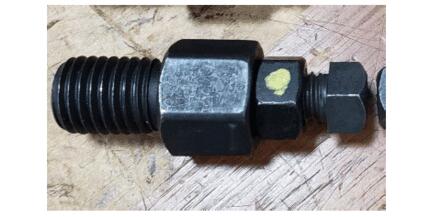
15.Disassemble the new stop bolt assembly. The new stop bolt assembly (Part No. 2-90KT0- 001-0) has been fitted with a new Grade 8 nut as indicated with a paint mark. (See Figure 9).
16Disassemble and clean the new adaptor, stop bolt, and jam nut with brake cleaner. Wipe dry with a clean shop towel or rag.
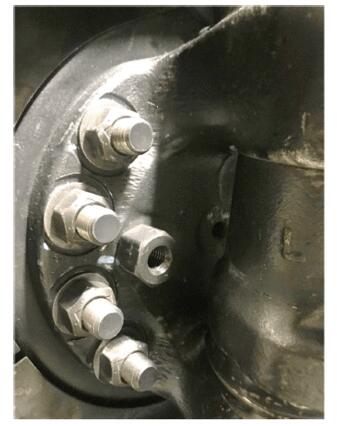
17.Install the new stop bolt assembly adaptor base (without the stop bolt or jam nut) using a 1” deep well socket. (See Figure 10.) Tighten the adaptor to the specified torque.
Tightening Torque: 133 N•m (98 lb ft).
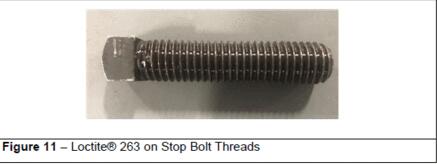
18.Apply Loctite® 263 to the entire length of the new stop bolt threads. (See Figure 11.)
IMPORTANT:The Loctite® will start to set within 30 minutes of application. Complete all the adjustment and torqueing procedures immediately.
19.Install a new jam nut all the way onto the stop bolt.
20.Thread the stop bolt all the way into the adaptor that was installed in Step 18. Only tighten hand tight.
21.Start the engine and turn the steering wheel in the opposite direction of the wheel/stop bolt being replaced. Continue to turn the steering wheel until the template installed in Step 12 is the same as in Figure 12. The 50° dashed line on the template should align parallel with the casting mark through the center of the axle.
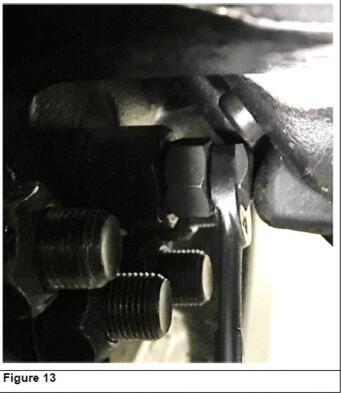
22.Using a 1/2” open-end wrench, adjust the stop bolt until the stop bolt contacts firmly against the axle bolt stop. (See Figure 13.) Ensure the template is still in the position.
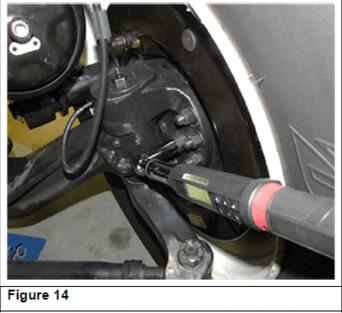
23.Tighten the stop bolt jam nut with a 3/4” open-end wrench. Have a second person start the engine and turn the steering wheel in the opposite direction to access the steering stop. Turn off the engine. Use a 3/4” deep well socket and a torque wrench to tighten the stop bolt jam nut to the specified torque. (See Figure 14.)
Tightening Torque: 128 N•m (94 lb ft).
24.Remove the template from the kingpin grease fitting and discard.
25.Per the instructions in the applicable WSM, remove and properly stow the safety lock pin and tilt the cab back down. Ensure the cab is locked into place.
IMPORTANT: Allow the Loctite® 263 to dry for at least two (2) hours before delivering or returning the vehicle to the customer.
26.Proceed to Applying the Campaign Label.
APPLYING THE CAMPAIGN LABEL
27.Using a ball-point pen, fill in a campaign label (Part No. 2-90028-700-0) with Campaign Number 19V-467 (US) or 2019-306 (Canada), Isuzu dealer code, and repair date.
28.Affix the campaign label onto the driver’s side B-pillar.
If you need more repair case for ISUZU,please go to:ISUZU Truck Repair