Many Audi and Seat locks from 2002 use a 9 cut lock. The 9th cut is a generic cut, so the same in every lock. All cut to code machines have the facility to cut this 9th cut automatically if selected.Locksmith Knowledge on VAG HU66 Gen 1,2,3 Lock
This doesn’t pose any problems to the Lishi user when picking and decoding the lock, as the decode will give you the 8 key cuts, and the cut to code machine adds the 9th generic cut for you.
Where this can cause problems is when you just need to pick the car open. The lock will pick open simply, but the locks will not be disengaged!
So you have picked the lock, the plug turns, but the door is not open.
This is common – simply relax tension and start resetting the lock. Turn it back almost to the reset position, and then turn in the opening direction again. Sometimes you need to repeat this 2 or 3 times, but the lock always opens and can be decoded for this key generation still.
NOTE: This is most common on Audi locks.
Useful check and procedure to make with all VAG locks prior to picking
What is common with all VAG locks,especially models equipped with remote keys and smart pod keys is that the lock seizes up as it is not being used. 2 different types of seized lock are commonly seen even on later models and these include:
Seized Wafers
This is probably the most common of the seized lock issues. This issue will present itself in 1 of 2 ways, and in some cases, both can occur. The first sign is you struggle to fully insert the pick into the lock, which is caused by 1 or more wafers sitting seized and out of their conventional position. The other common give away is rock solid or stiff wafers that don’t want to move and return freely and smoothly, when there is no tension applied to the plug.
The solution is simple – flush the lock with plenty of lubricant a few times and rake the wafers with a hand rake or inner groove tool for a short while. The gentle raking and lubricant in most cases will free up the wafers to allow a smooth picking and accurate decoding process to be performed without any issue – and with the added bonus of servicing the lock for the customer!
Seized Plugs
This is less common than seized wafers, but still a common enough situation for the technician to encounter. Here is an example of a job which encountered seized plugs: ‘recently I was called to a 2011 Audi A5 using the pod key and bypass lock. A recovery operator had attended the job and had given up after 90 minutes with no success. The customer had a spare key pod and bypass key but the remote was dead even after changing the battery – the bypass key would not turn the lock at all. The customer had never tried the spare key; the recovery operator had tried to pick the lock but could not get any wafers to bind. After 90 minutes the recovery operator diagnosed that the lock was faulty and the spare key was for a different car – which is not uncommon in cars purchased second hand – he was told to use a locksmith.
On arrival to the job and after getting the story from the customer on the recovery operator’s findings, I checked the lock by inserting a Lishi tool and applying tension and then checked for binding wafers. All the wafers moved freely and none were binding to pick. The plug would not move at all – which instantly gave away that the plug was seized. A seized plug would not only stop wafers from binding for picking, but would also stop the correct key from turning the plug. So, the job was simple – I flushed the lock and the plug with lubricant, and then inserted the customer’s spare bypass key, using some force I turned the key and opened the door.
I then flushed the lock again until it was moving freely on the key and put the spare key pod in the slot which resynched the remote pod key – so I used this to pop the boot open.’
All plugs should have a slight clockwise and anti-clockwise movement with your tool or key, if not then it’s likely it’s seized. The giveaway signs for a seized plug are: no plug movement or no binding wafers at all when tension is applied with Lishi tools.
The fix is simple:
1) Use plenty of lubricant to flush the lock and the plug.
2) Use the Lishi tool fully inserted or a cut down key blank to apply heavy tension left and right to free the plug
These are simple and common issues yet still catch many out. Although simple they can mean the difference between the success and failure of a job.
Picking and decoding the generation 1 lock using the Lishi single lifter 2in1
The generation 1 lock as we know follows a strict 1 up and 1 down wafer configuration.
The lock also has a preferred picking sequence, which is dependent upon whether you are picking the lock clockwise or anti clockwise.
The tools blades are all made to a number 4 cut height, so as soon as the tool is inserted into the lock, all number 4 cuts in the lock will be instantly set. So if all cuts were 4s in the lock, the tool would insert and open instantly.
NOTE: I mentioned all 4 positions will be set, but not all lowest cut number 4 wafers will slap tightly when set. Sometimes a stiff movement is felt, which is why we must follow the rule of:
If the wafer moves at all then leave it alone!
Clockwise
If picking in the clockwise direction then the lock follows a picking sequence of:
Pick positions 1, 3, 5, and 7 first in whatever order these decide to bind until fully set. You will know when they are fully set as the plug will seem to turn a few mm – you can also confirm by feeling for a tight slap in each of these positions. Once set we then pick positions 2, 4, 6 and 8 again in which ever order these decide to bind, once set the lock will open.
Anti-clockwise
If we were picking the lock anti clockwise, then we will simply need to reverse the sequence, so we would:
Pick positions 2, 4, 6 and 8 first in which ever order these decide to bind first until all are set. We would then pick positions 1, 3, 5 and 7 in which ever order they decide to bind until the lock is open.
The generation 1 lock responds best to a firm medium tension. On left hand drive vehicles picks anti-clockwise and on UK right hand drive vehicles it picks open clockwise.
Initially we need to fully insert the tool into the lock, then move the lifter to position 1 and find the spring wafer in this position.
We then check the location of the spring wafer in position 2 to ensure it’s a gen 1 lock. If the wafers are in 1 on bottom and 2 on top or vice versa then it’s a gen 1 lock, if the wafers are felt in 1 bottom and 2 bottom, or 1 top and 2 top then it’s a gen 2 lock.
So having confirmed it’s a gen 1 lock, we position the indicator on position 1 and ensuring we have the tool fully inserted, apply a firm medium tension and maintain this tension.
Now move the indicator across positions 1, 3, 5 and 7, tickling each position in turn.
We are feeling for a solid binding wafer.
REMEMBER IF THE WAFER MOVES AT ALL THEN LEAVE IT ALONE!
Each time we find a solid wafer we need to pick it by lifting or depressing the lifter by 1mm or so. If the solid wafer remains solid we must lift another 1mm until a tight slapping movement is felt, this indicates a set wafer. Once all solid wafers in positions 1, 3, 5 and 7 are set and slapping, you will feel the plug turn a few mm – this confirms all wafers on this side of the lock are picked.
Once the plug moves a few mm and each of positions 1, 3, 5 and 7 are slapping, we turn our picking attention to positions 2, 4, 6 and 8. Maintaining our firm medium tension we follow the same process of tickling positions 2, 4, 6 and 8 to find the solid wafers in their binding order – once all solid wafers are picked and set, the lock will open.
Once open, we hold the lock in position via the tension arm and run the decode whilst the lock is in the open position.
With the single lifter tool we take our decode reading in the opposite direction of what we picked in. So in position 1, if we picked the wafer downwards on the bottom half of the grid, we take our decode reading by lifting the lifters indicator up the 1 line, upwards on the top half of grid – so the opposite direction to picking.
We gently push the indicator up or down the position lines 1 to 8 in the opposite direction to which we picked. It is essential we push gently but fully to the stop position. The indicator will stop on one of the horizontal lines numbered 1 to 4. If it rests on a number 1 line then it’s a number 1 key cut, if it comes to rest on a number 3 line then it’s a number 3 cut on the key.
We read each position in turn and write down the reading. When all positions are read, we enter the key cuts into our machine and simply cut the correct key.
Picking the gen 2 lock
As we know the only difference between the gen 1 and gen 2 lock is the wafer configuration being 2 up and 2 down – this changes the preferred picking sequence we must follow.
Clockwise direction
In a clockwise direction of picking we must first pick and set positions: 1, 5, 8 and 4 in whatever order these bind solid first. Once picked the plug will turn approximately 2mm and each position
will slap tightly, we are then ready to pick positions 2, 6, 7 and 3 in whatever order they bind solid until the lock opens.
Anti-clockwise direction
If picking in an anti-clockwise direction we must reverse this. We would begin by picking positions 2, 6, 7 and 3 first until these are set, then picking positions 1, 5, 8 and 4 until the lock opens.
Again, as we are using a single lifter tool, whilst holding the lock in the open position we read each position in turn in the opposite direction to which we picked the lock.
Write down each reading and insert into your cut to code machine to cut an accurate key.
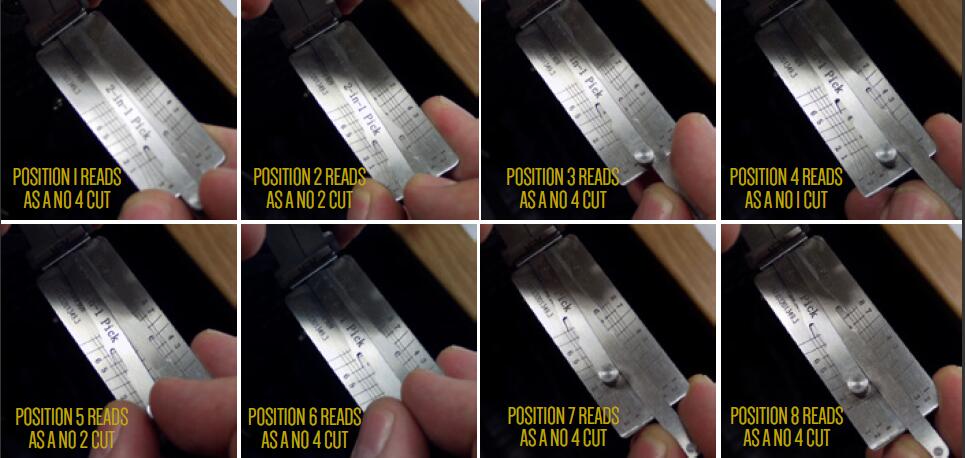
Picture how to guide: pick and decode of a gen 2 lock using the single lifter 2in1
We begin by inserting the tool fully into the lock and checking the wafer positions to ensure a gen 2 lock configuration of 2 up 2 down:
Begin by fully inserting the tool and check We now apply a firm, medium tension and pick positions 1, 5, 8 and 4 in their binding order:
Once position 4 was picked the plug turned 2mm which confirmed that positions 1, 5, 8 and 4 are all picked and set. This was confirmed by checking each position had a tight slap. As we didn’t need to pick positions 1 and 5 this confirms instantly that positions 1 and 5 are number 4 cuts.
We maintain our firm, medium tension and now concentrate on picking positions 2, 6, 7 and 3 in their binding order.

So as again we didn’t need to pick positions 2 and 6, this confirms that these 2 positions are also number 4 cuts, as the tool already presets the number 4 cuts.
So holding the lock in this open position we begin the decode process, knowing already that positions 1, 2, 5 and 6 are all number 4 cuts.
We read each position in the opposite direction to that which we picked in:
So having written down each reading, this decode gives us a key from bow to tip which is from positions 1 at bow to 8 at tip of: 44224431
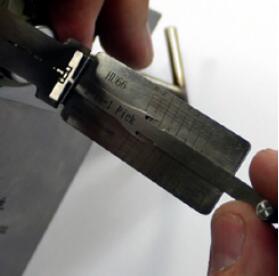
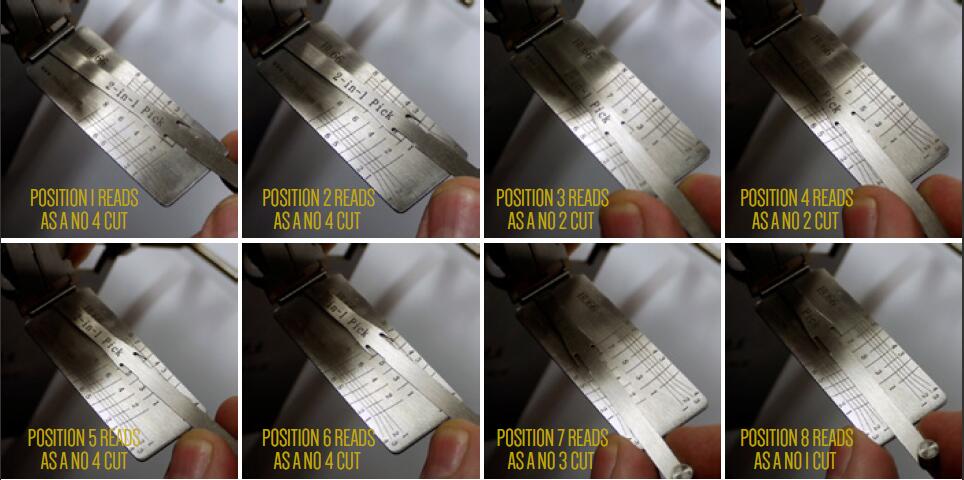
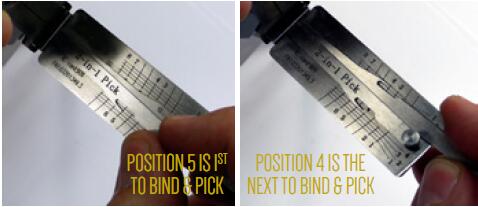
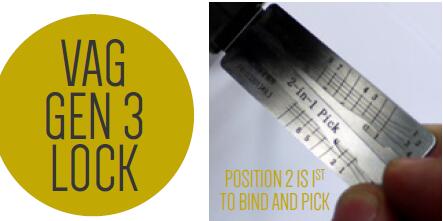
Picture how to guide: picking and decoding VAG gen 3 lock
As we are picking this lock in the clockwise direction we follow the subsequent picking sequence of picking positions 1,5, 8 and 4 first, then once set and the plug is felt to move a few mm we will pick positions 2, 6, 7 and 3 until open.
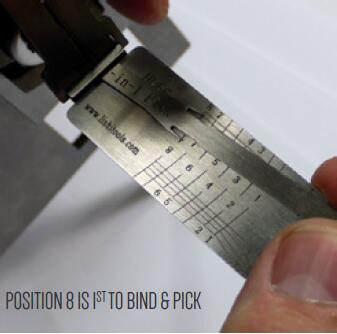
We begin by ensuring both lifters are central on the grid and fully insert the tool into the gen 3 lock. Once fully inserted we apply a light to medium tension via the tension arm in a clockwise direction and proceed to tickle positions 1, 5, 8 and 4 to find the solid binding wafers.
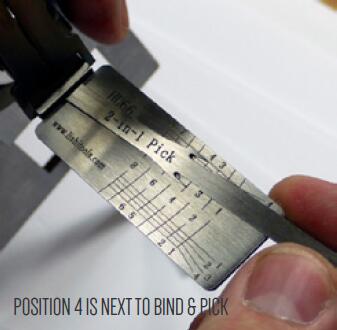
As position 4 is picked the plug moved a few mm. This confirms that positions 1, 5, 8 and 4 are all picked and set and suggests, as we didn’t need to pick them, that positions 1 and 8 are number 4 cuts – further confirmed when I checked each position and they were all slapping tightly.
So we now concentrate on picking positions 2, 6, 7 and 3.
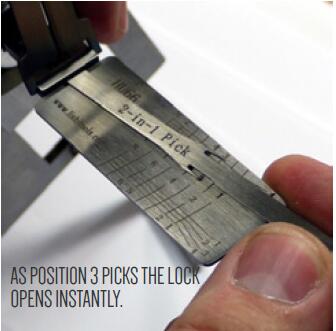
As soon as position 2 is picked the lock opened – which again suggests that positions 6, 7 and 3 are all number 4 cuts, as these did not need picking. So prior to decoding we already know that this key has a number 4 cut in positions 1, 3, 6, 7 and 8.
We decode in the same direction as we pick, so whilst holding the lock in the picked open position we decode each position and write this down:
So we have read a key from bow to tip of 42412444.