This instruction show you guide on how to assemble the plug-type injection pumps for BOMAG BW 177/179 DH/PDH-4 single drum roller.
Related Contents:
Bomag EPC 2021 2017 Electronic Parts Catalogue Free Download
BOMAG Workshop Manual PDF Files Download
Procedures:
Notice:
The adjustment of the injection pump tziming (FB) affects:
• the fuel consumption,
• the power
• the exhaust emission
of the engine.
On engines of series 2012 the start of delivery is adjusted without tolerance. The start of delivery is enered in degree of crank angle measured from the top dead centre of the piston and depends on application, power and speed setting of the engine.
The plug-in injection pump is in position of start of delivery when the plunger just closes the fuel supply bore in the plunger sleeve.
On engines with inline injection pumps the engine drive is turned to start of delivery position and closing of the fuel supply bore is determined by means of a high pressure pump. Occurring tolerances are compensated in the coupling of the injection pump drive, whereby the injection pump camshaft is turned to start of delivery position against the fixed engine drive.
The injection pump cams on engines of series 2012 are arranged on the camshaft of the engine. For this reason the conventional adjustment method for the start of delivery cannot be used.
The start of delivery of the injection pump must be adjusted using the new method.
For this the conventional adjustment method is subdivided into length measurements of individual engine parts and calculations.
The permissible manufacturing tolerances for the components
• cylinder crankcase,
• camshaft,
• plunger
• plug-in injection pump are measured and eliminated by the adjustment of the start of delivery.
However, in cases of interest for BOMAG engineers the engine will not be overhauled completely, but individual injection pumps will be replaced.
Crankcase, camshaft and plunger remain unchanged.
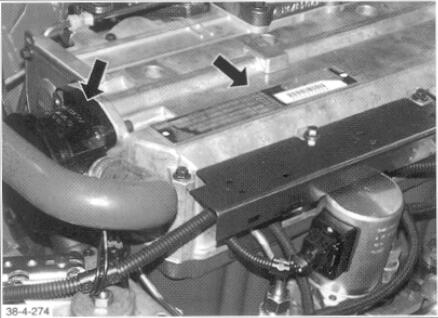
This results in a certain installation measurement for the engine drive, which is stamped on the engine type plate.
In column „EP“ iit is stamped as „CODE“ for each cylinder.
Note:
If an injection pump and/or nozzle is replaced, the respective high pressure line between pump and nozzle must also be replaced..
1.Remove crankcase ventilation and cylinder head cover.
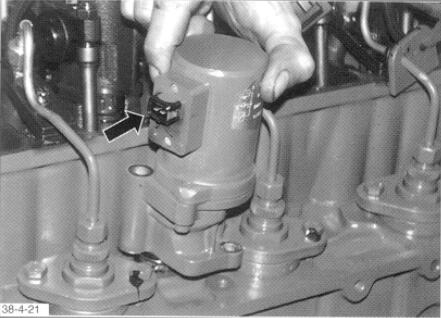
2.Remove the engine solenoid
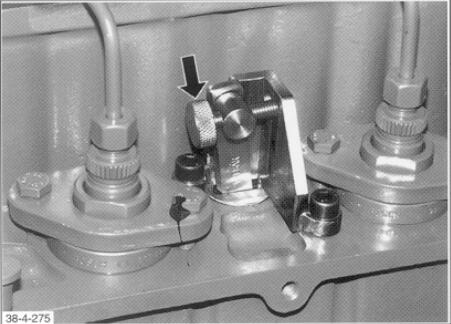
3.Insert the pressing device WILBÄR No. 100 830 carefully into the groove of the governor rod and fasten it.
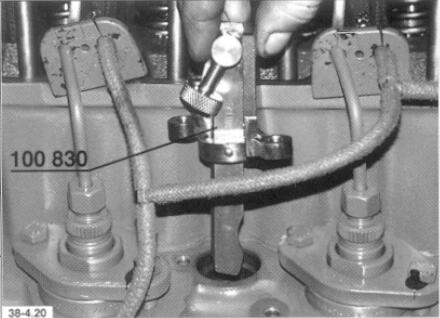
4.Turn the knurled fastening screw to press the governor rod to stop position.
Note:Tighten the knurled fastening screw by hand.
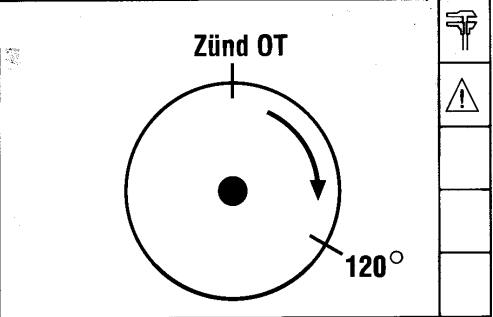
5.Set the cylinder of the injection pump to be replaced to ignition top dead centre (valves overlapping). Then turn the crankshaft approx. 120° against the sense of rotation.
Note:View on flywheel
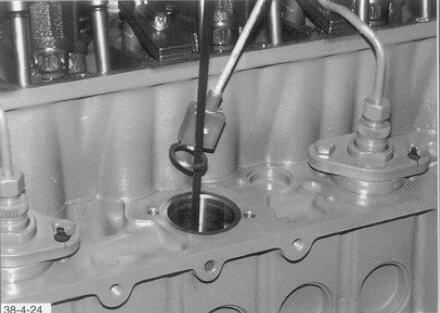
6.Remove injection line and injection pump.
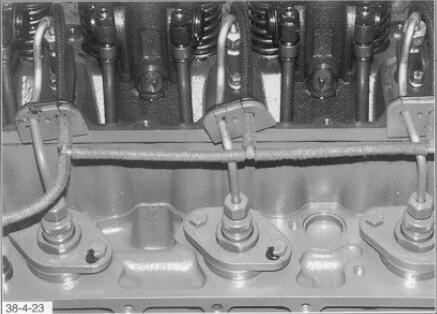
7.Take the compensation shim carefully out with the rod magnet.