This illustration show the procedures on how to remove and install air conditioner unit for Hitachi EX5600 excavator.
Related Contents:
Hitachi MPDr v2.56 v2.25 Diagnostic Software Free Download
2016 HITACHI Parts Manager Pro 6.5.5 Free Download
2019 Hitachi Workshop Service Manual PDF Download
Procedures:

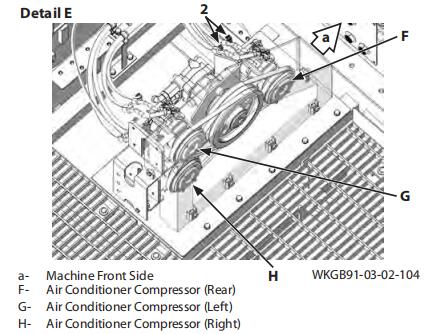
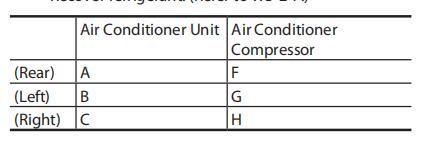
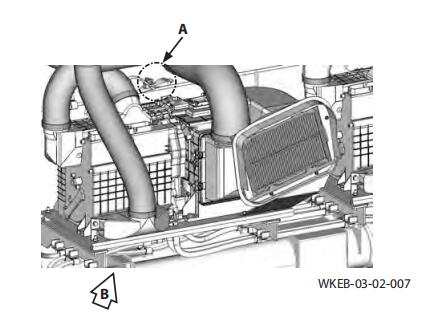
The air conditioner units are located in the cab bed. Three air conditioner units are installed. Theprocedures for removal and installation are almost same. The procedures for air conditioner unit (rear) (A) are explained here.
CAUTION: Refrigerant is harmful to the environment. Recover all refrigerant. As for performing service, recharge (charge) or recover etc. must be done by trained and qualified service personnel.
IMPORTANT: Cap the open ends in case the hoses and pipes have been disconnected. In addition,attach identification tags onto the connectors,hoses, and pipes for assembling. If the clips which secure the hoses have been removed, install the clips after connecting the hoses.
Removal
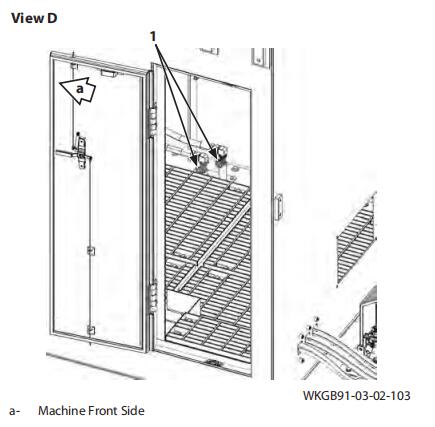
1.Set the machine position for inspection and maintenance. Stop the engine. Turn OFF the isolation switch. (Refer to W1-6-1.)
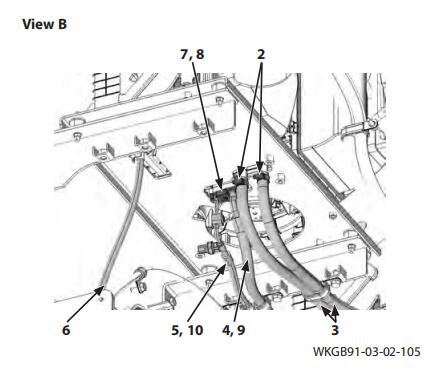
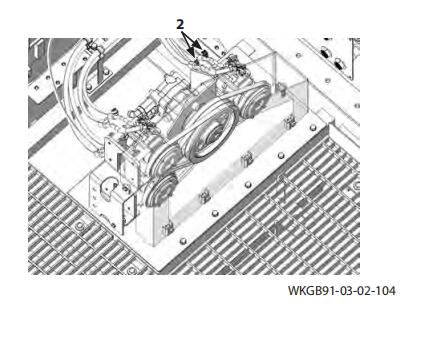
2.Close valves (1) (2 used).
3.Connect the refrigerant recovery device to ports (2) (2 used) of the air conditioner compressor (rear) (F). Recover refrigerant.
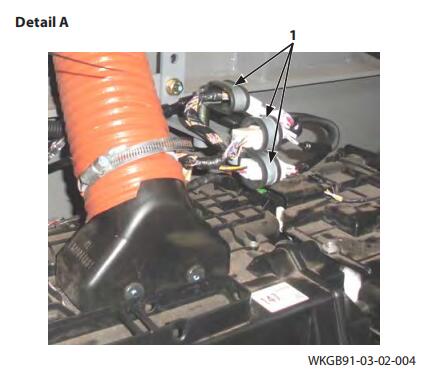
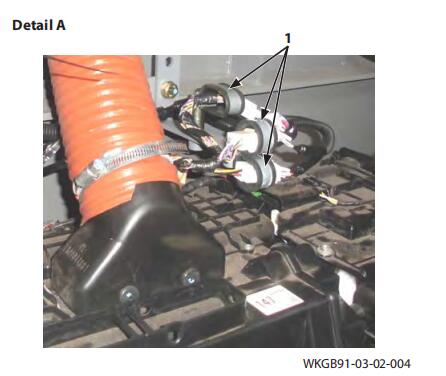
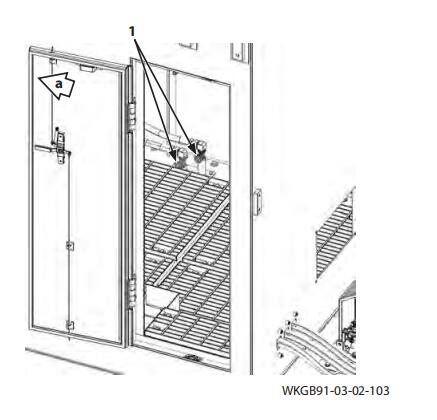
4.Disconnect connectors (1) (3 used).
5.Loosen clamps (2) (2 used). Disconnect hoses (3) (2 used). j : 7 mm
6.Disconnect hose (6).
7.Remove bolt, washer (7) and connector (8).
Disconnect hoses (4, 5). Remove O-rings (9, 10).

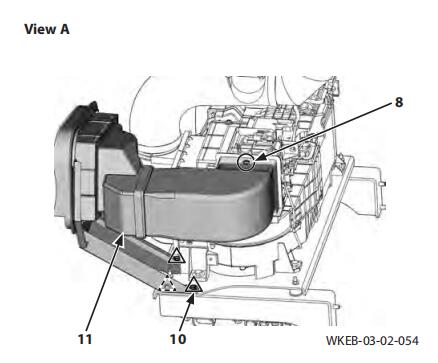
8.Remove bolts, washers (6) (2 used). Disconnect duct (7).
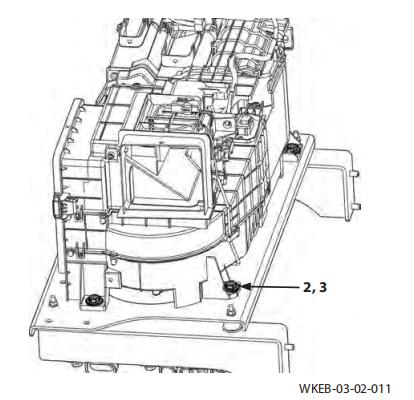
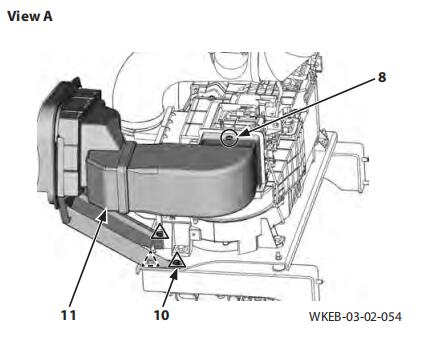
9.Remove rivets (8) and bolts, washers (10) (3 used).
Remove the duct (11) assembly.
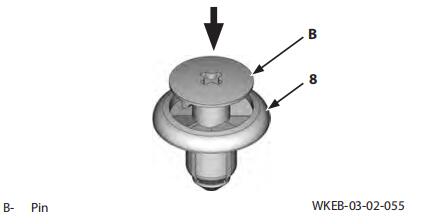
NOTE: Turn pin (B) by using a screwdriver for removing rivet (8).

10.Remove screws (3) (3 used), washers (4) (3 used) and clamps (5) (3 used). Disconnect duct (2).
11.Remove rivets (8) (3 used). Disconnect duct (9).
12.Remove rivets (8) (5 used). Disconnect duct (1).
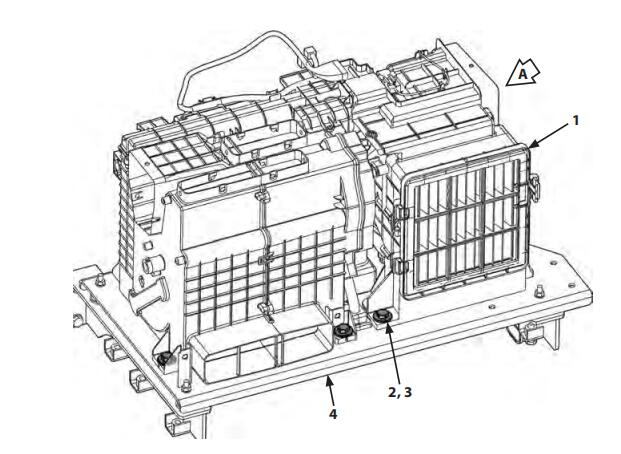
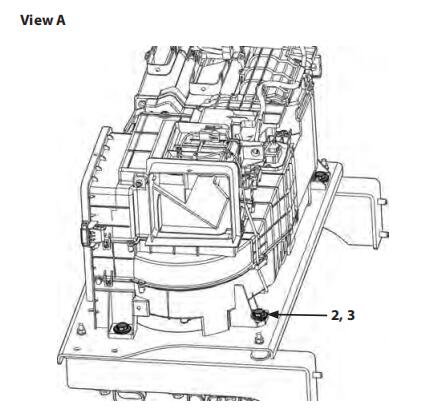
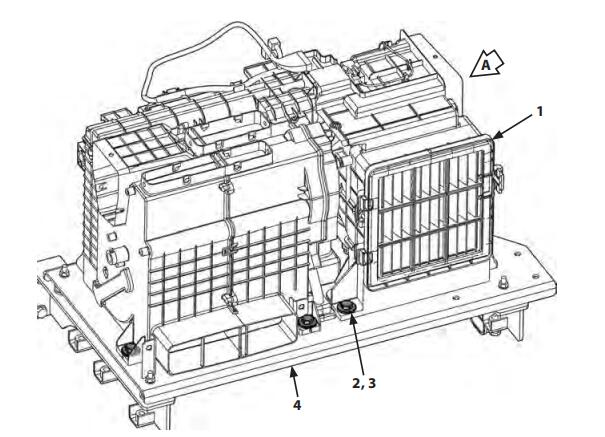
IMPORTANT: When removing air conditioner unit (1) from bracket (4), do not damage pipes (5) (2 used) of the heater core.
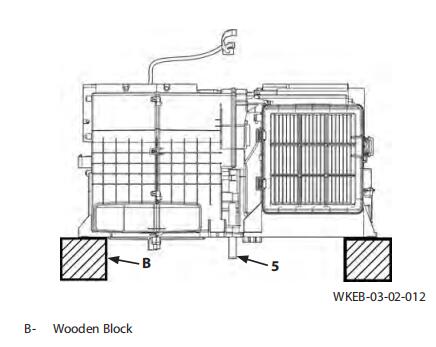
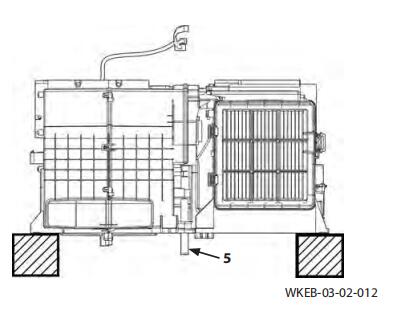
13.Remove bolts, washer, nuts (2) (6 used) and spacers (3) (6 used). Remove air conditioner unit (1) from bracket (4). Place air conditioner unit (1) onto wooden blocks (60 mm (2.4 in) square) (B) (2 used).
Installation
IMPORTANT: When installing air conditioner unit (1) to bracket (4), do not damage pipes (5) (2 used) of the heater core.
1.Install air conditioner unit (1) to bracket (4) with bolts, washer, nuts (2) (6 used) and spacers (3) (6 used).
17 mm
22 N·m (16 lbf·ft)
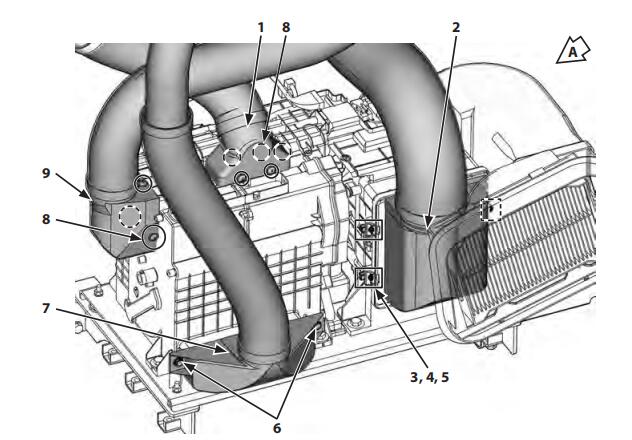
2.Connect duct (1) with rivets (8) (5 used).
NOTE: Set rivets (8) to the mounting holes and push pins (B) for installing rivets (8).
3.Connect duct (9) with rivets (8) (3 used).
4.Connect duct (2) with screws (3) (3 used), washers (4) (3 used) and clamps (5) (3 used).
5.Install duct (11) assembly with rivet (8) and bolts,washers (10) (3 used).
13 mm
10 N·m (7.4 lbf·ft)
6.Connect duct (7) with bolts, washers (6) (2 used).
13 mm
10 N·m (7.4 lbf·ft)

7.Apply compressor oil to O-rings (9, 10). Install O-rings (9, 10) to hoses (4, 5). Connect hoses (4, 5) with bolt, washer (7) and connector (8).
10 mm
4.0 to 6.8 N·m (3 to 5 lbf·ft)
8.Connect hose (6).
9.Connect hoses (3) (2 used) with clamps (2) (2 used).
7 mm
6 to 7 N·m (4.4 to 5.2 lbf·ft)
10.Connect connetors (1) (3 used).
11.Connect the refrigerant filling device to ports (2) (2 used). Charge refrigerant. (Refer to W3-2-7.)
12.Open valves (1) (2 used).
More repair case for Hitachi machine,please refer to:Hitachi Machine Repair