Several weeks ago,car-auto-repair.com show Kobelco ISUZU 4JJ1 2015 Valve Stem Oil Seal and Spring Removal guide. show you guide on how to install valve stem oil seal and valve spring for Kobelco machine with ISUZU 4JJ1 Tier 4 XASK-01 engine.
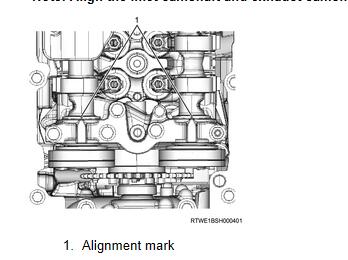
Preparations:
ISUZU E-IDSS 2023 2019 Engine Diagnostic Service System Free Download
Procedures:
1Valve Stem Oil Seal Installation
Install the spring seat to the cylinder head.
Note:Install the spring lower seat.
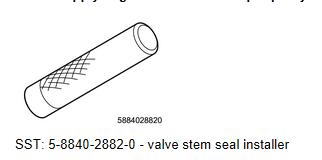
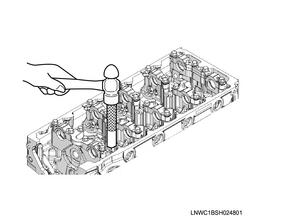
Install the valve stem oil seal to the cylinder head using special tool.
Note: Apply engine oil to the outer periphery of the valve guide and install the oil seal using a valve stem seal installer.
Note: After installing the valve stem oil seal, confirm that it is securely inserted all the way in.
Caution: Confirm that the valve stem oil seal is not inclined.
Caution: Confirm that the garter spring is placed correctly.
2Valve Spring Installation
Install the valve spring to the cylinder head.
3Spring Seat Installation
Install the spring seat to the valve spring.
Note: Install the spring upper seat.
4Split Collar Installation
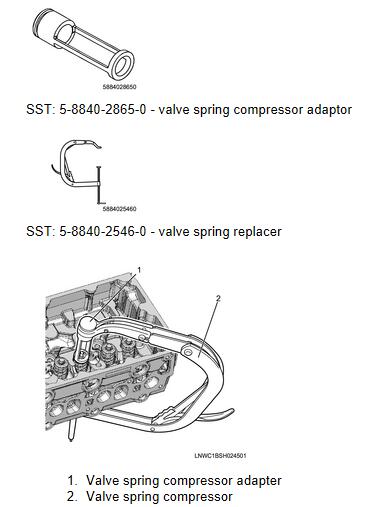
Install the split collar to the valve using special tool.
Note:Using a valve spring compressor adapter and valve spring compressor, compress the valve spring and install the split collar.
5Valve Stem End Cap Installation
Install the valve stem end cap to the bulb.
6Camshaftbracket Installation
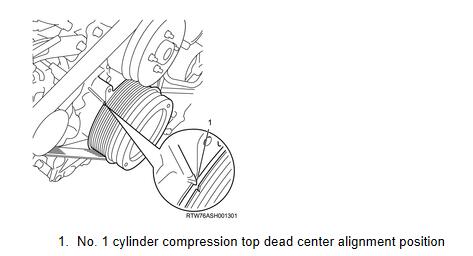
Align the No. 1 cylinder to compression top dead center.
Note: Turn the crankshaft in the forward direction (clockwise) to align the gear case cover and crank pulley alignment marks.
Note:Verify the compression top dead center alignment position of the No.1 cylinder using a mirror, etc.
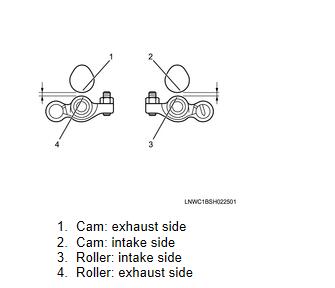
Align the camshaft to the alignment mark.
Note: Align the inlet camshaft and exhaust camshaft marks with the mark on the camshaft bracket.
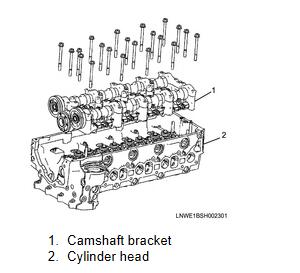
Align the camshaft bracket to the cylinder head.
Caution: Confirm that the valve cap is correctly installed to the valve stem end.
Caution: Be careful of valve cap detachment or looseness.
Apply engine oil to the bolt.
Note: Apply to the threaded portion and seating surface of the M8 bolts.
Temporarily tighten the camshaft bracket to the cylinder head.
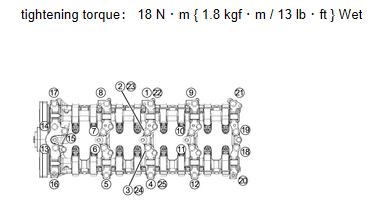
Final tighten the camshaft bracket to the cylinder head.
Note: Tighten the M8 bolts in the order shown in the diagram.
7Baffle Plate Installation
Install the baffle plate to the cylinder head.
8Rocker Arm Adjustment
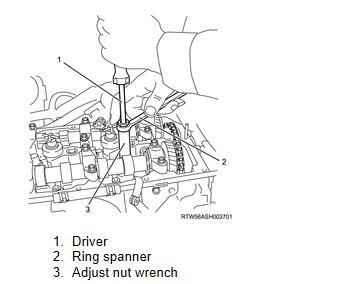
Loosen the adjust screw using special tool.
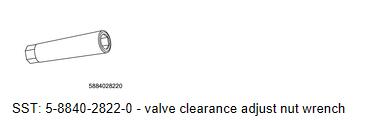
Note: Use the adjust nut wrench to loosen each adjust screw of the rocker arm.
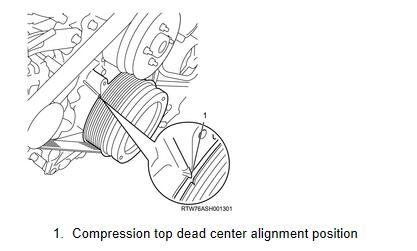
Align 1st cylinder to the compression top dead center.
Note: Turn the crankshaft in the forward direction (clockwise) to align the gear case cover and crank pulley alignment marks.
Adjust the valve clearance to specified value using a feeler gauge.
Note: Insert a feeler gauge between the rocker arm roller and cam and tighten the rocker arm adjust screw.
Align the No.4 cylinder to compression top dead center.
Note: Rotate the crankshaft 360˚ from compression top dead center of the No.1 cylinder and align the No.4 cylinder to compression top dead center.
Adjust the valve clearance to specified value using a feeler gauge.
Note: Insert a feeler gauge between the rocker arm roller and cam and tighten the rocker arm adjust screw.
Note: Adjust the valve clearance if a circle is marked on the diagram when the No.1 cylinder is at the compression top dead center, or when an X is marked on the diagram when the No.4 cylinder is at the compression top dead center.
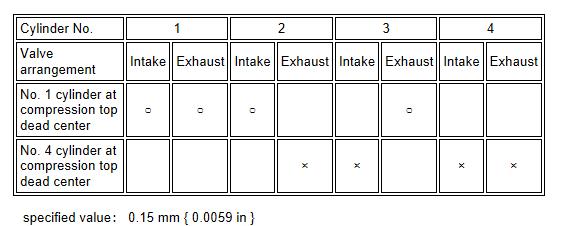
specified value: 0.15 mm { 0.0059 in }
Caution: Make sure to adjust while cool.
Tighten the bolt using special tool.
Note: When the movement of the thickness gauge becomes stiff, secure the adjust screw nut of the rocker arm.
tightening torque: 18 N・m { 1.8 kgf・m / 13 lb・ft }
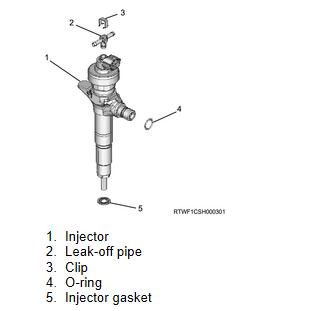
9Injector Installation
Apply the engine oil to the O-ring.
Install the O-ring to the injector.
Caution: Do not damage the O-ring.
Install the injector gasket to the cylinder head.
Caution: Do not reuse the injector gasket.
Note: Drop the injector gasket into the port on the cylinder head side.
Caution: Clean the cylinder head and injector of any foreign material and dirt before assembling the injector gasket.
Note: Check that the injector gasket is seated horizontally.
Note: Check whether the injector gasket was inserted by checking the nozzle height.
Caution: Press the injector in perpendicularly to ensure that the injector gasket is not slanted.
Caution: Do not press in by holding the injector connector.
Caution: Do not forcibly push the injector gasket into the injector as it will be pushed until it hits the end of the injector during clamp tightening.
Caution: Do not reuse the leak-off pipe and clip.
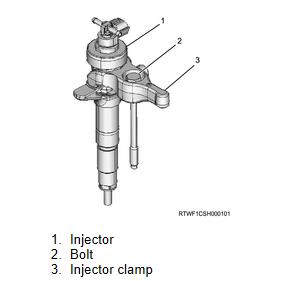
Install the injector clamp to the injector.
Apply engine oil to the bolt.
Note: Apply to the threaded portion and seating surface of the injector clamp bolt.
Install the injector to the cylinder head.
Temporarily tighten the injector clamp to the cylinder head.
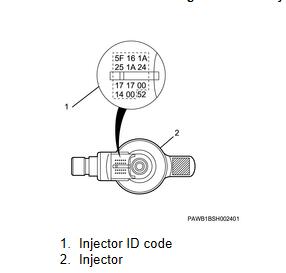
Caution: If the injector has been replaced, record the injector ID code of the new injector.
Caution: Record the 24 figures of the injector ID plate
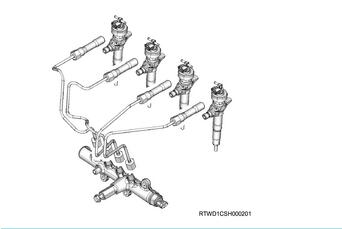
10Injection Pipe Installation
Caution: If the high pressure pipe of the fuel system has been removed, make sure to replace with a new part.
Caution: Reuse may cause the seal surface to be damaged and fuel to leak.
Temporarily tighten the injection pipe to the injector and common rail assembly.
Note: Apply engine oil to the threaded portion of the sleeve nut on the injector side of the injection pipe and the O-ring of the injector.
Note: When installing, do not damage the injector sleeve gasket.
Note: Using an open-end wrench, lightly tighten the sleeve nut on the common rail side until it is firmly attached.
Note: Tighten the sleeve nuts on the injector side until they can no longer be turned by hand.
- Securely tighten the injector to the cylinder head.
Note: Tighten the injector clamp bolt to the specified torque.
tightening torque: 25 N・m { 2.5 kgf・m / 18 lb・ft }
- Securely tighten the injection pipe to the injector.
Note: Tighten the sleeve nut on the injector side of the injection pipe to the specified torque.
tightening torque: 44 N・m { 4.5 kgf・m / 32 lb・ft }
- Securely tighten the injection pipe to the common rail assembly.
Note: Tighten the sleeve nut on the common rail side of the injection pipe to the specified torque.
tightening torque: 44 N・m { 4.5 kgf・m / 32 lb・ft }
tightening torque: 7.8 N・m { 0.8 kgf・m / 69 lb・in } Clamp nut
11Cylinder Head Cover Installation
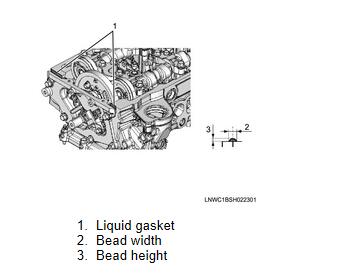
Apply liquid gasket to the cylinder head.
Note: Apply ThreeBond 1207B to the mating surface with the cylinder head.
Caution: Install the cover within five minutes of applying liquid gasket.
bead width: 2.0 to 2.5 mm { 0.079 to 0.098 in }
bead height: 1.0 to 1.5 mm { 0.039 to 0.059 in }
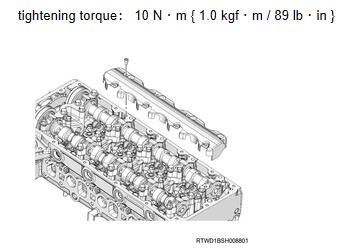
Install the cylinder head cover to the cylinder head.
tightening torque: 10 N・m { 1.0 kgf・m / 89 lb・in }
Connect the PCV hose to the cylinder head cover.
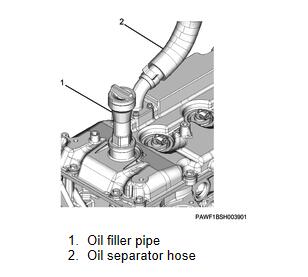
Connect the oil separator hose to the cylinder head cover.
Note: Connect the PCV hose or oil separator hose.
Install the oil filler pipe to the cylinder head cover.
tightening torque: 20 N・m { 2.0 kgf・m / 15 lb・ft }
Note: The specifications of equipment vary depending on the machine.
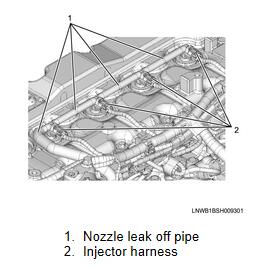
12Fuel Hose Installation
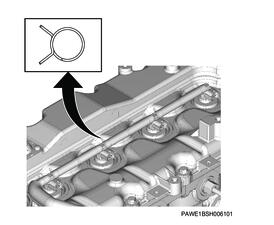
Install the nozzle leak off pipe to the injector.
Note: If the nozzle leak off hose has been removed, install with the clip knob facing the exhaust side as shown in the diagram.
Connect the harness connector to the injector.
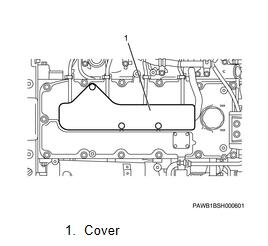
Install the cover to the cylinder head cover.
13Battery Ground Cable Connect
Connect the battery ground cable to the battery.
More repair cases for ISUZU engine,please refer to:ISUZU Engine Trouble Repair